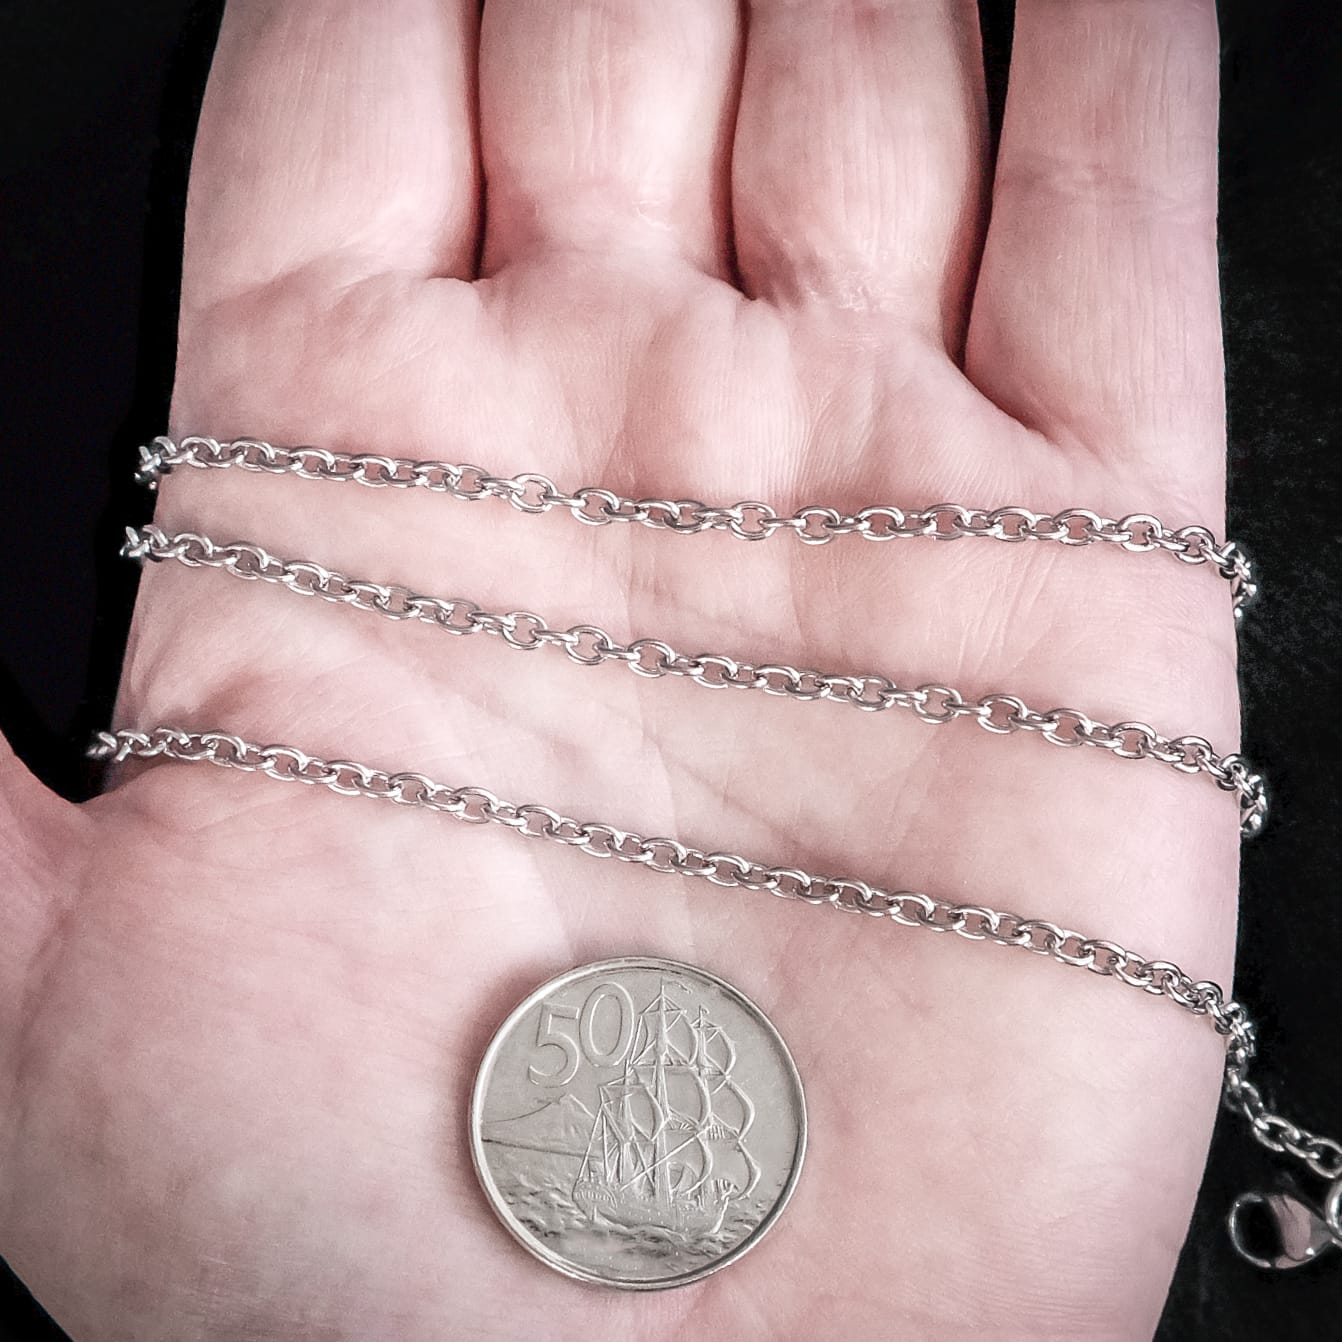
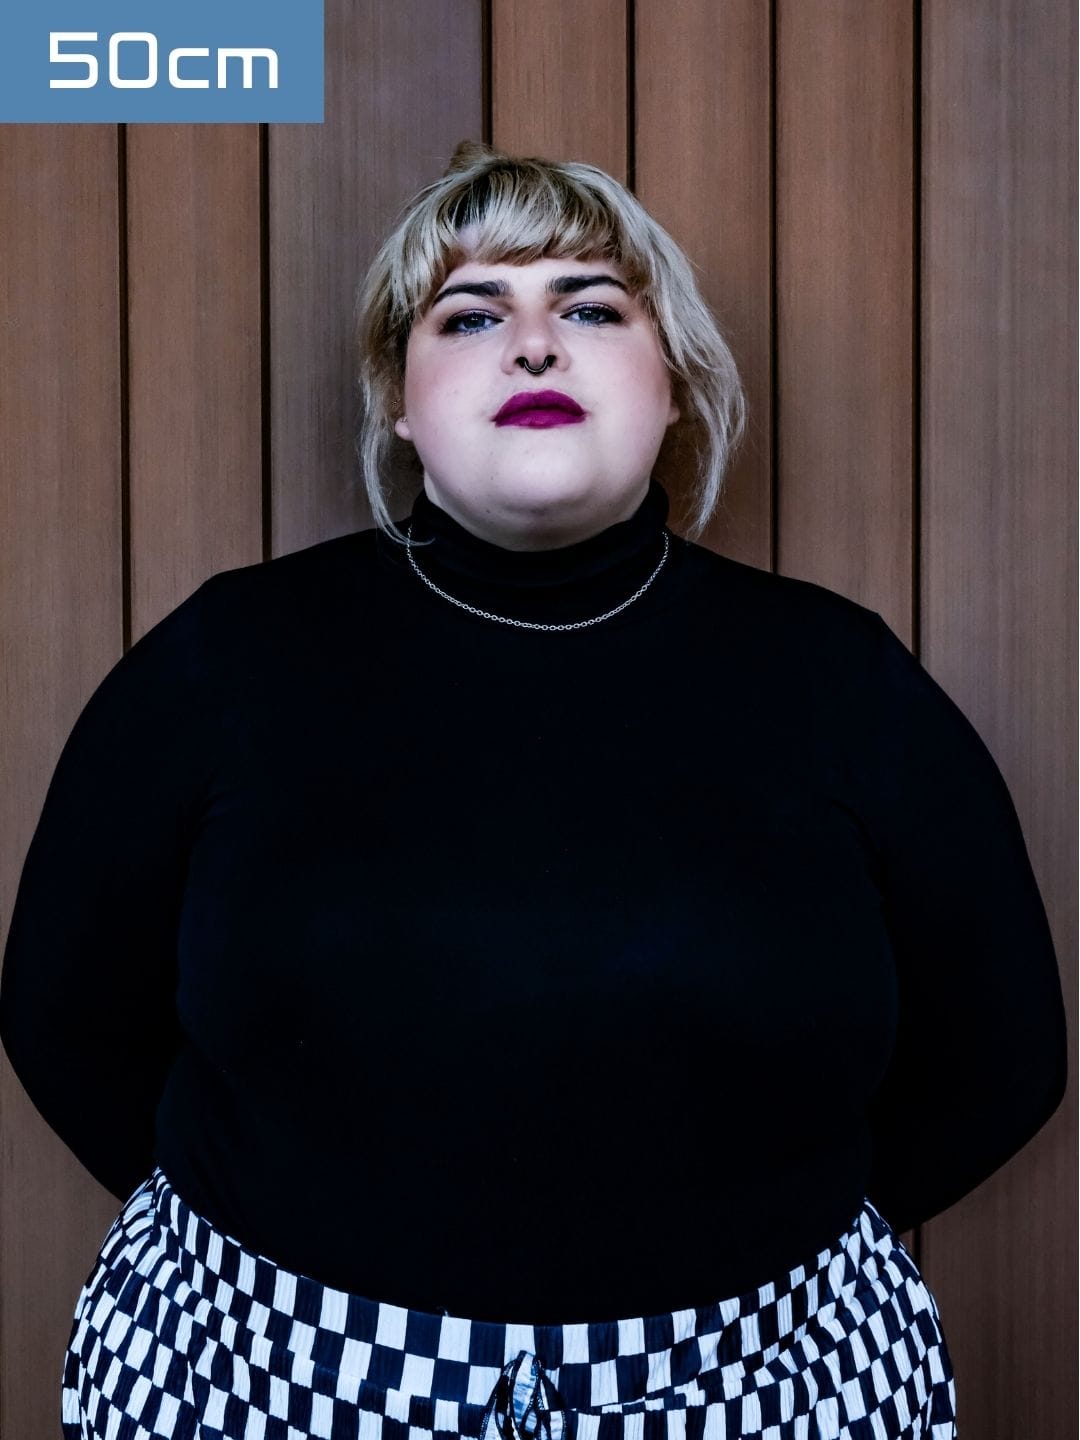
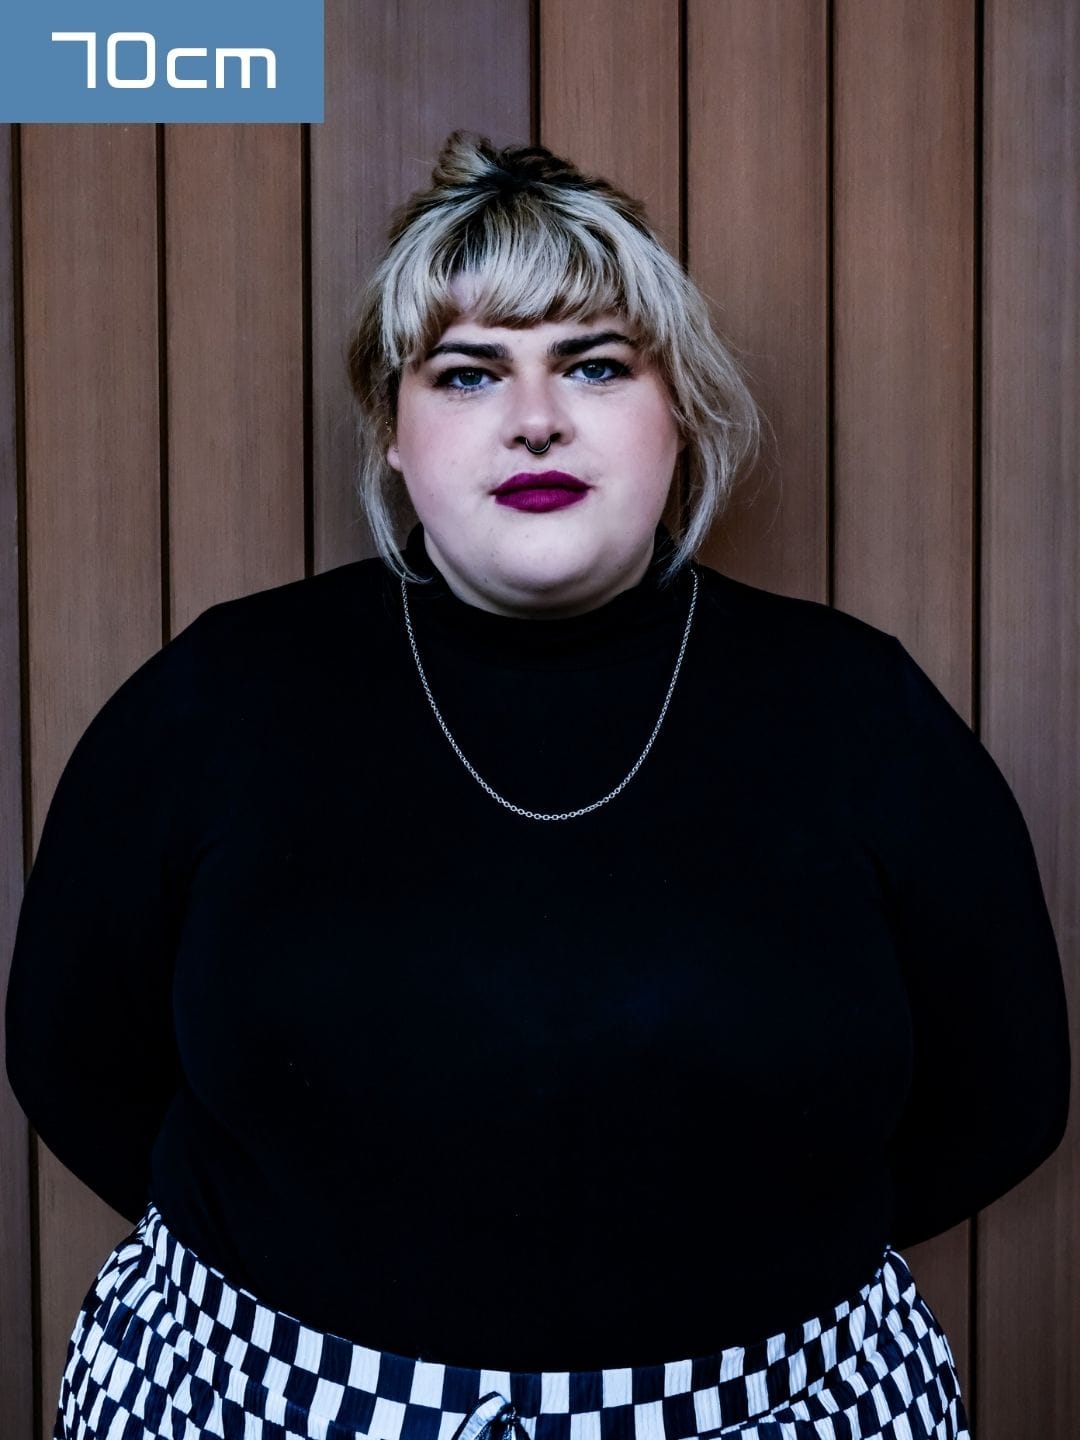
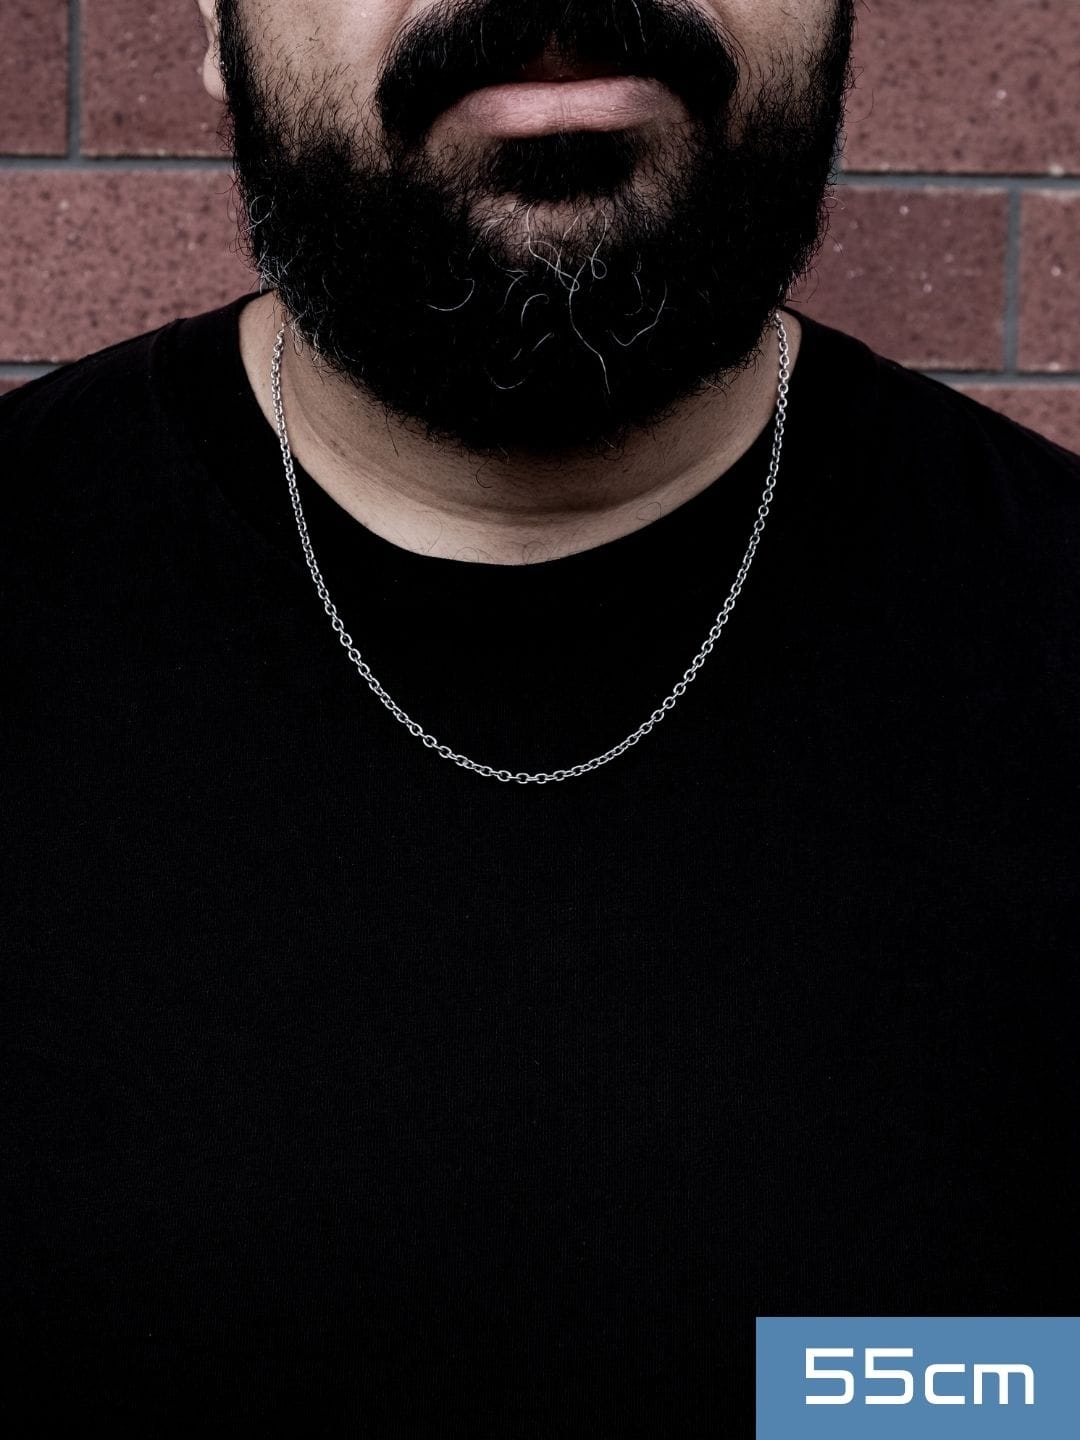
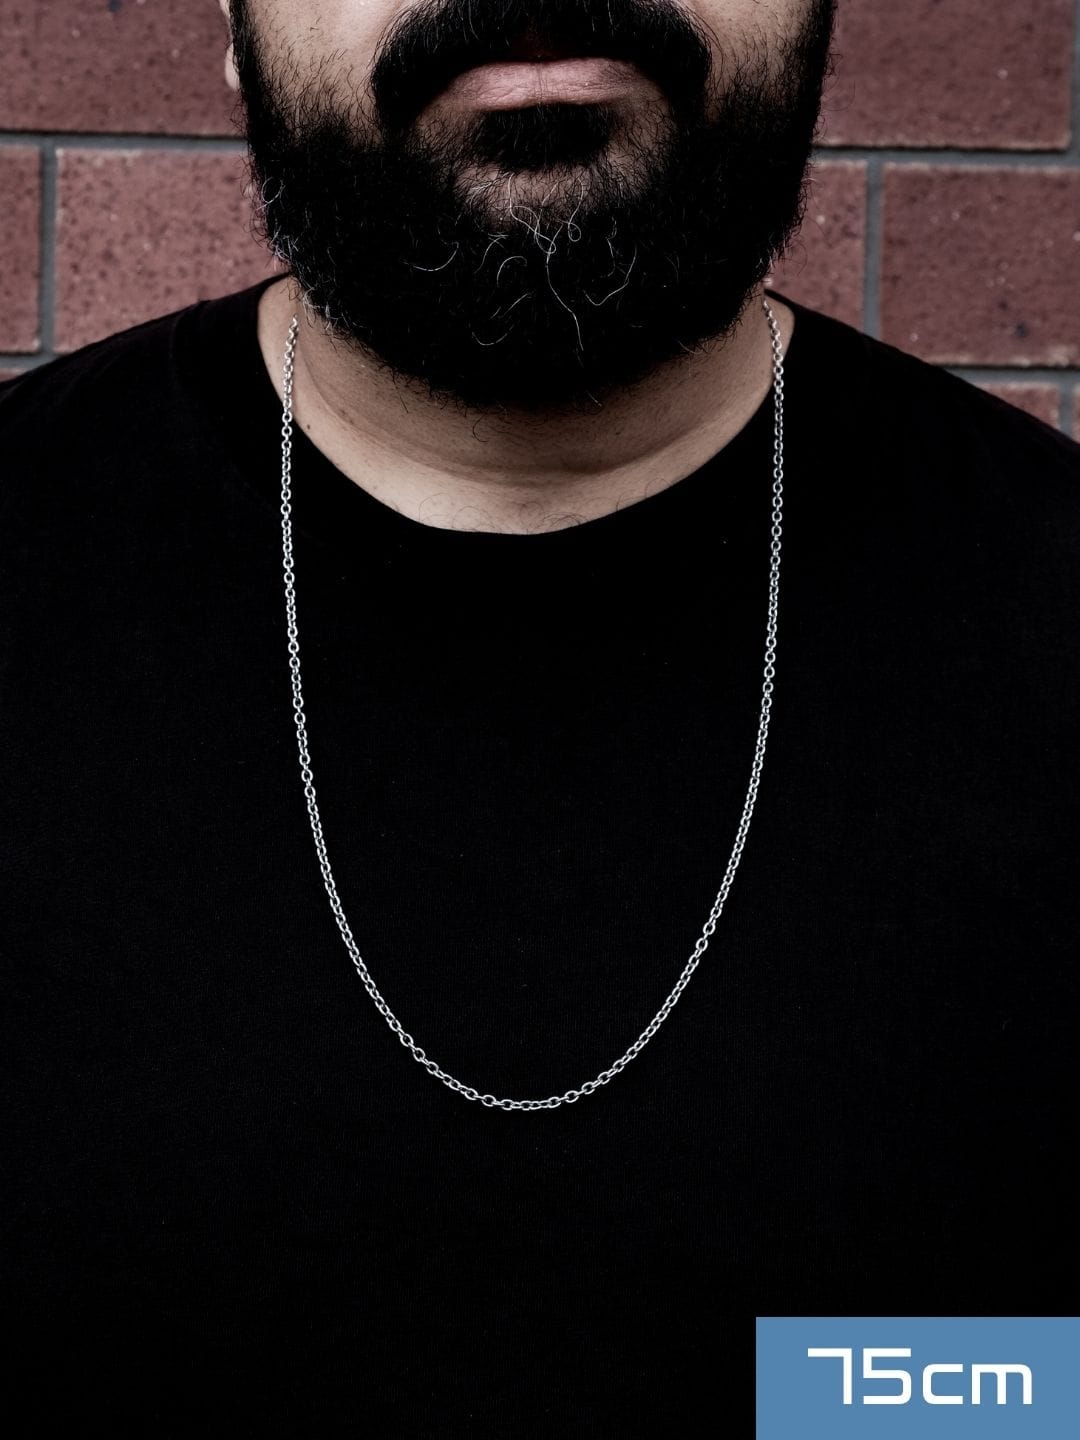
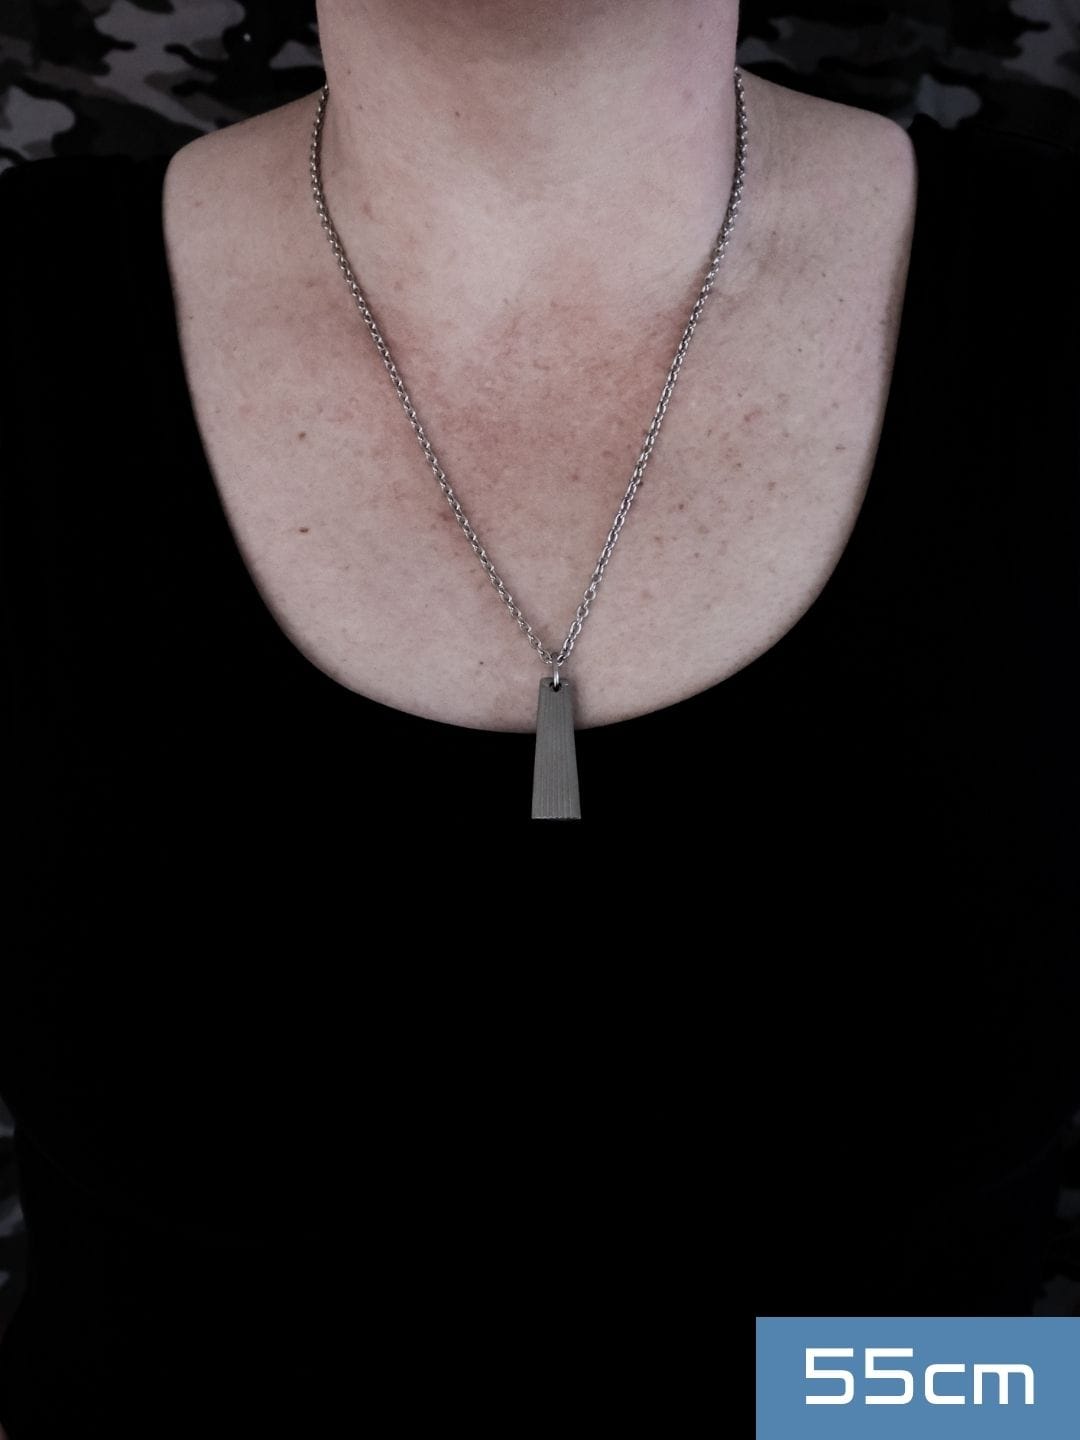
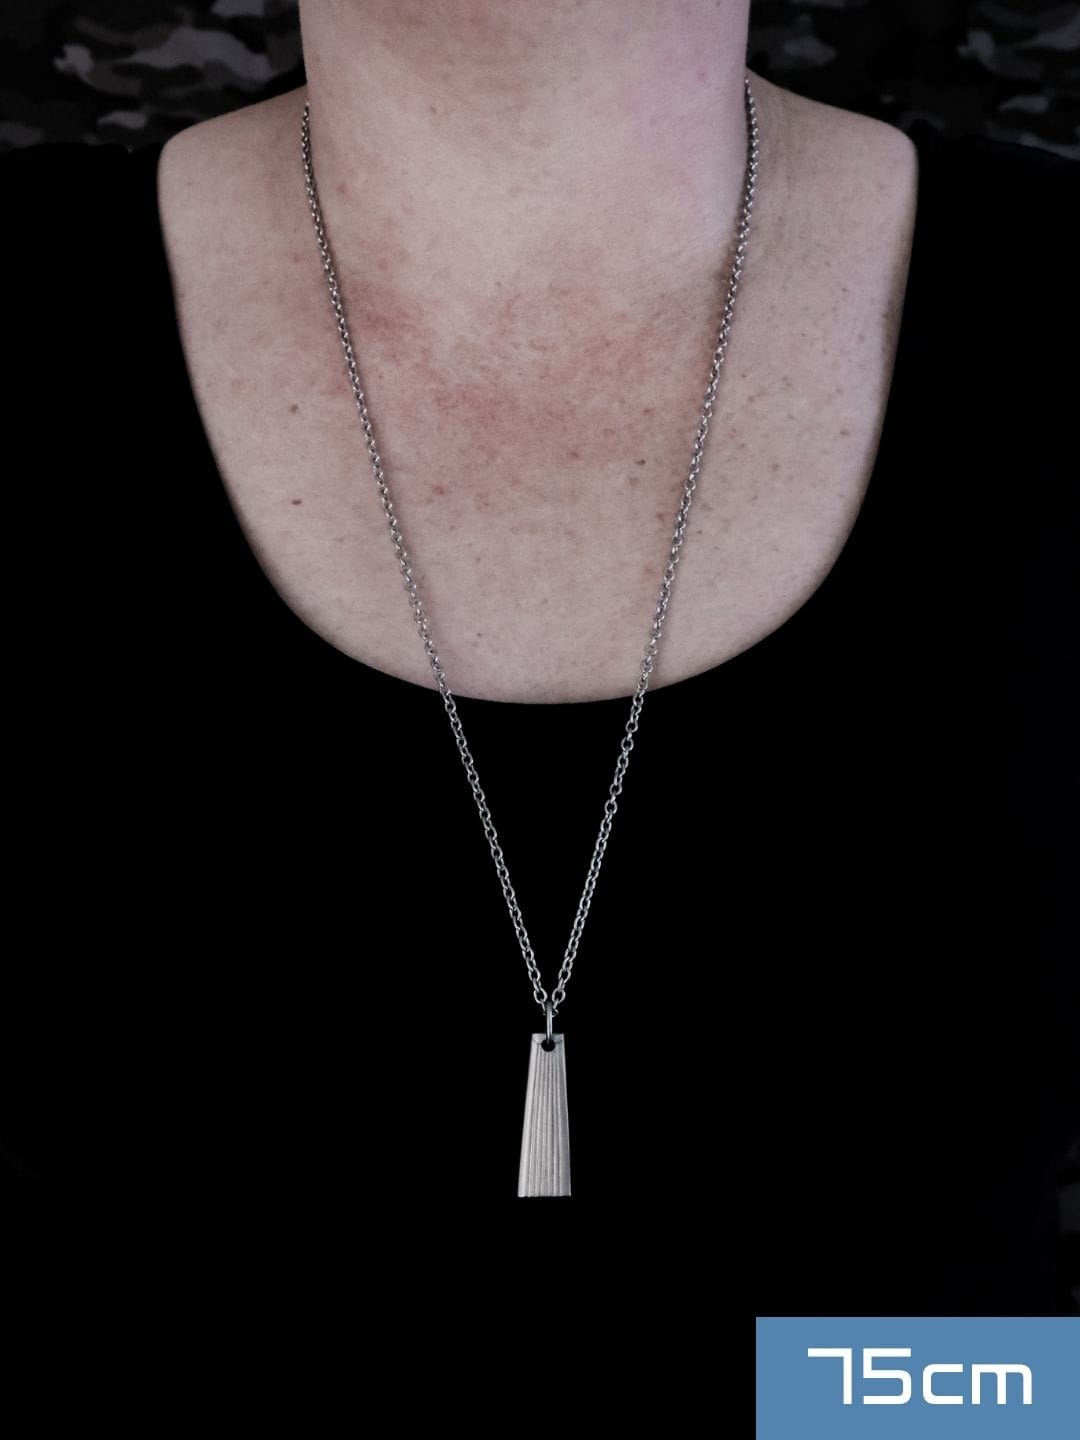
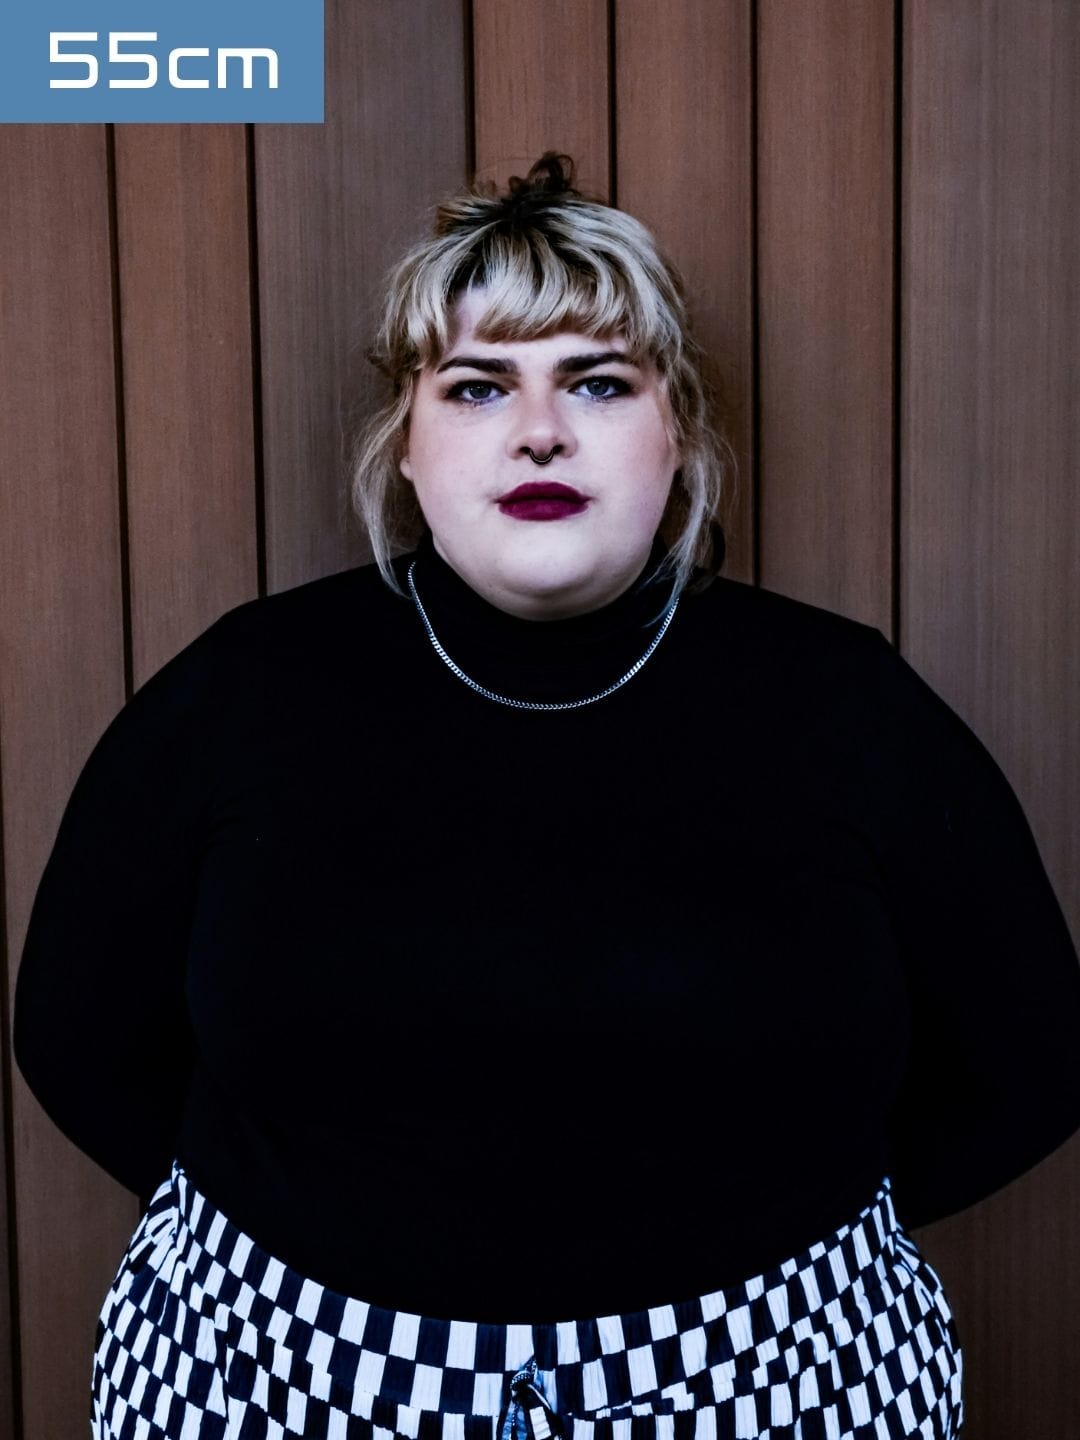
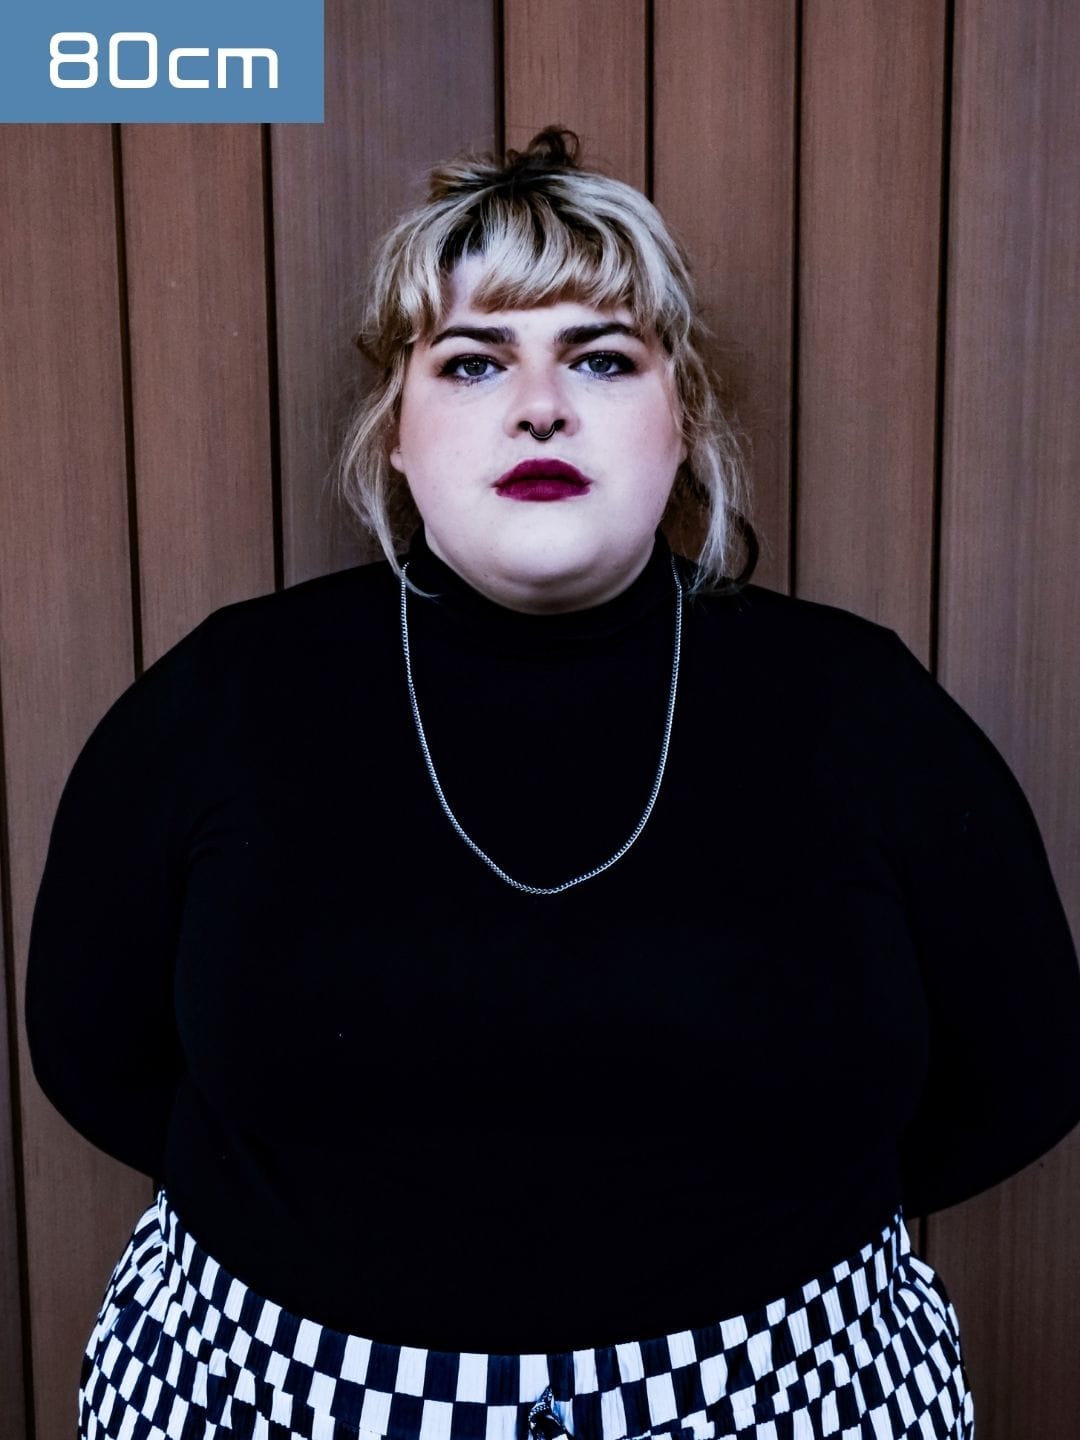
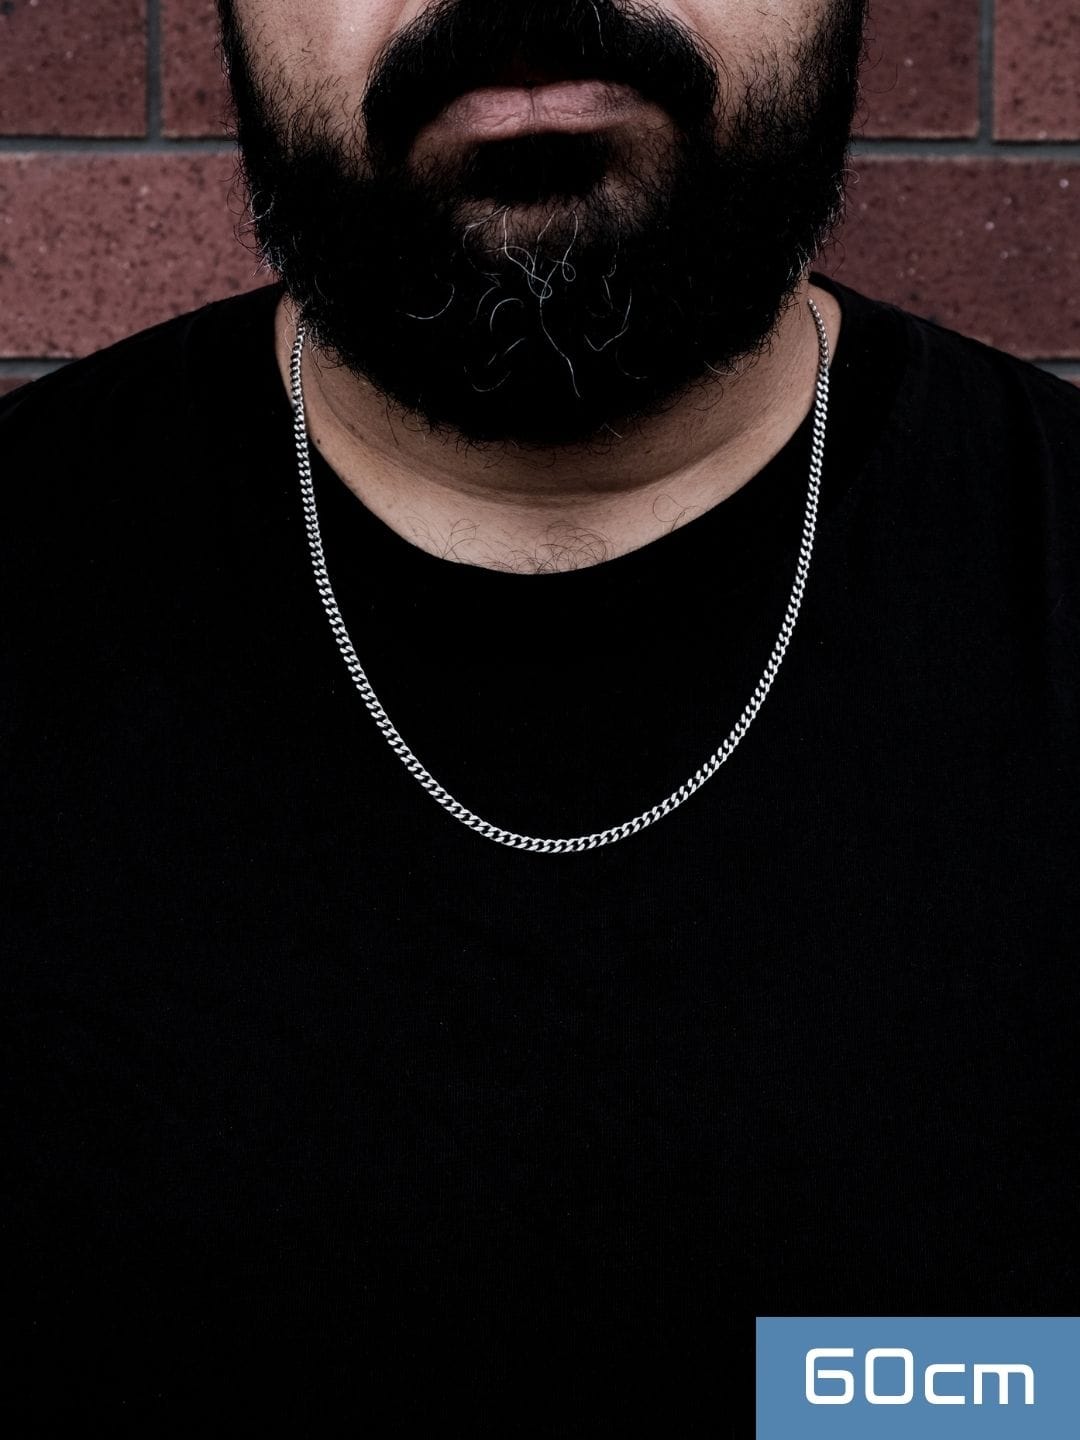
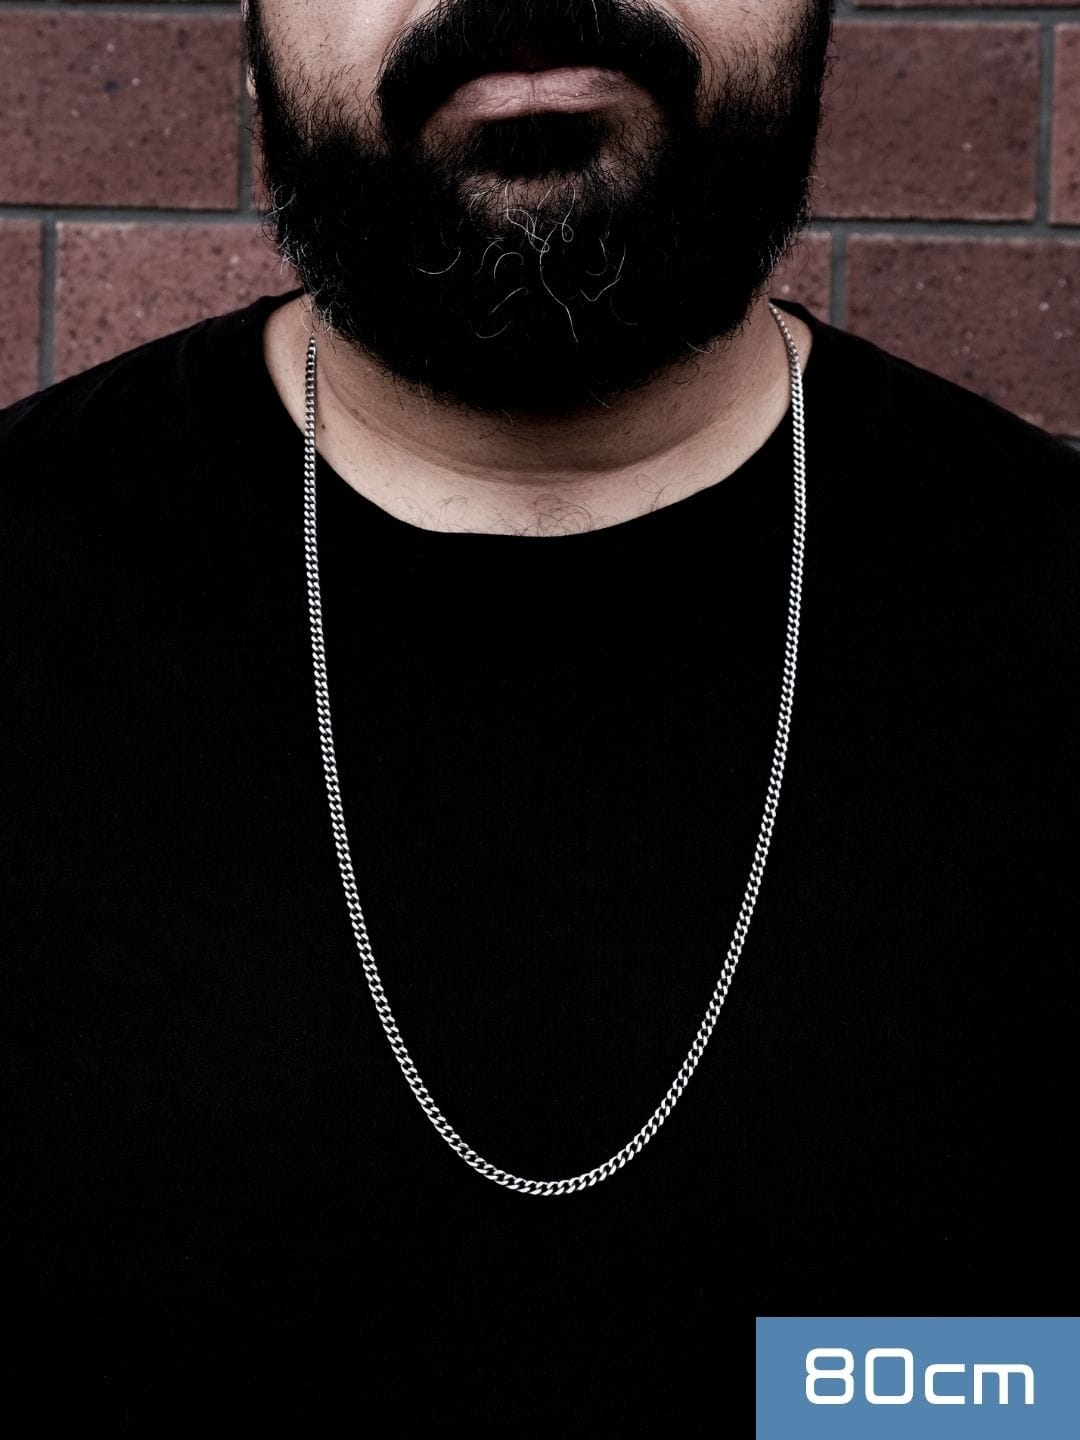
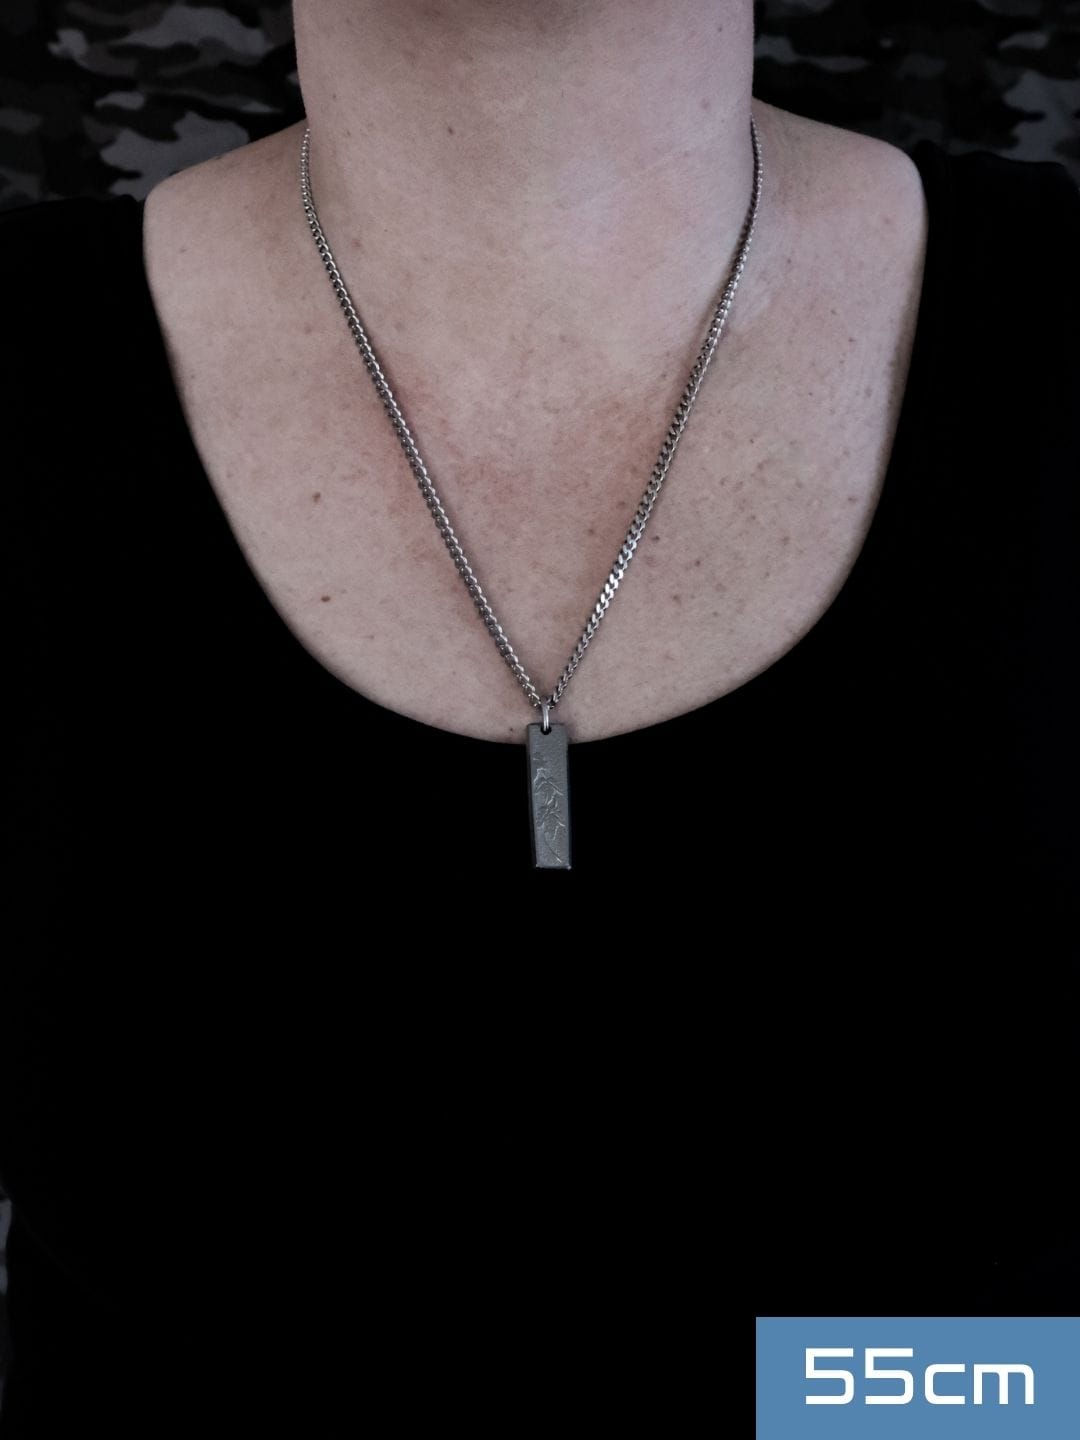
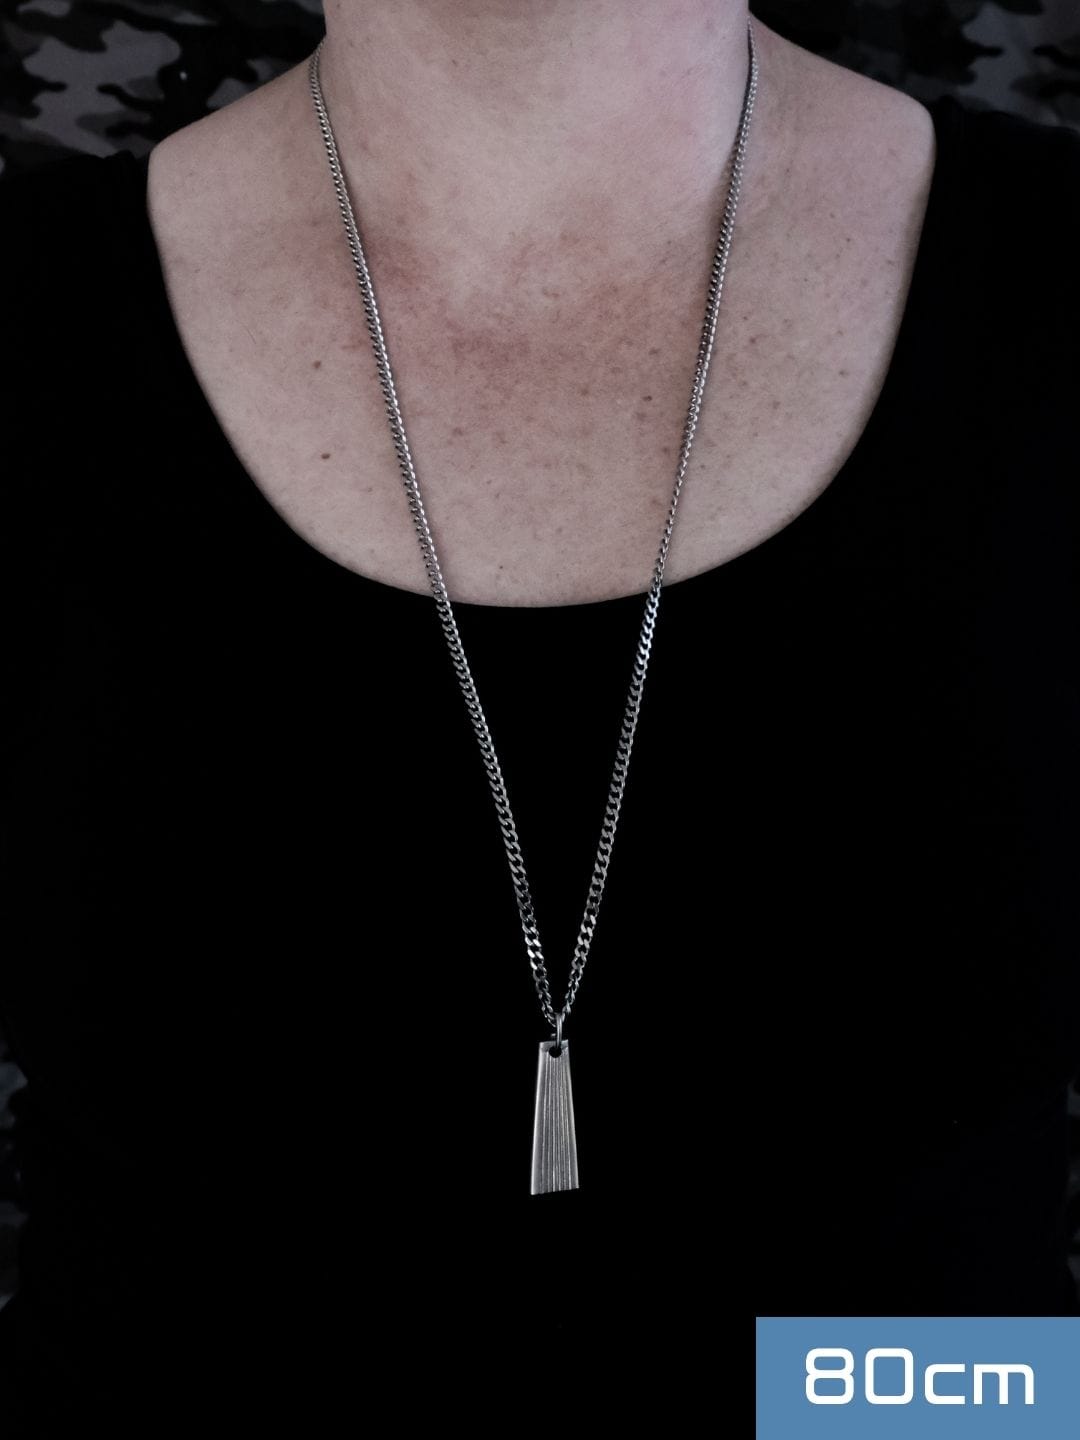
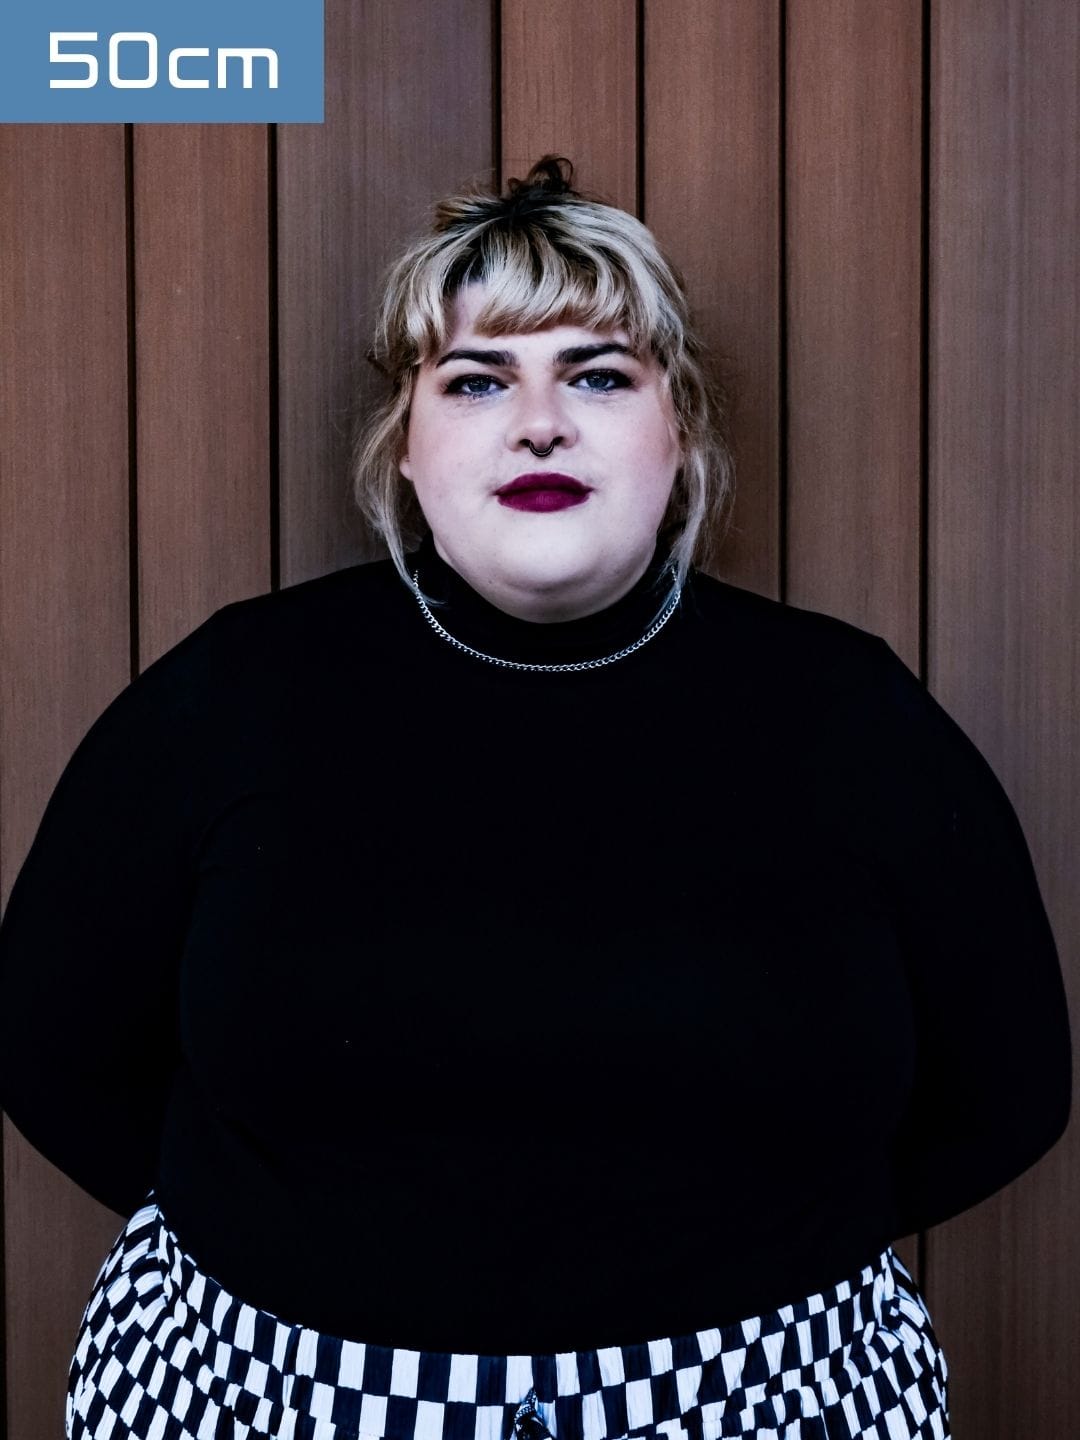
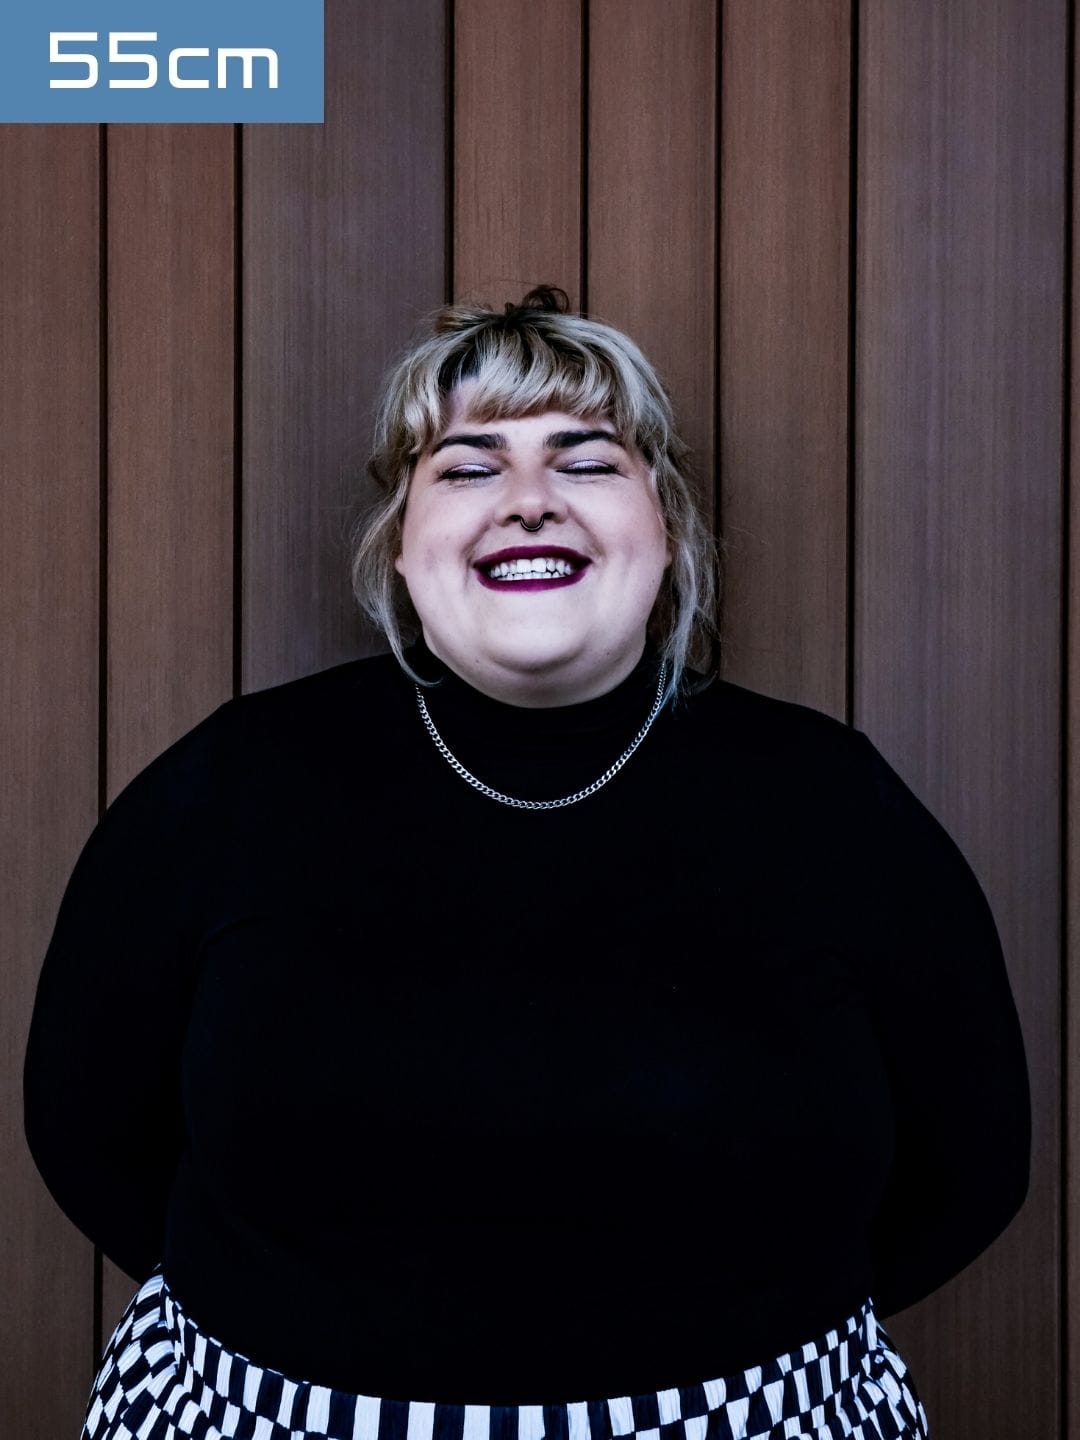
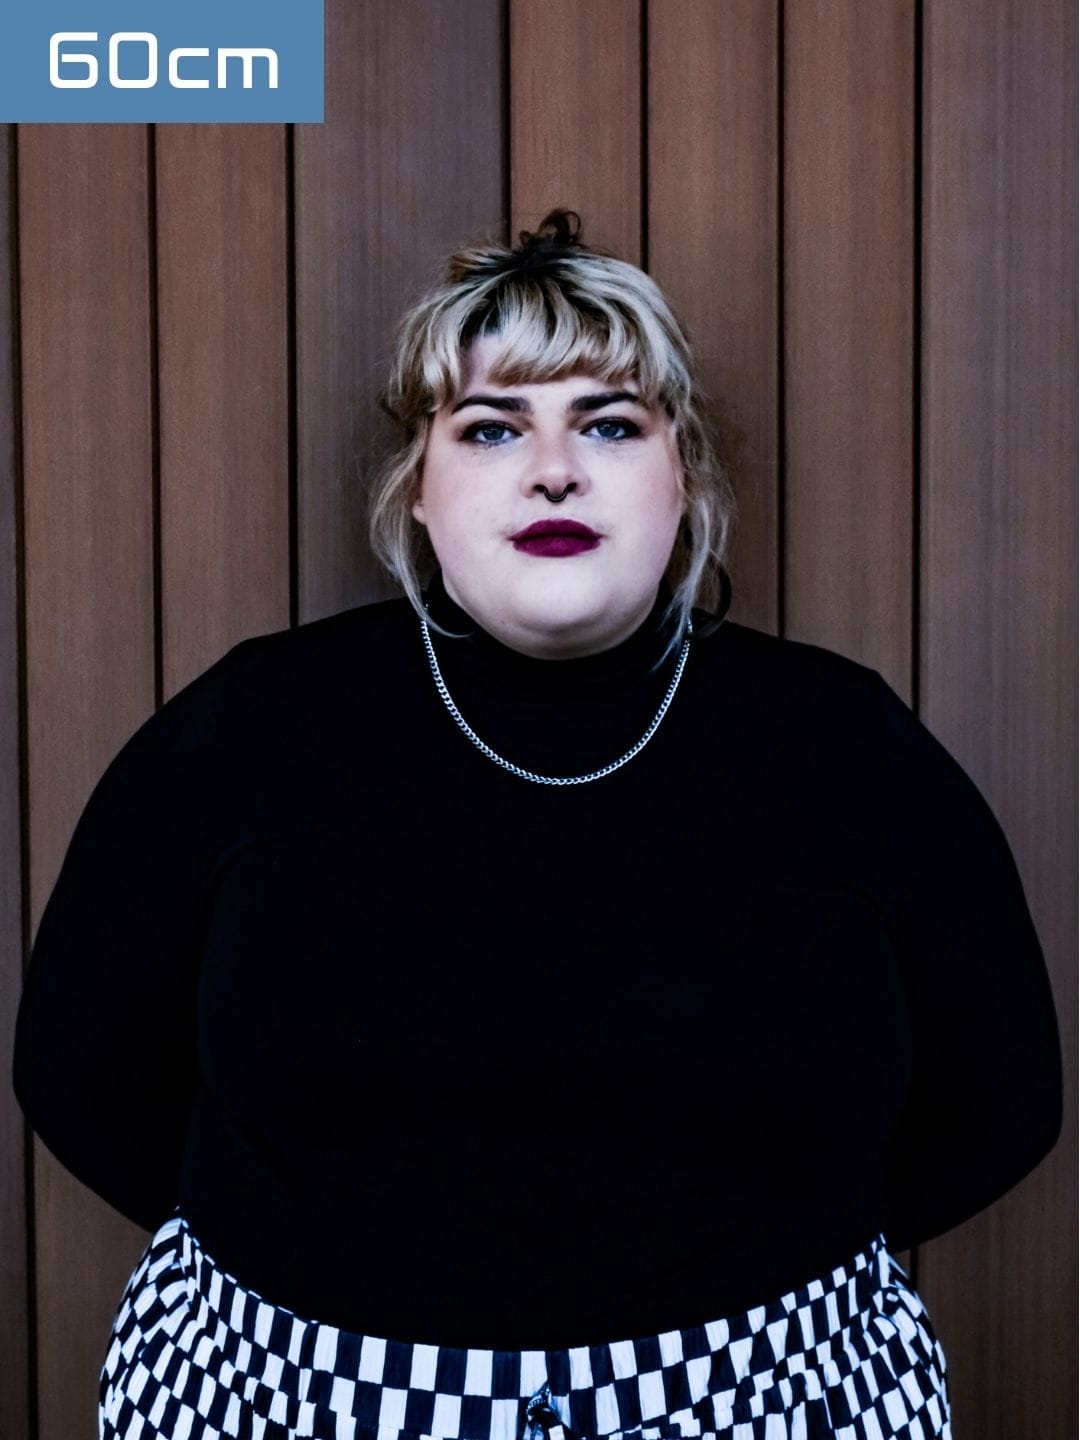
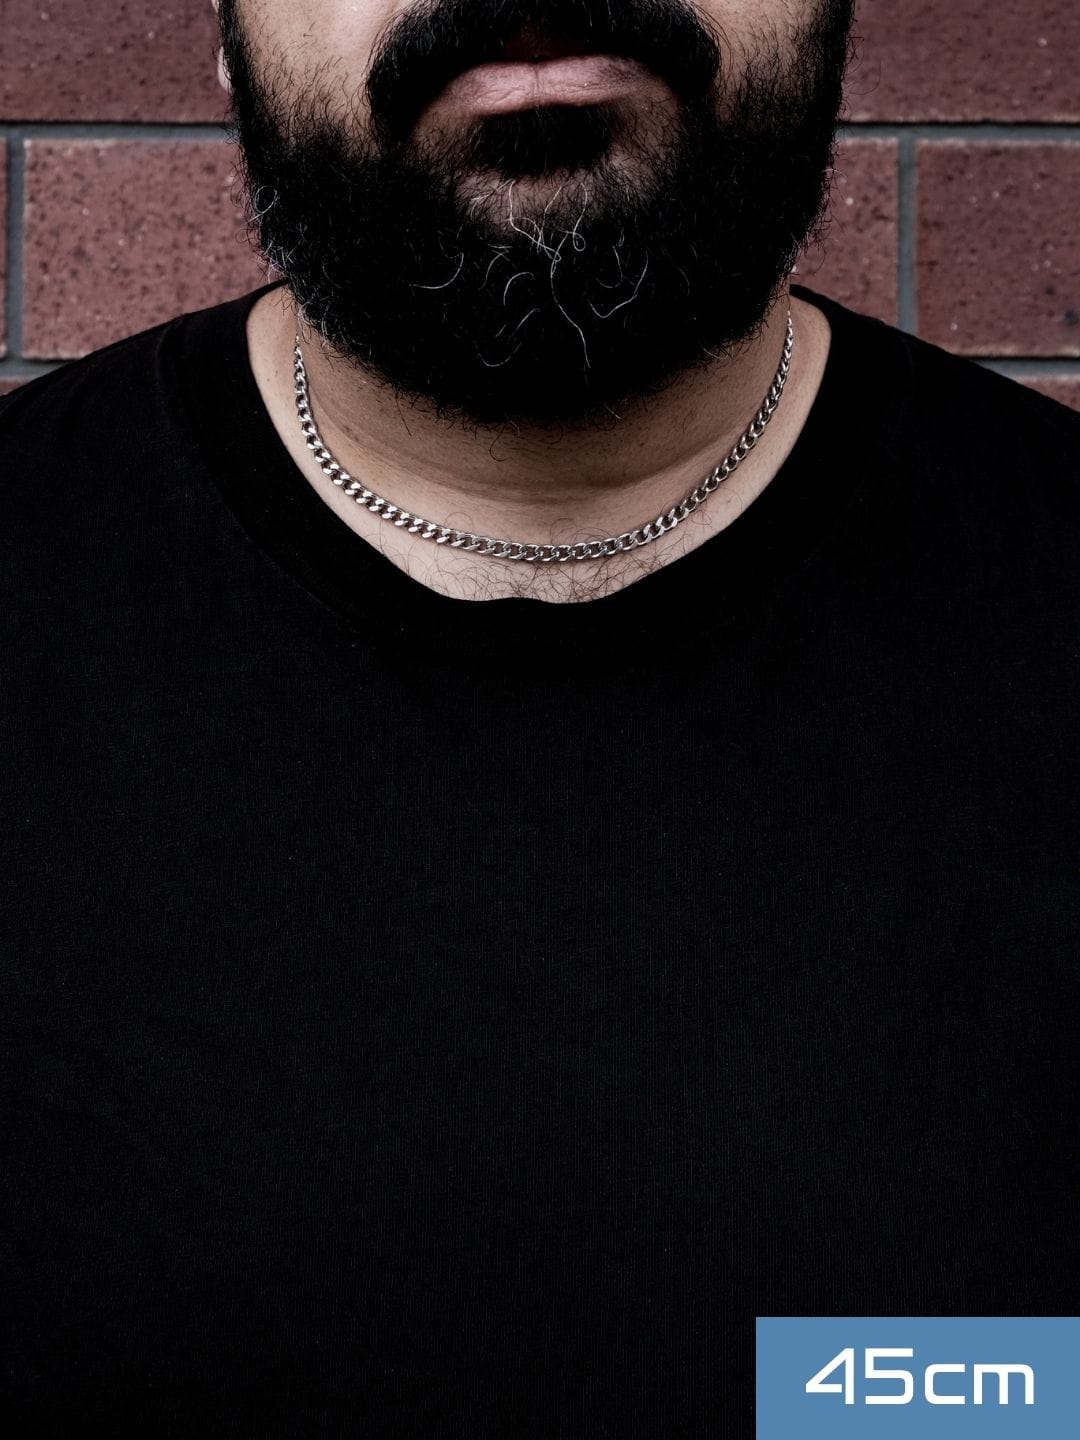
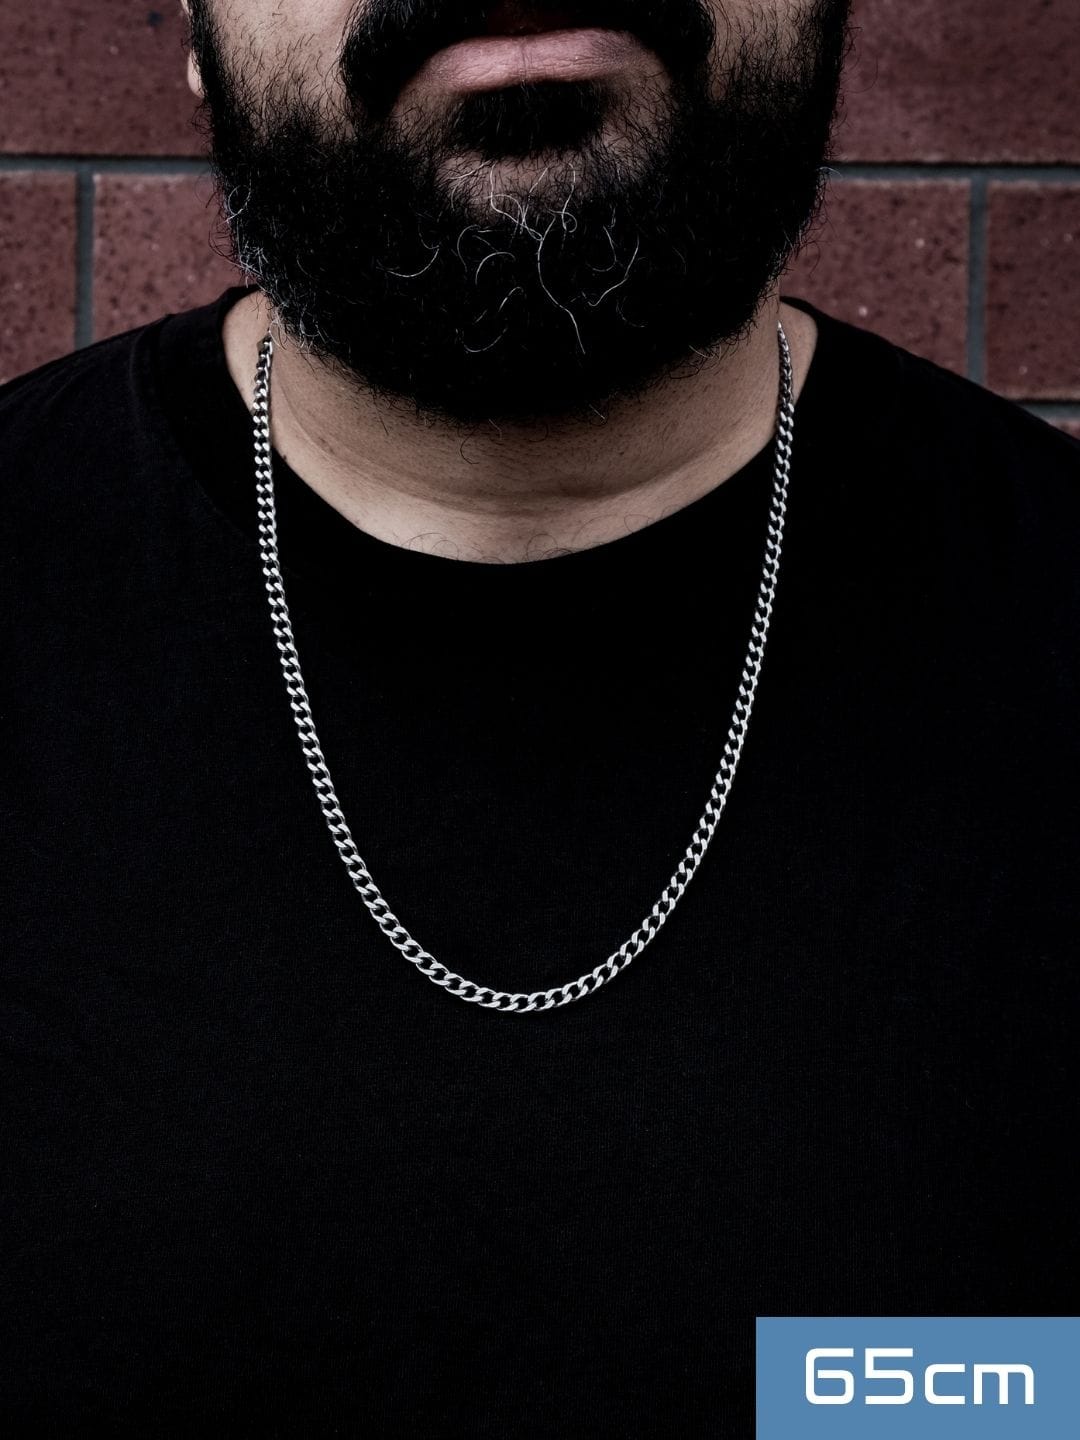
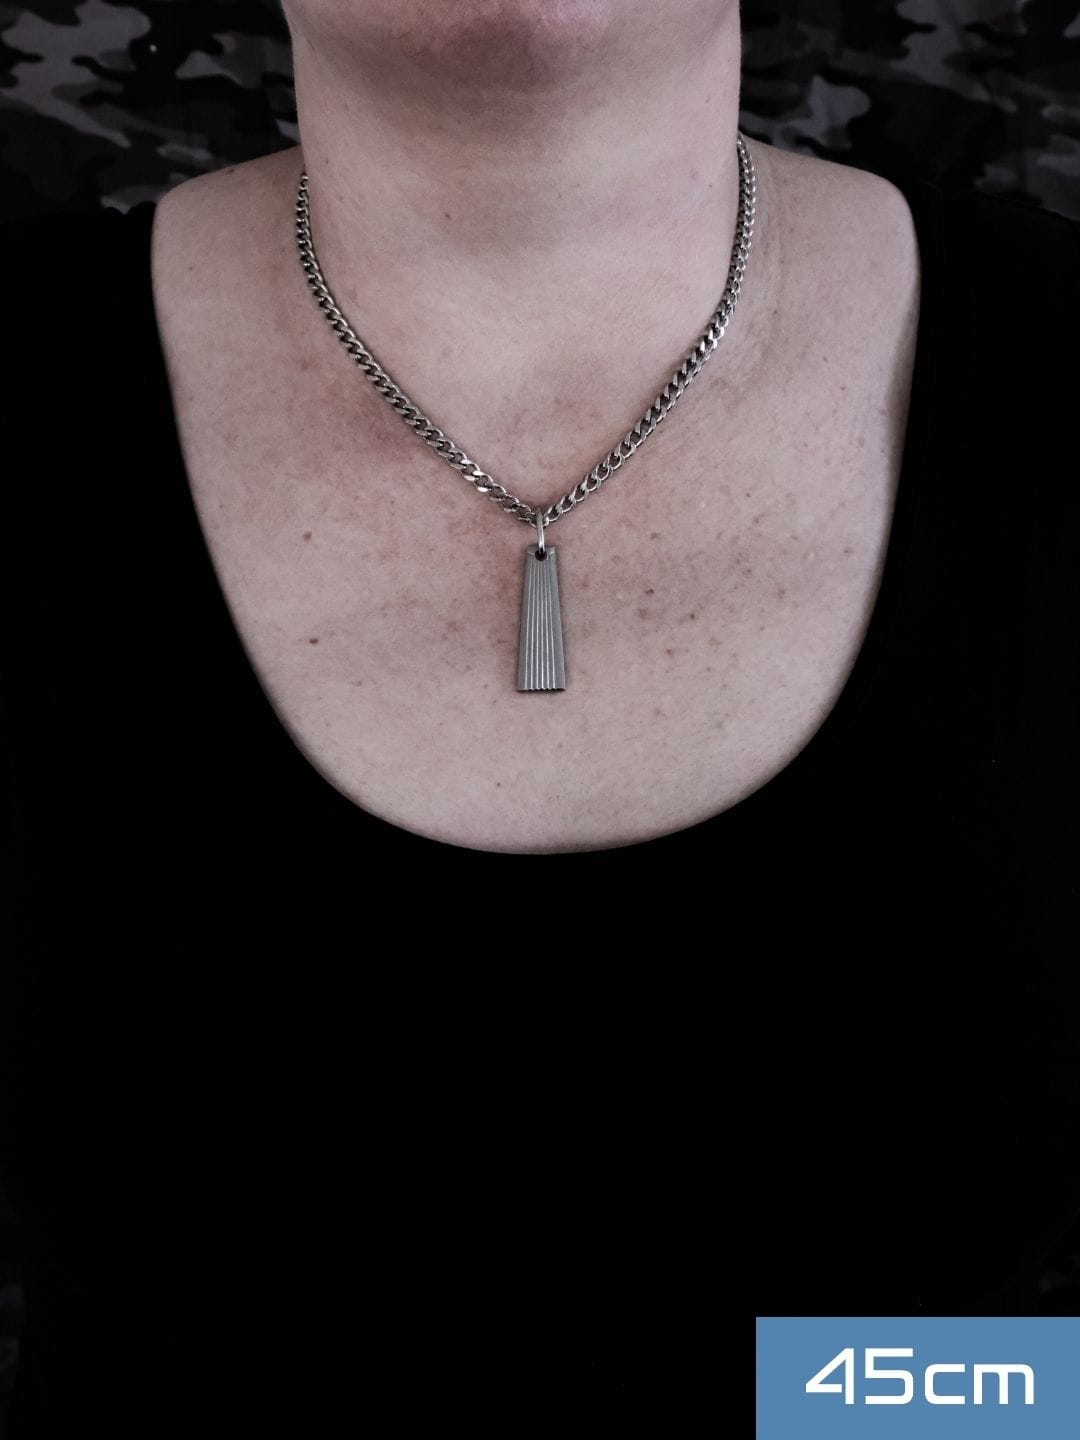
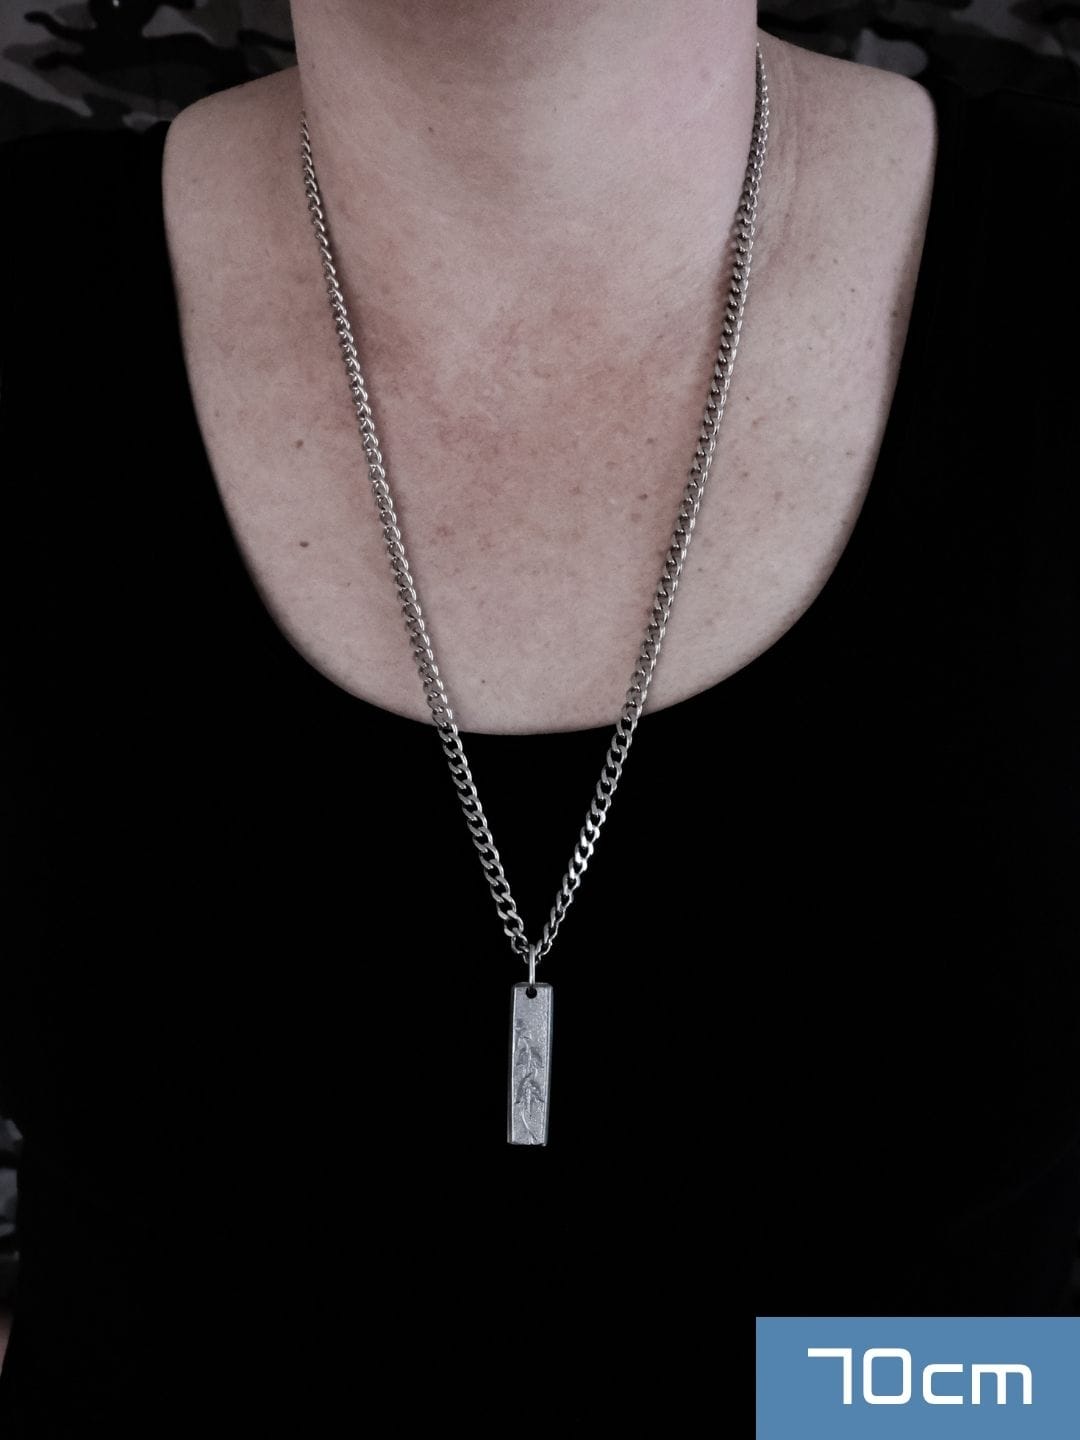
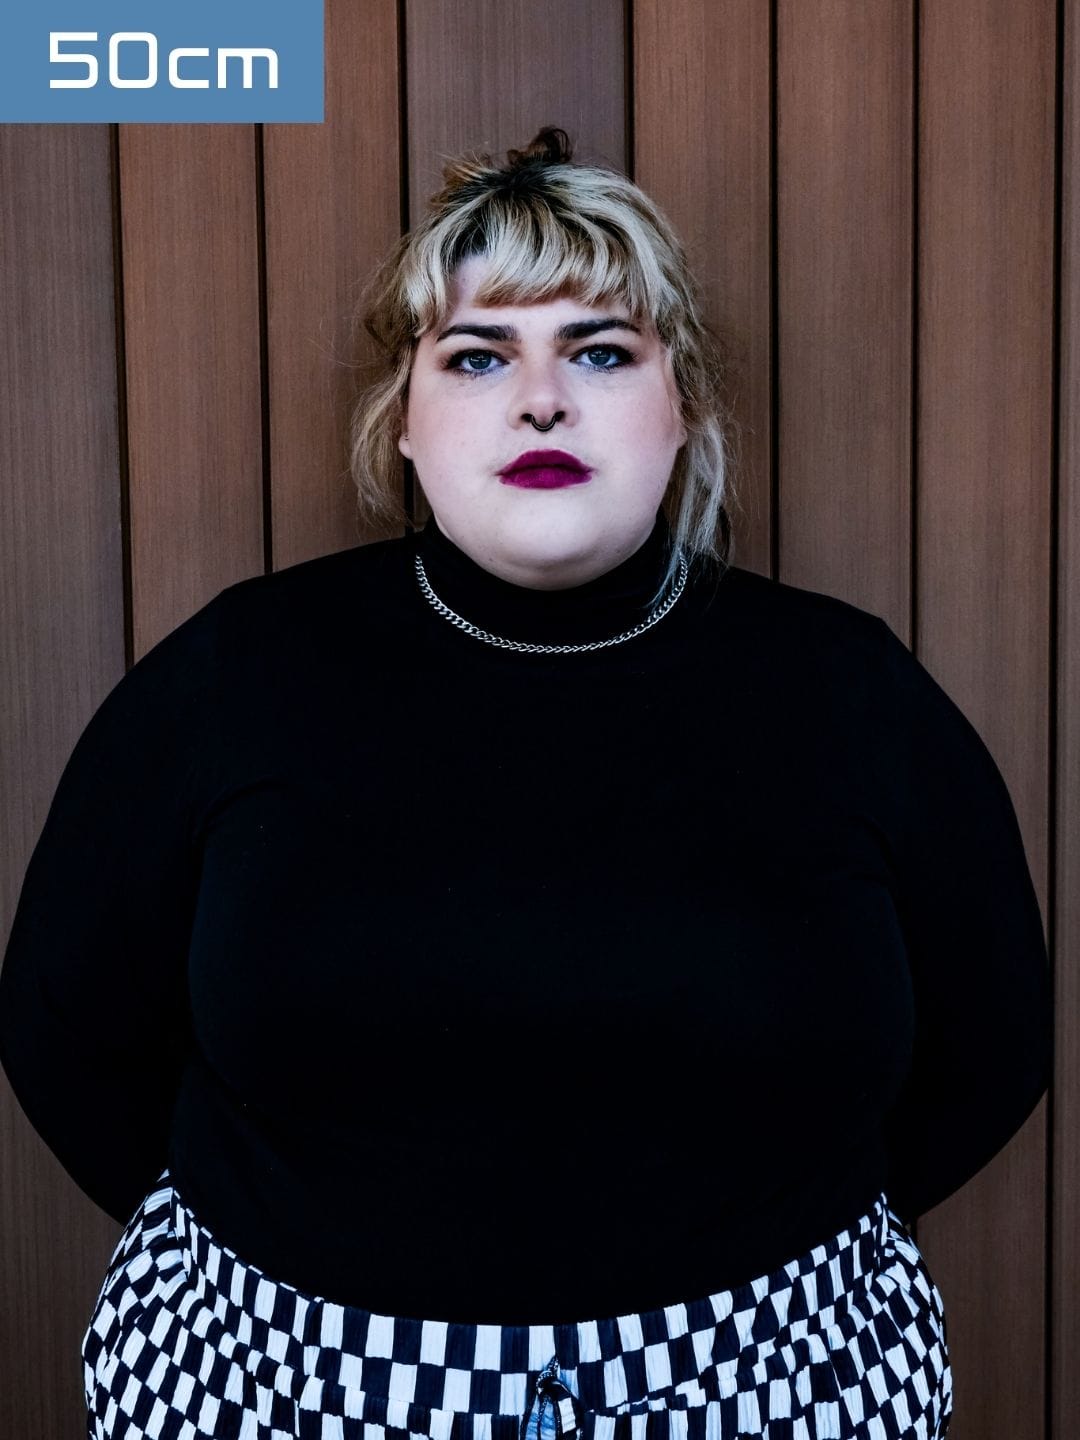
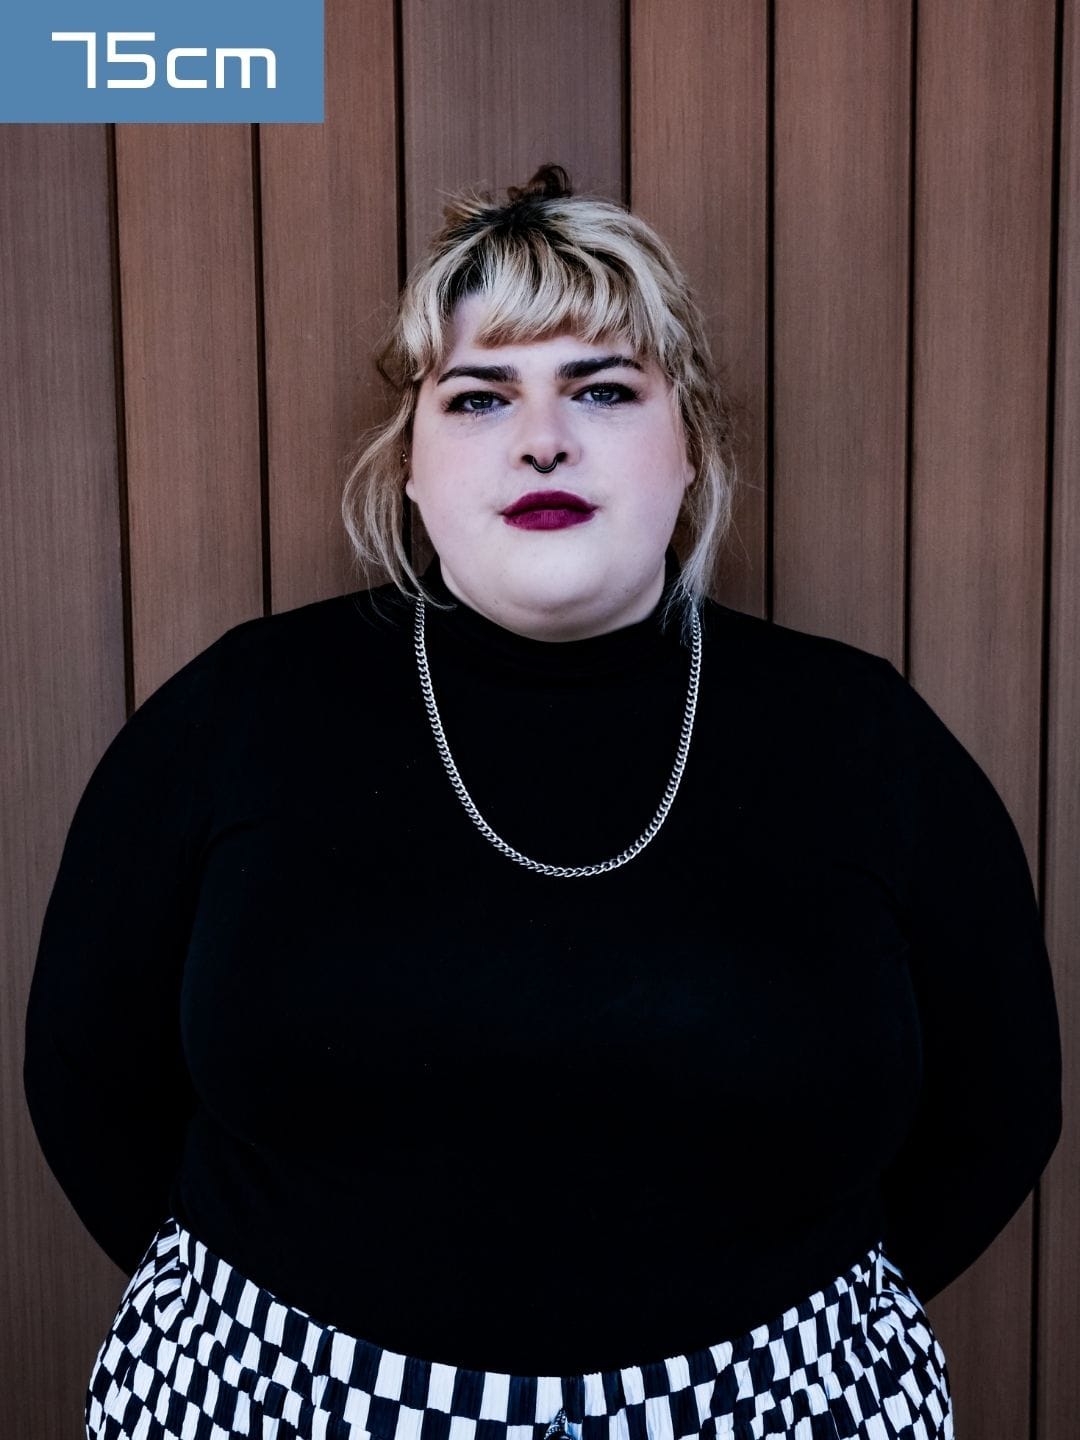
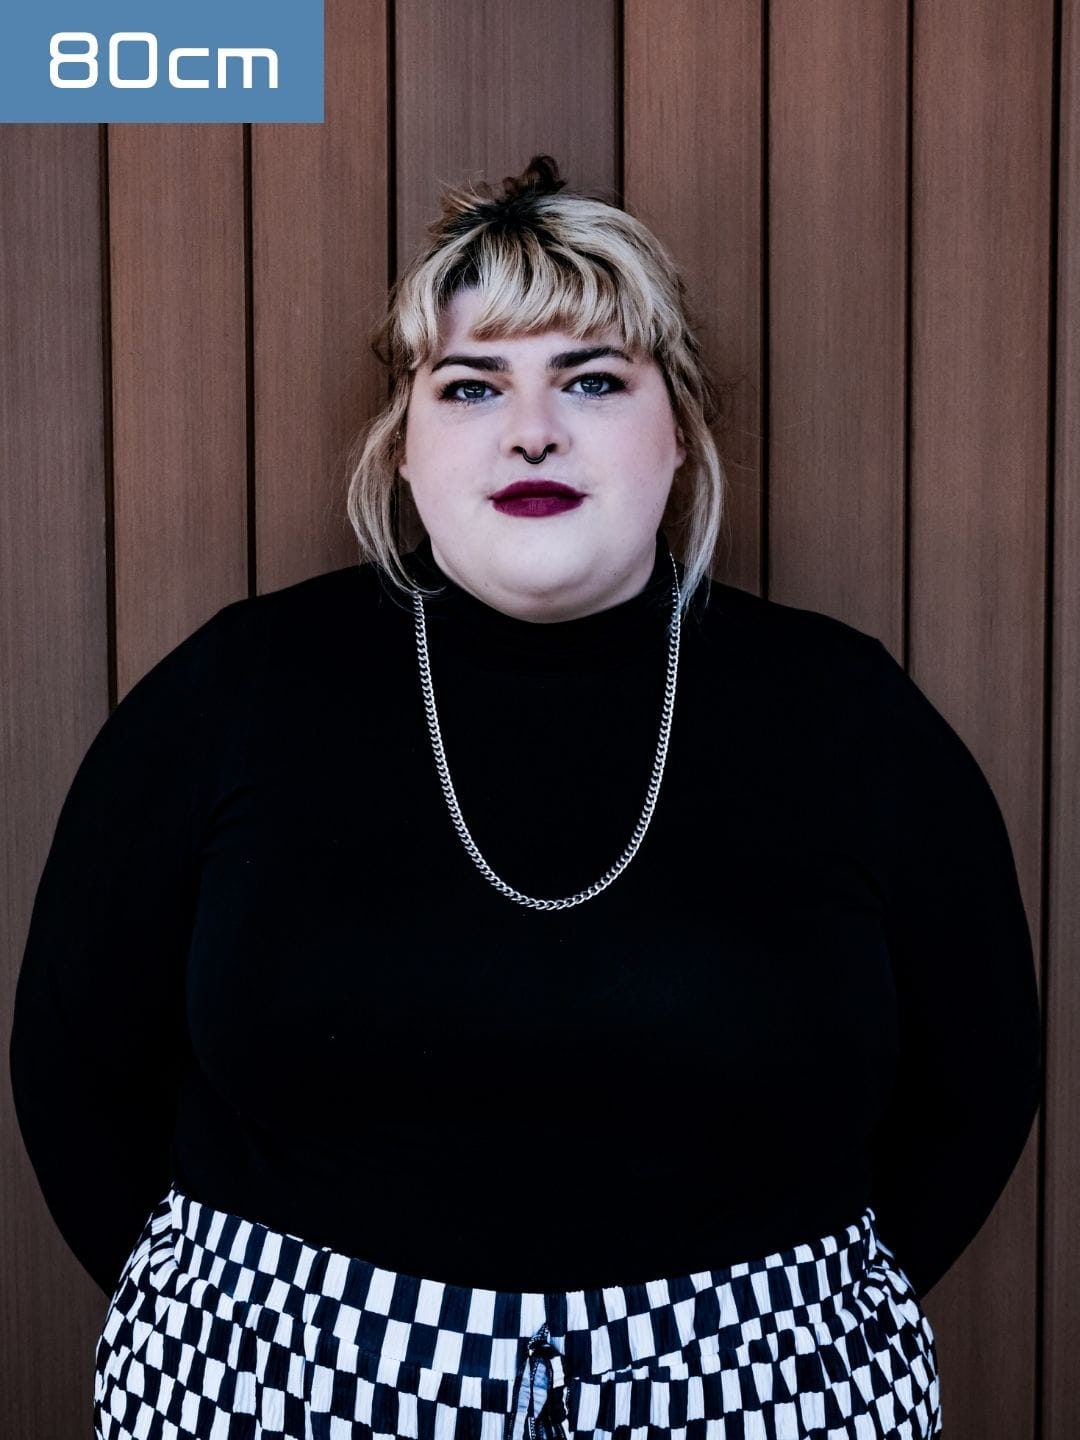
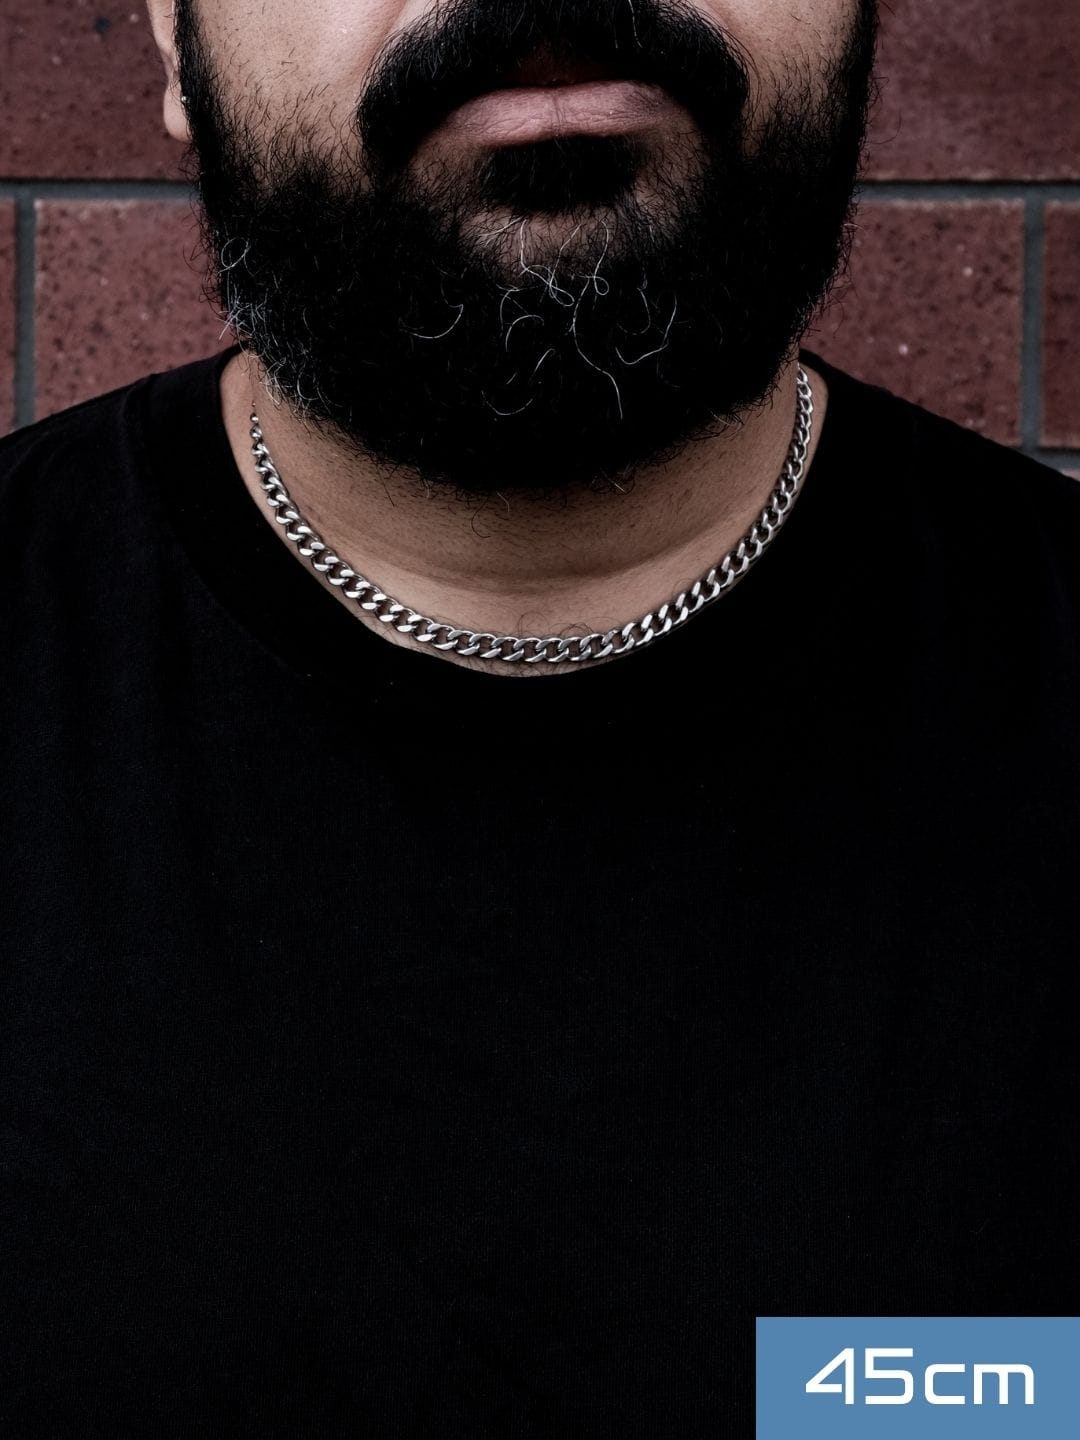
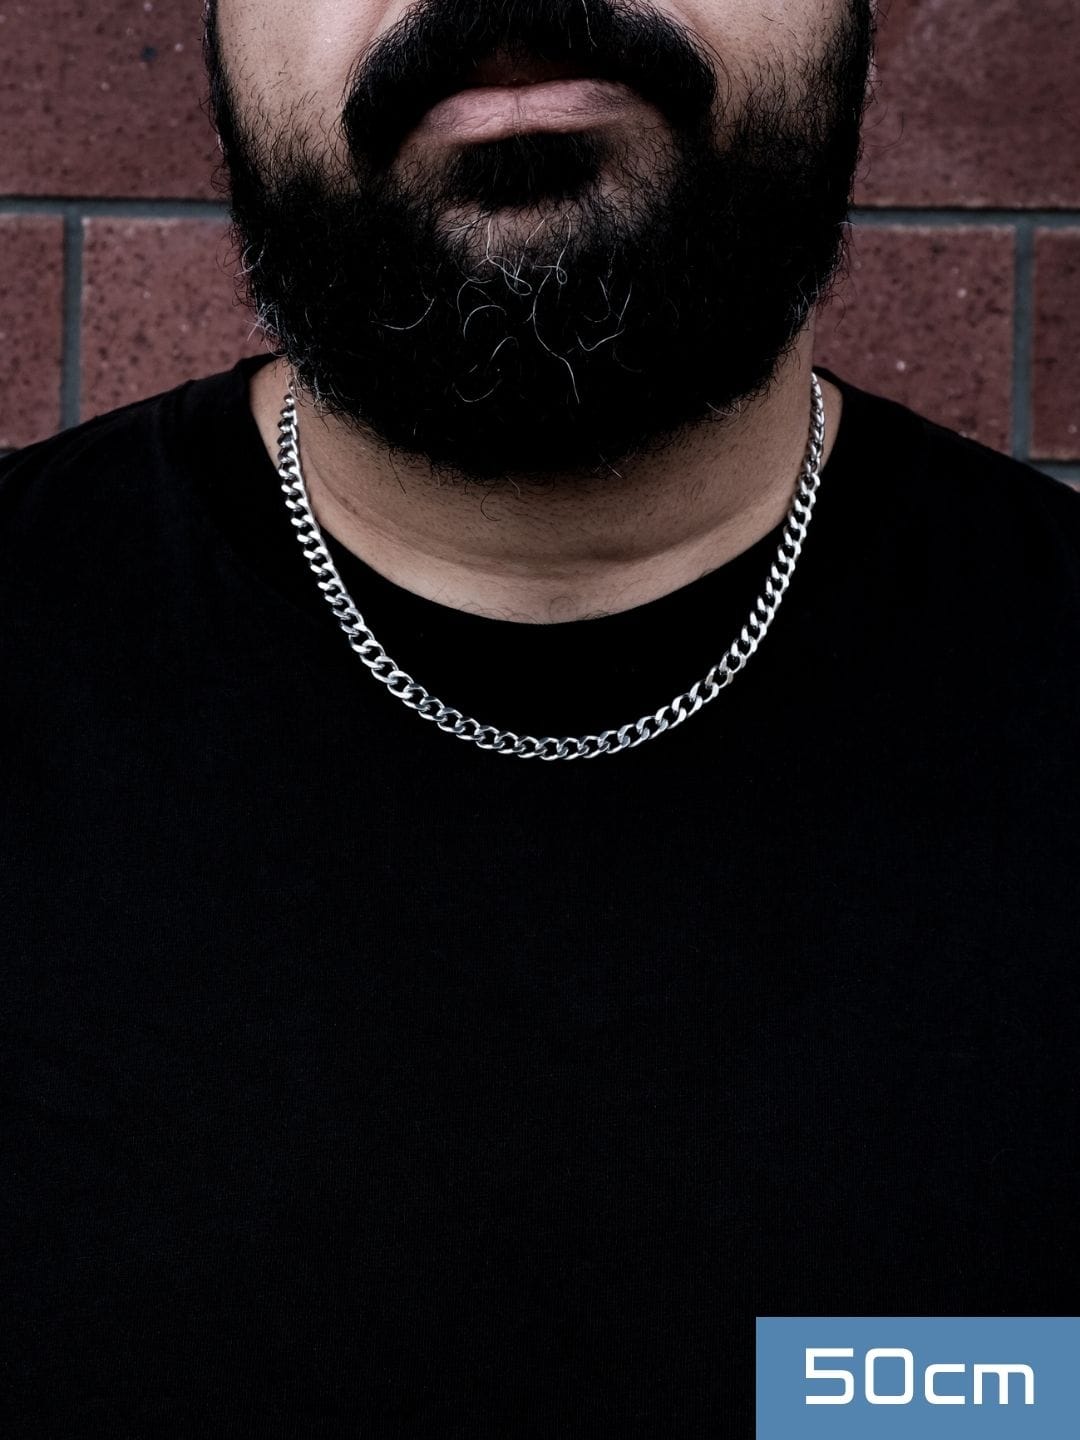
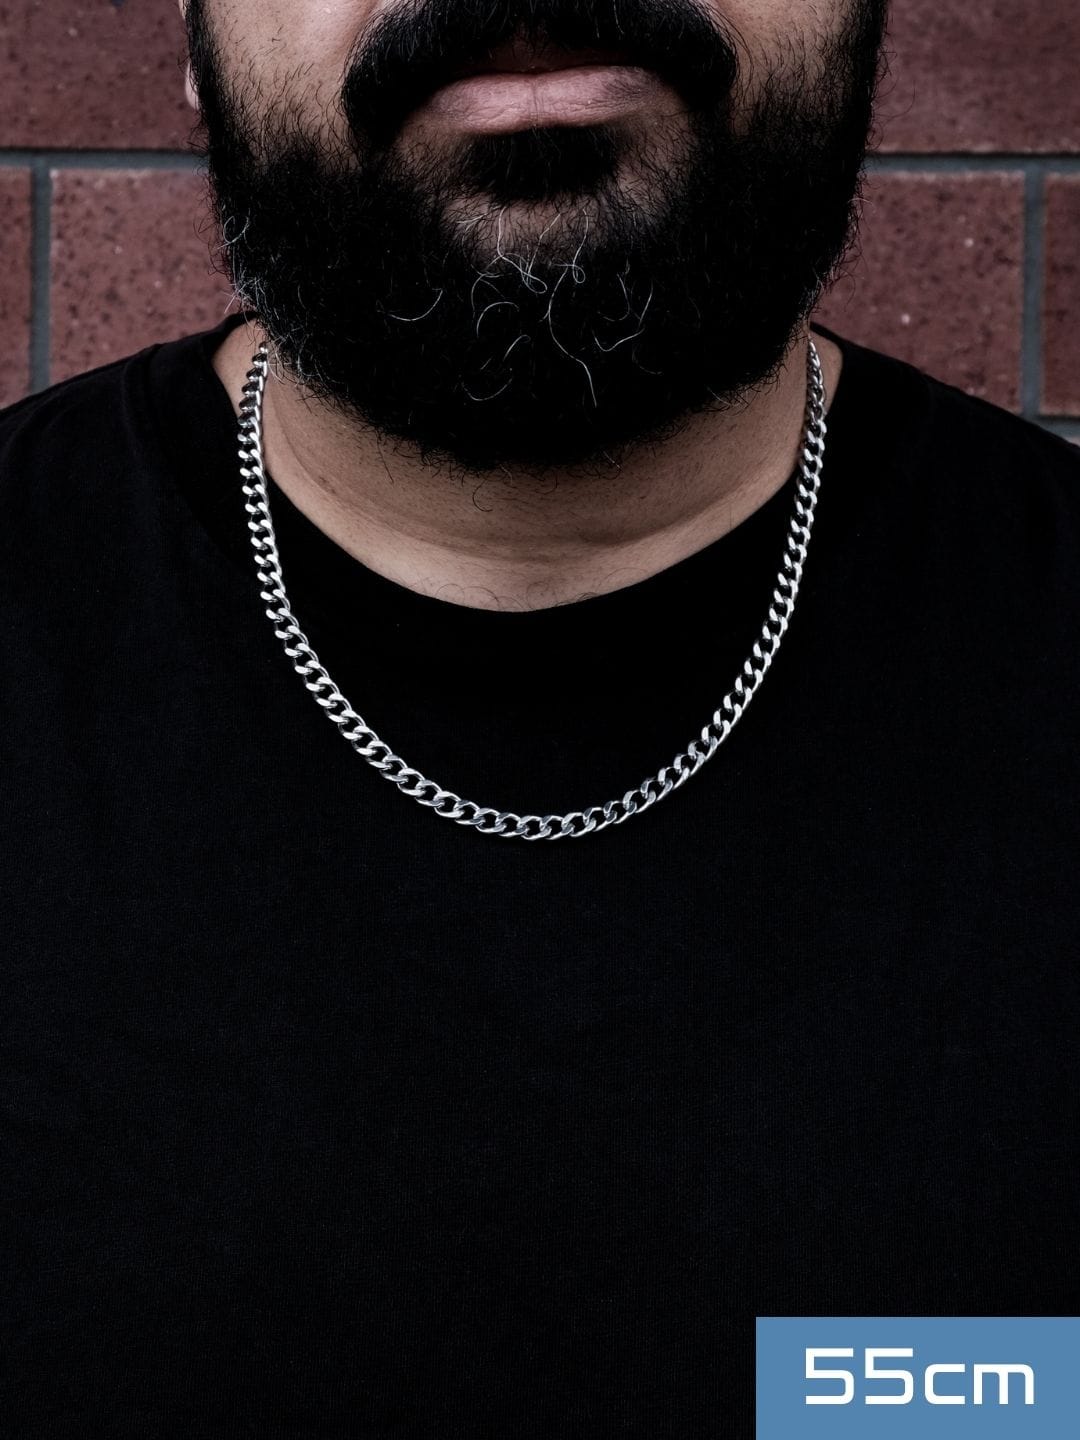
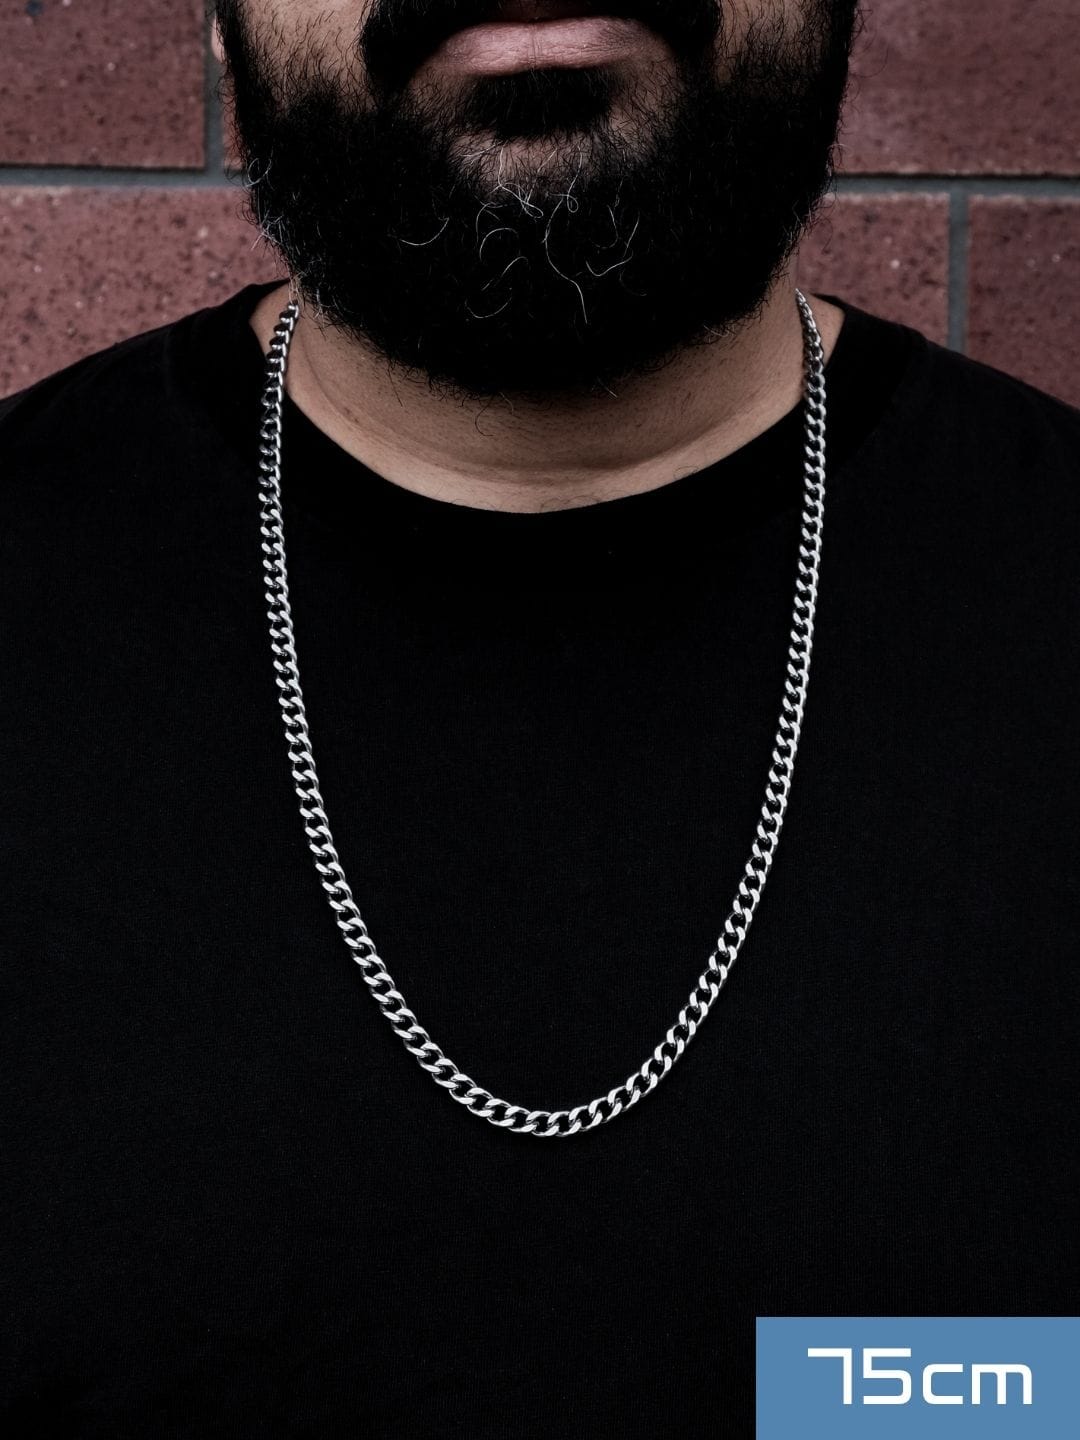
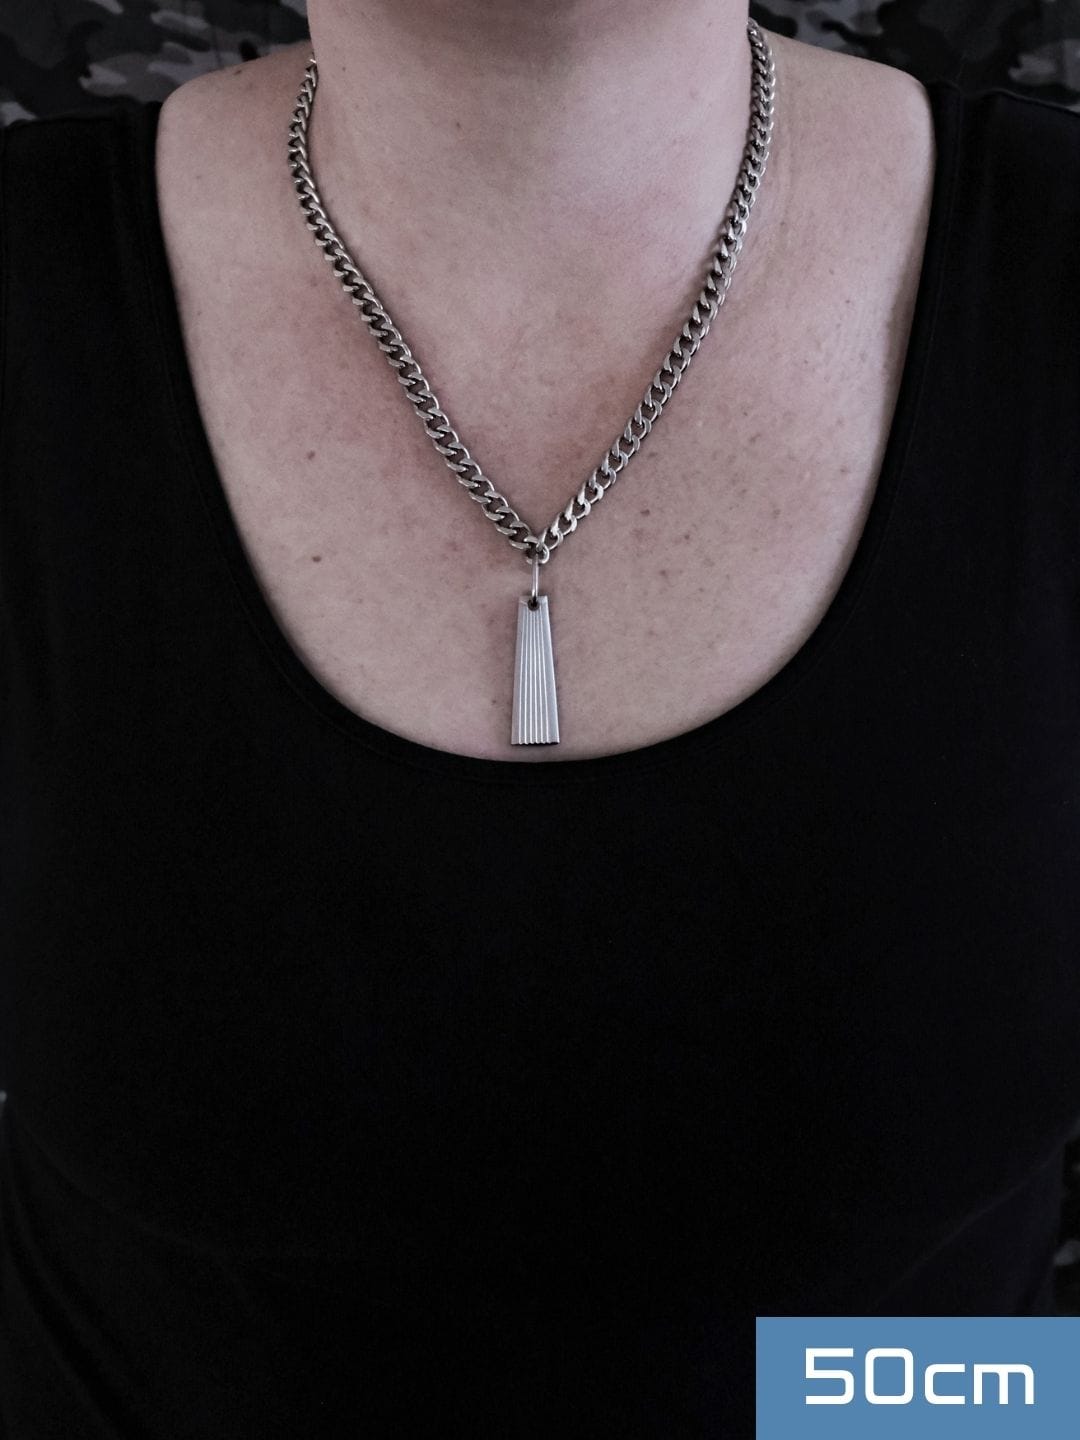
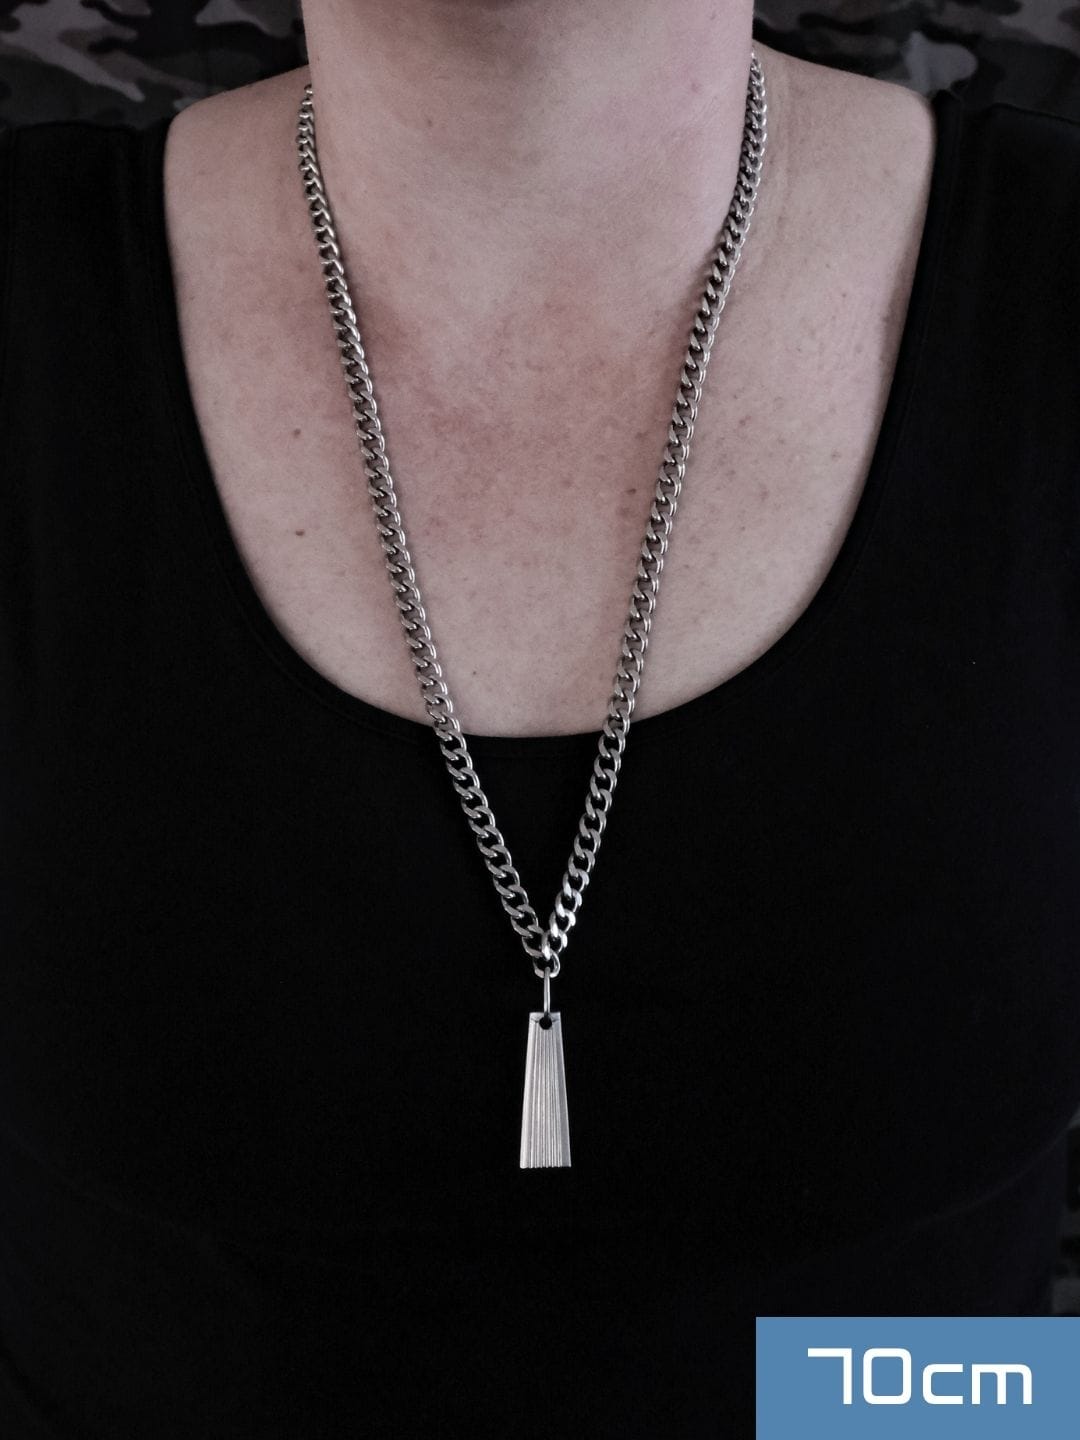
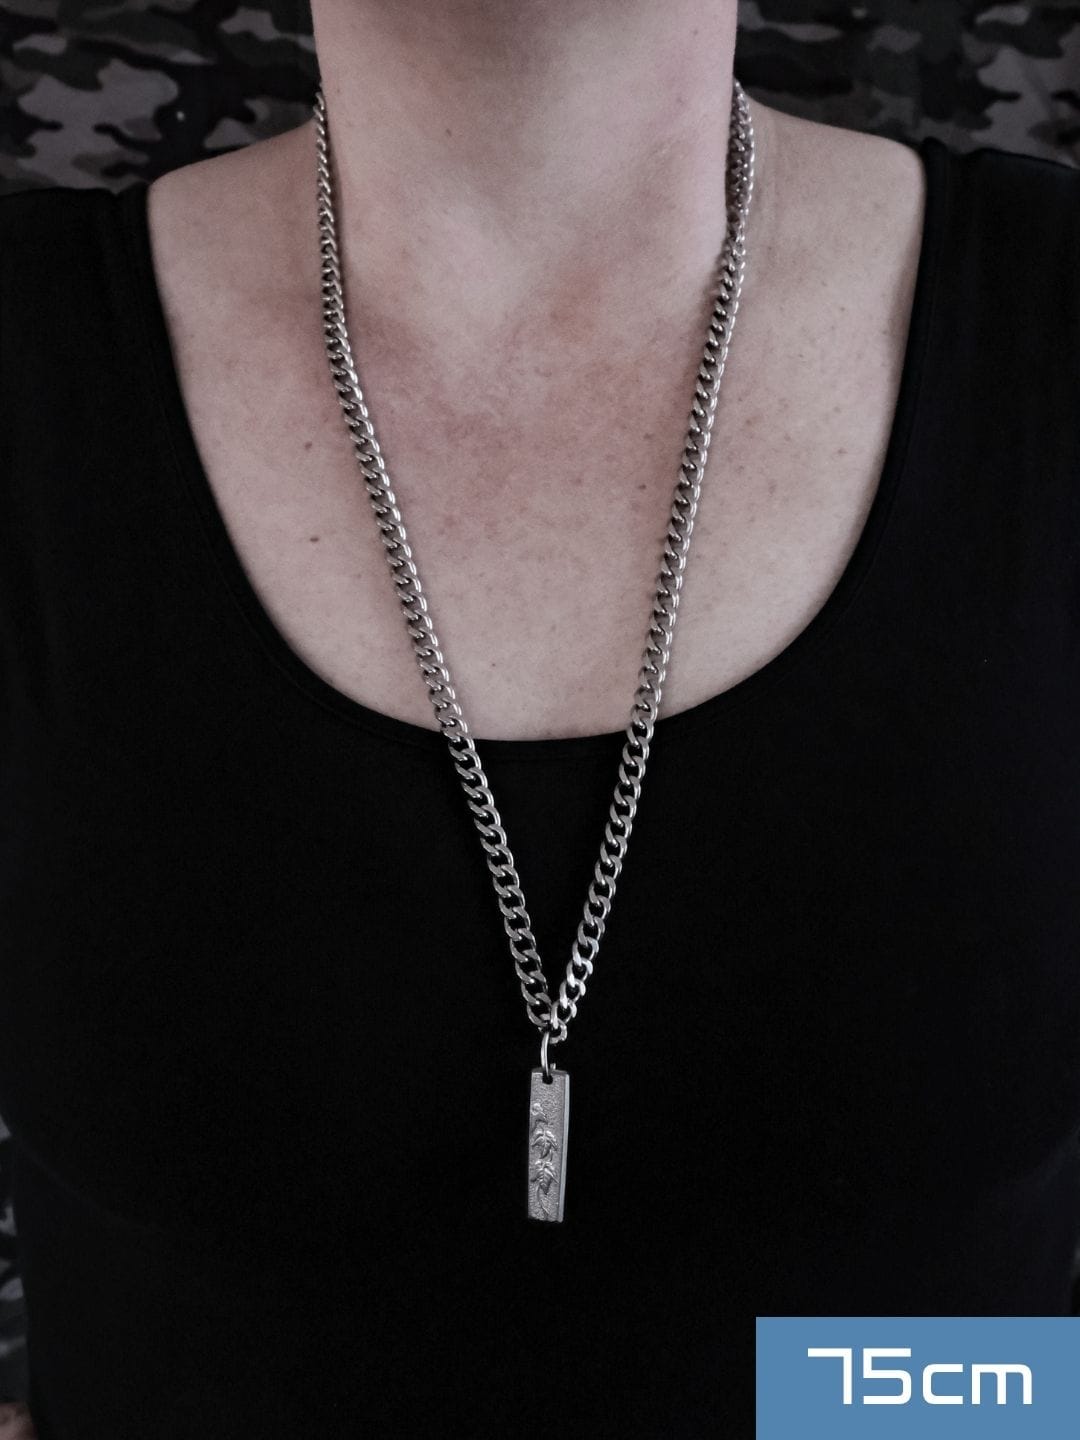
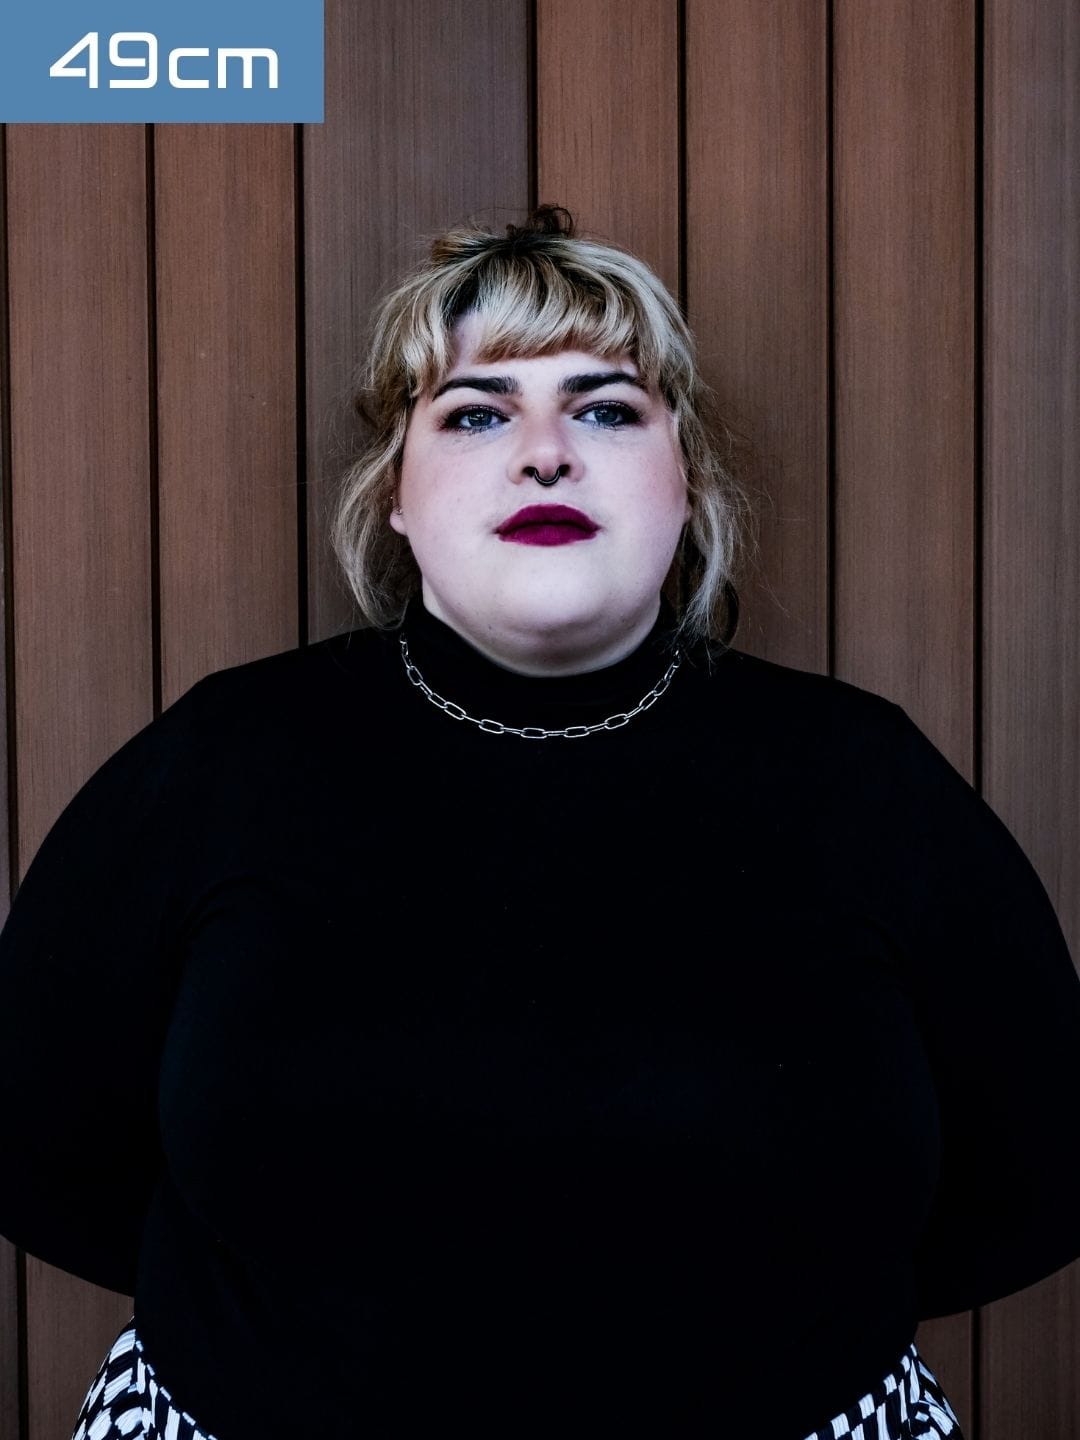
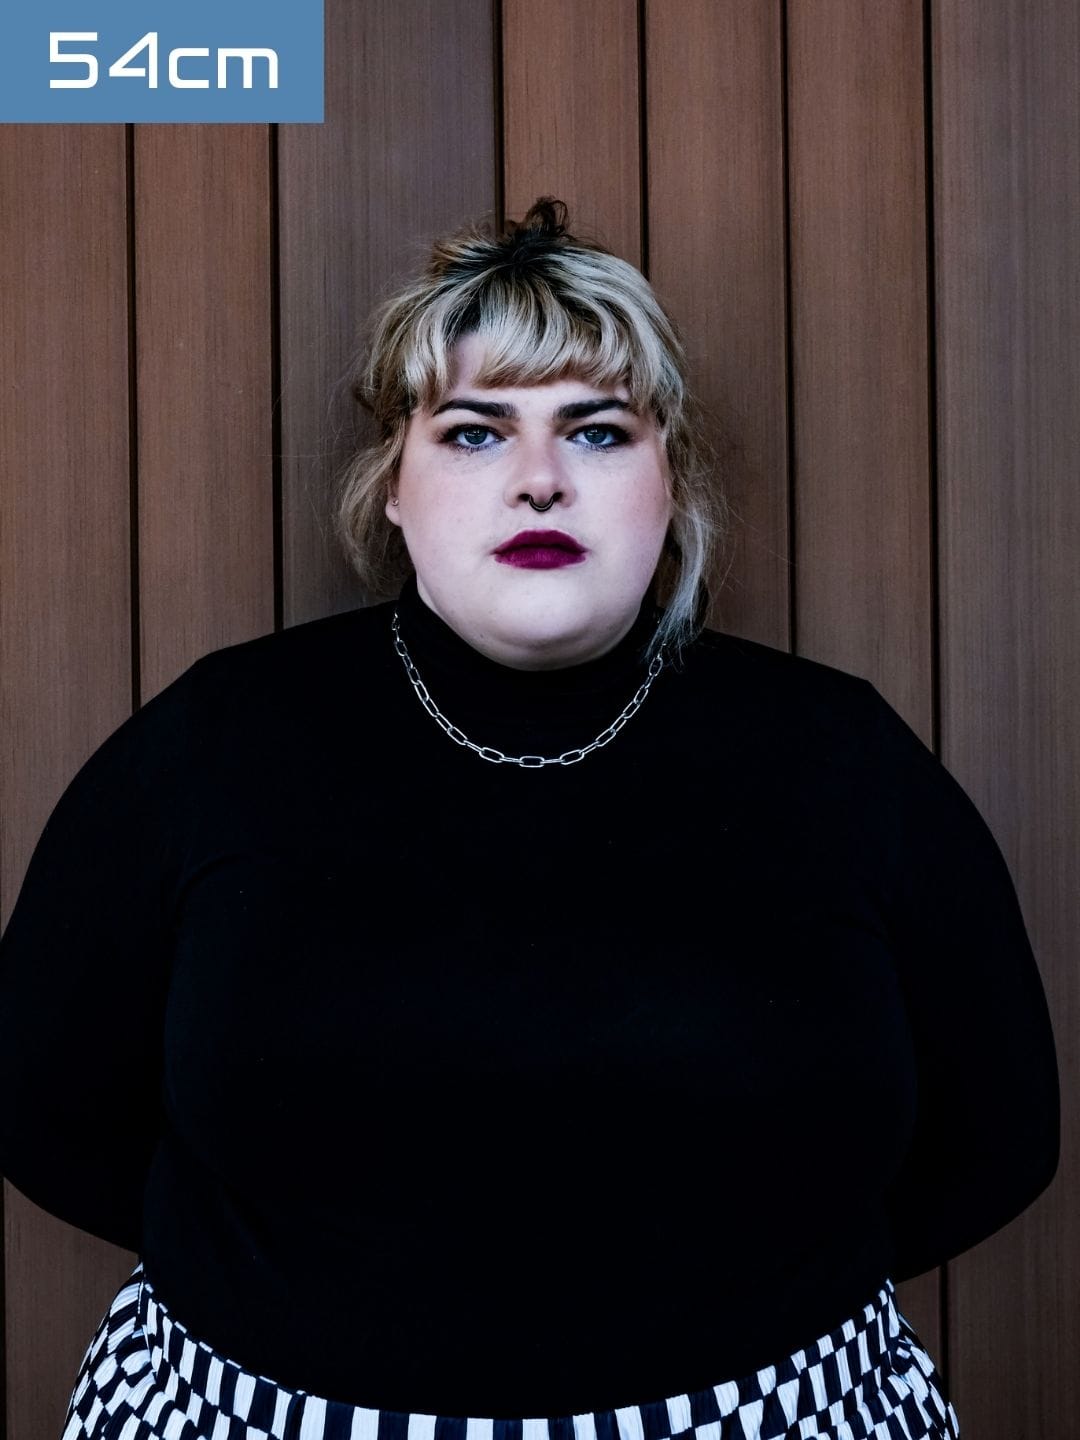
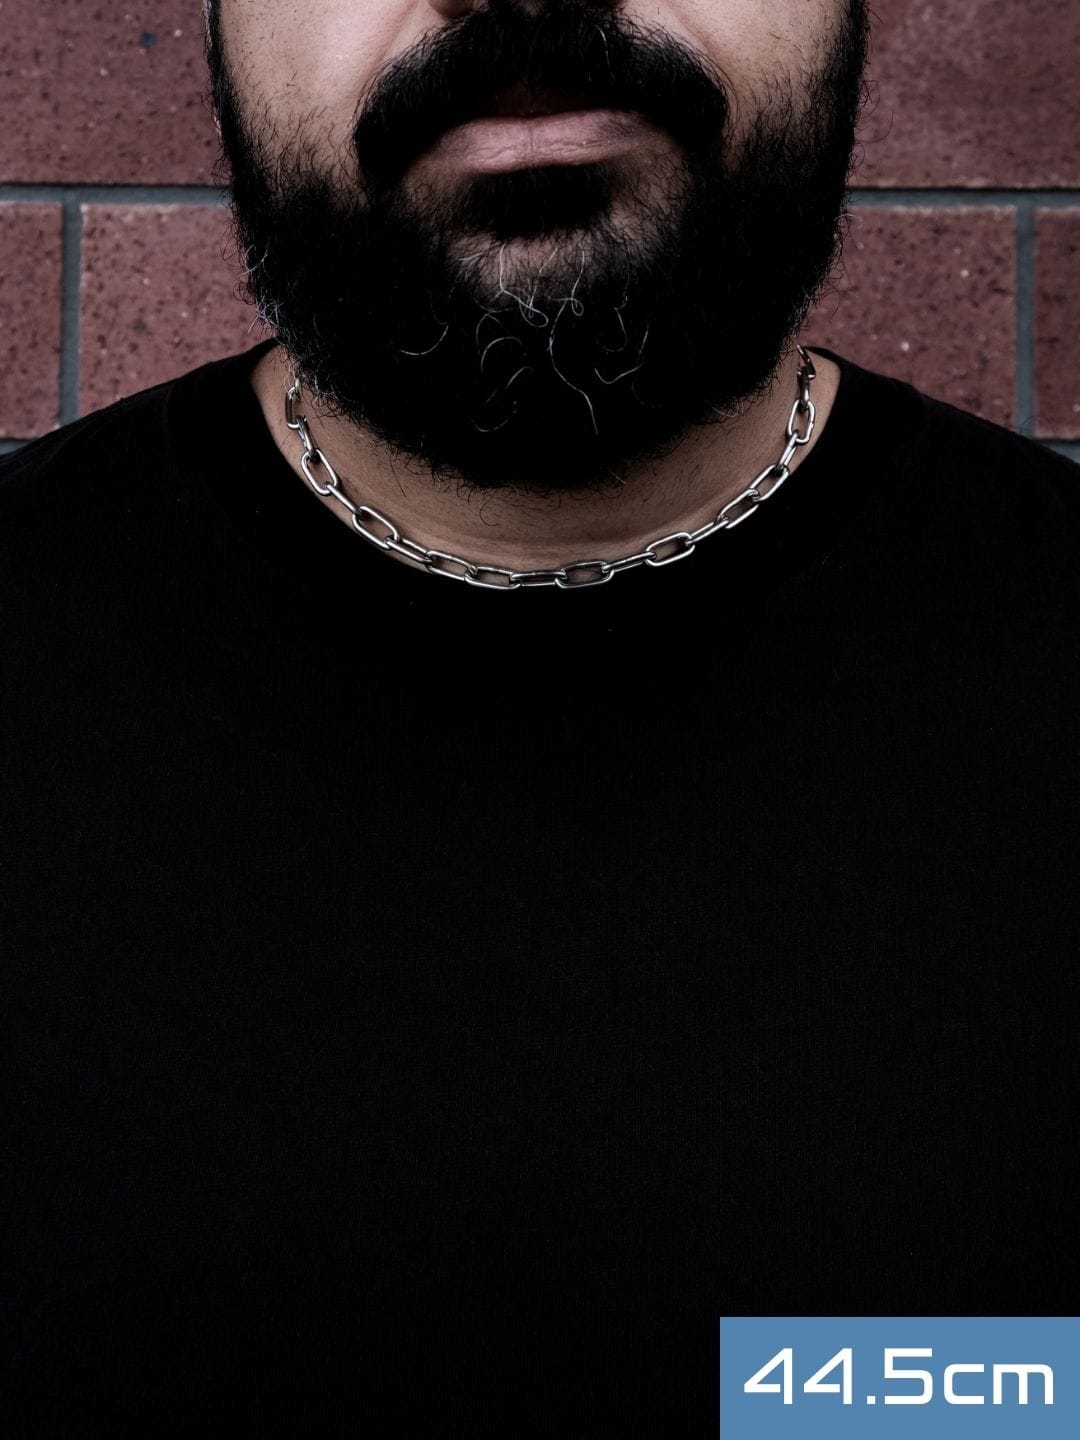
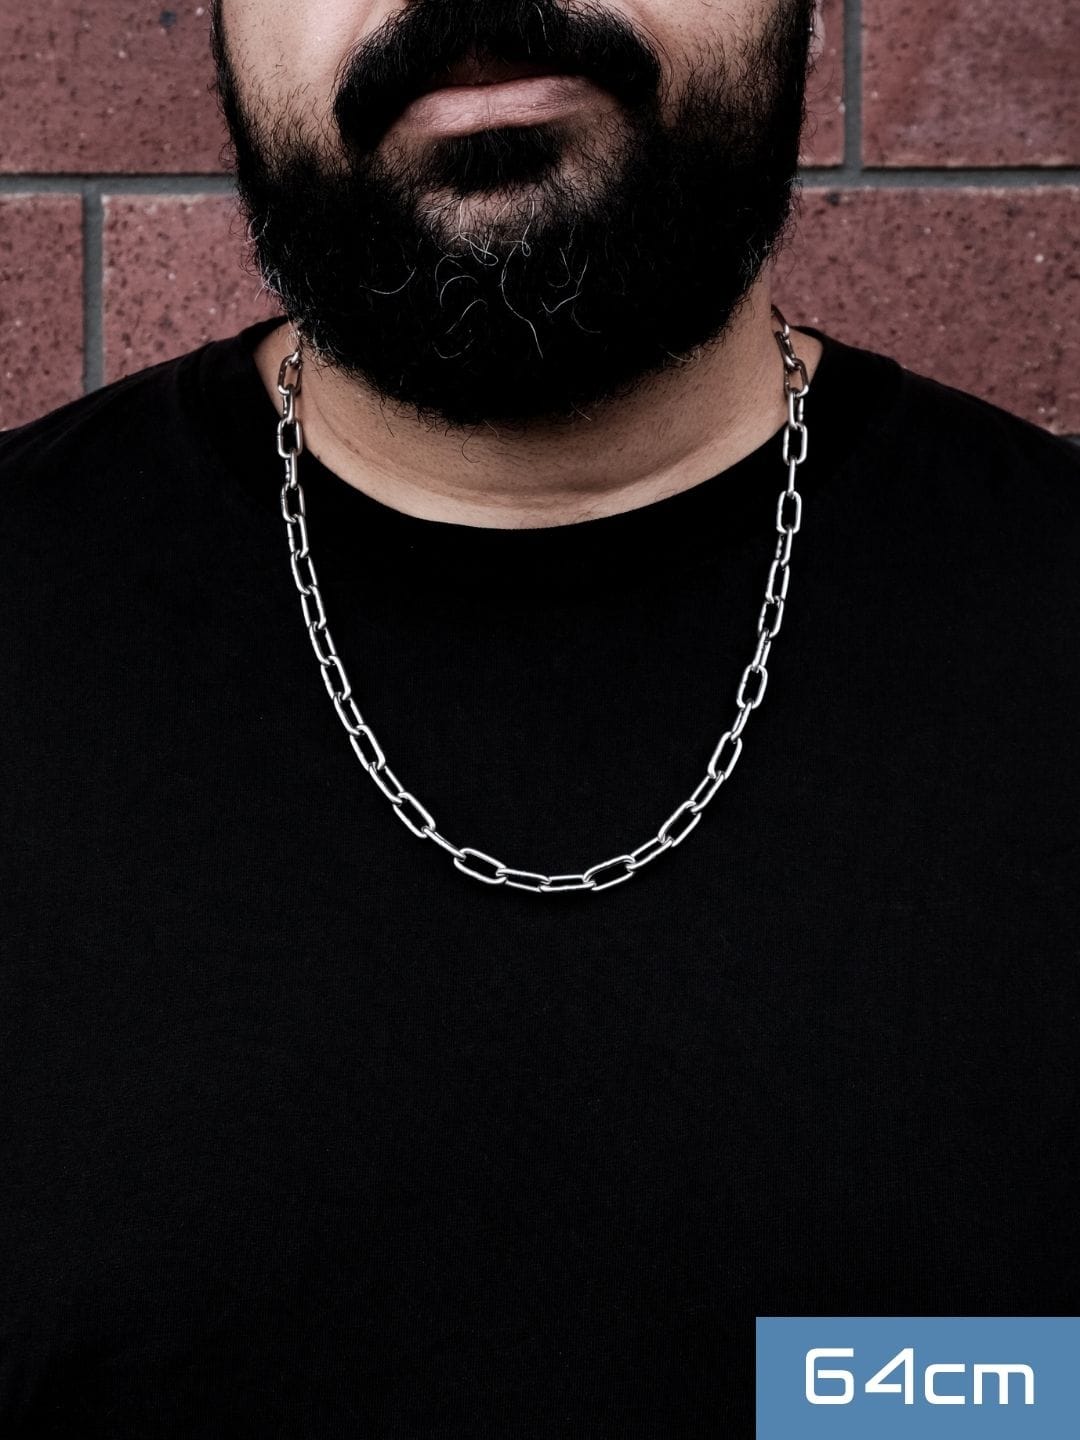
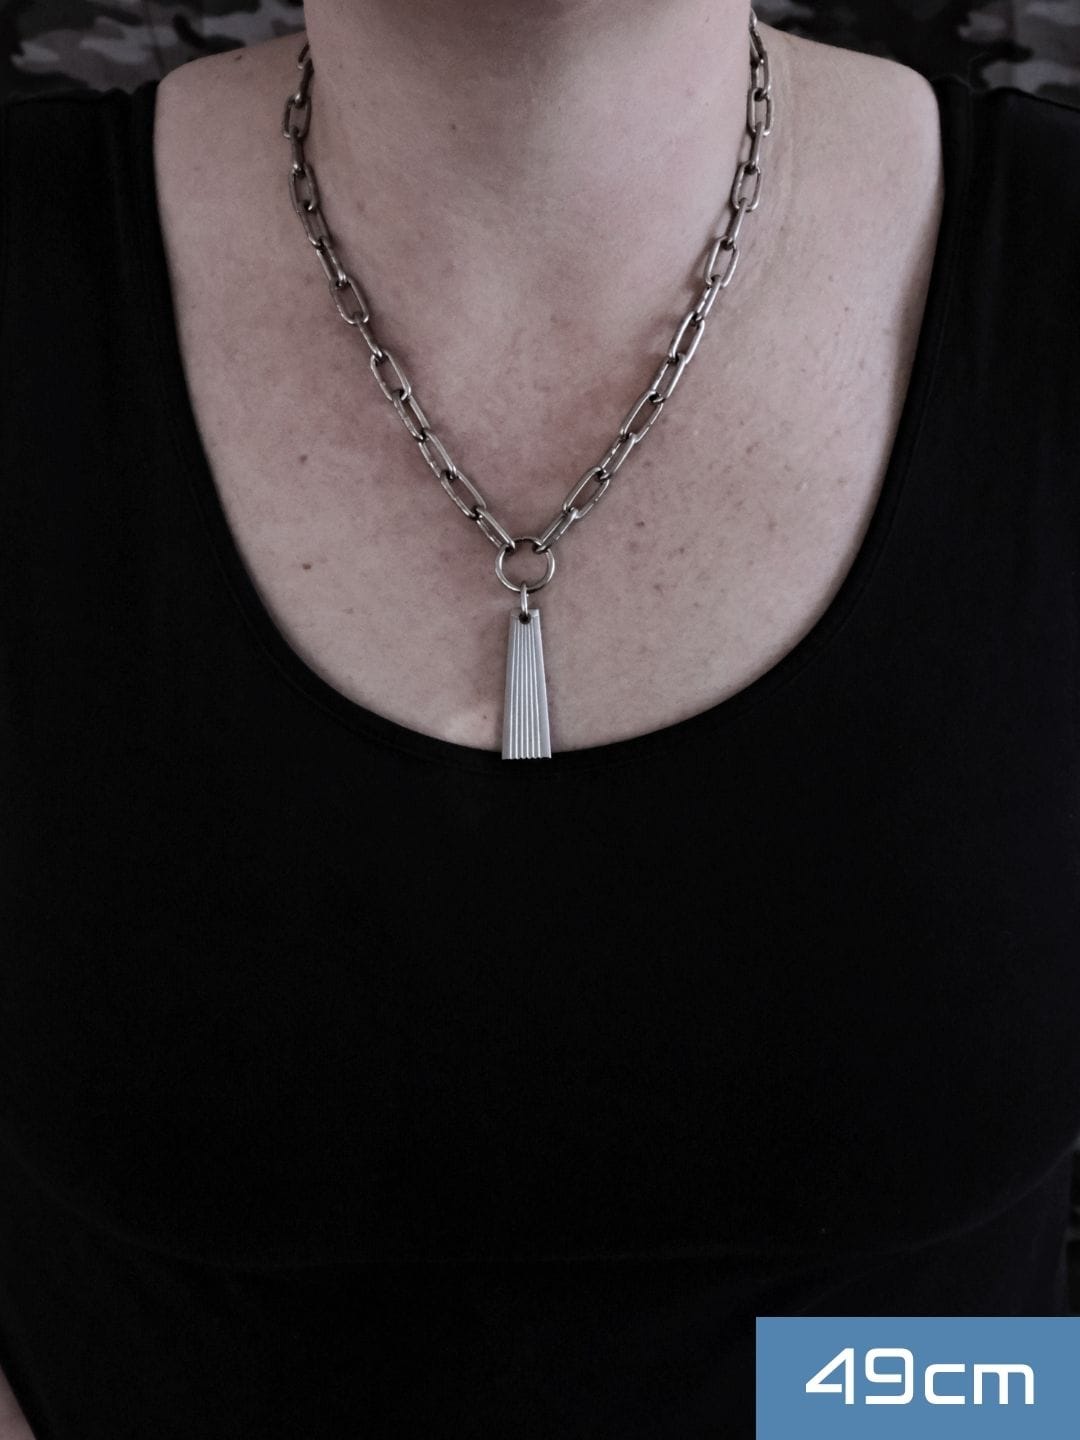
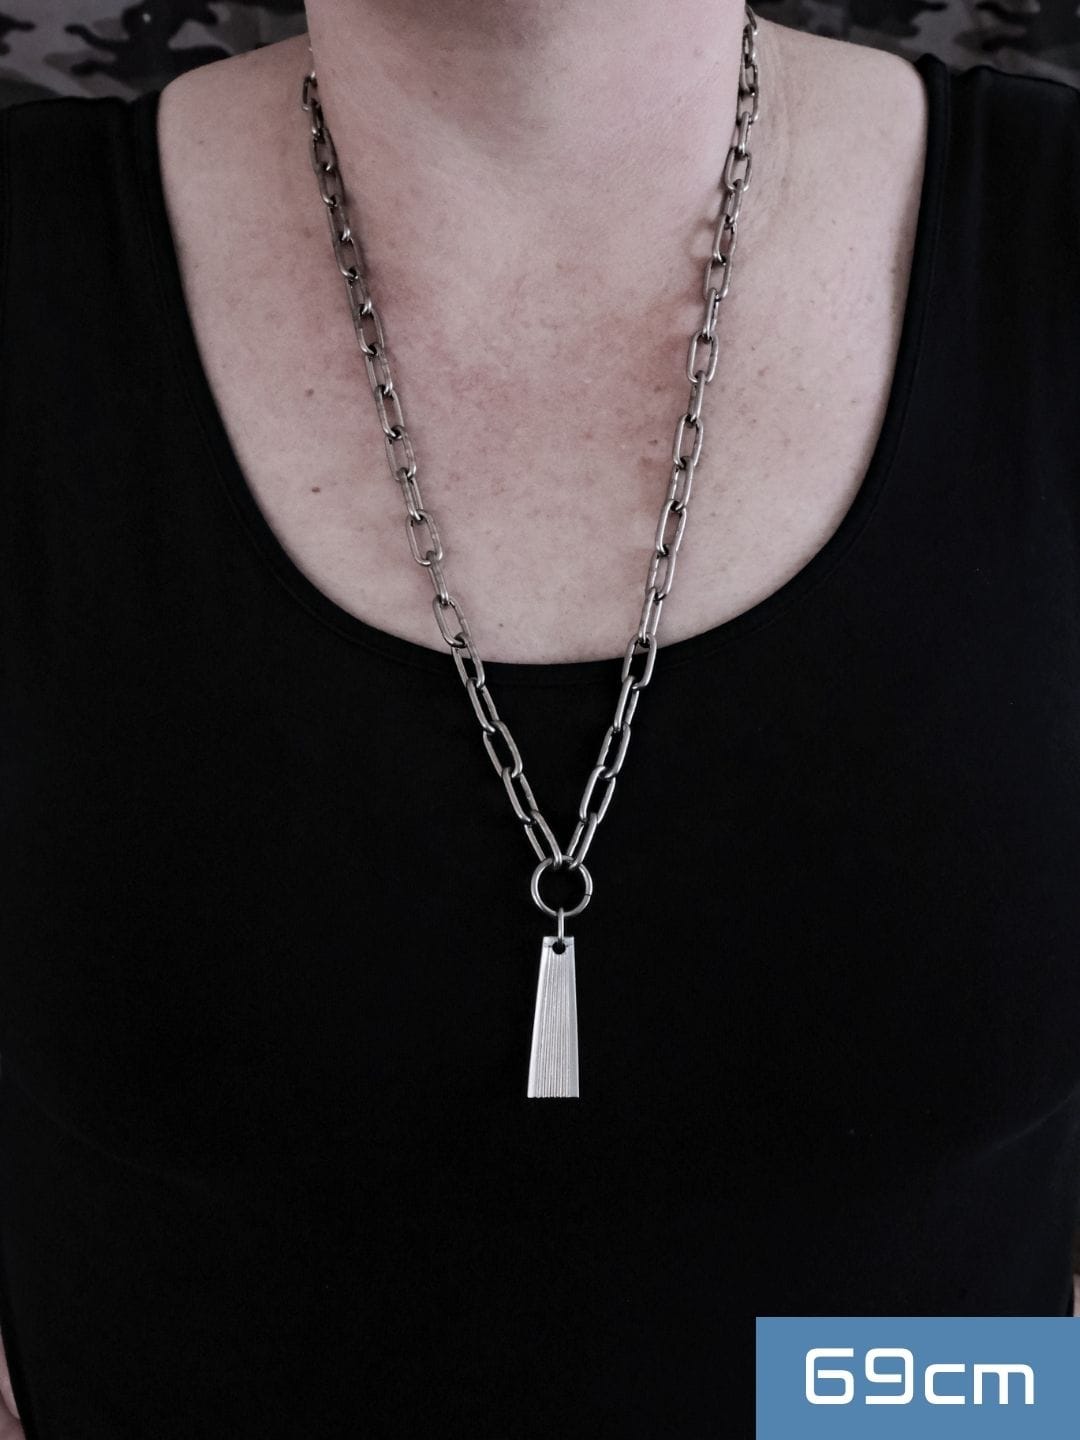
Check out the images below to see how the chain sits on various neck sizes. Keep in mind that if a pendant is added, it pulls down the chain by approx 1.5-2cm.
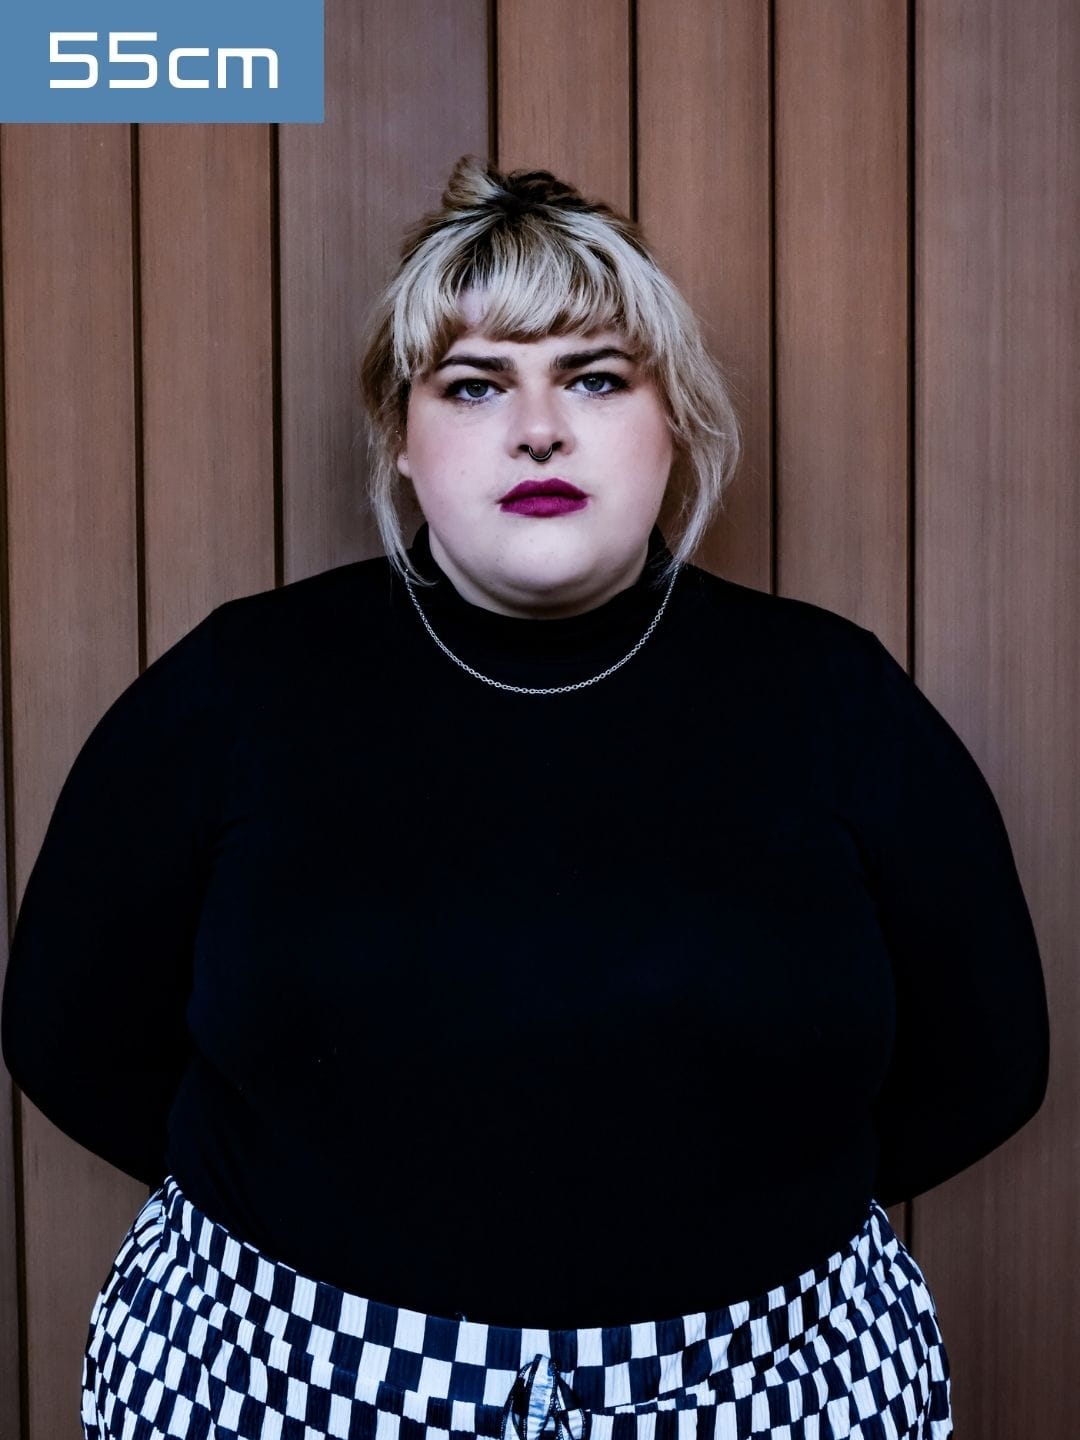

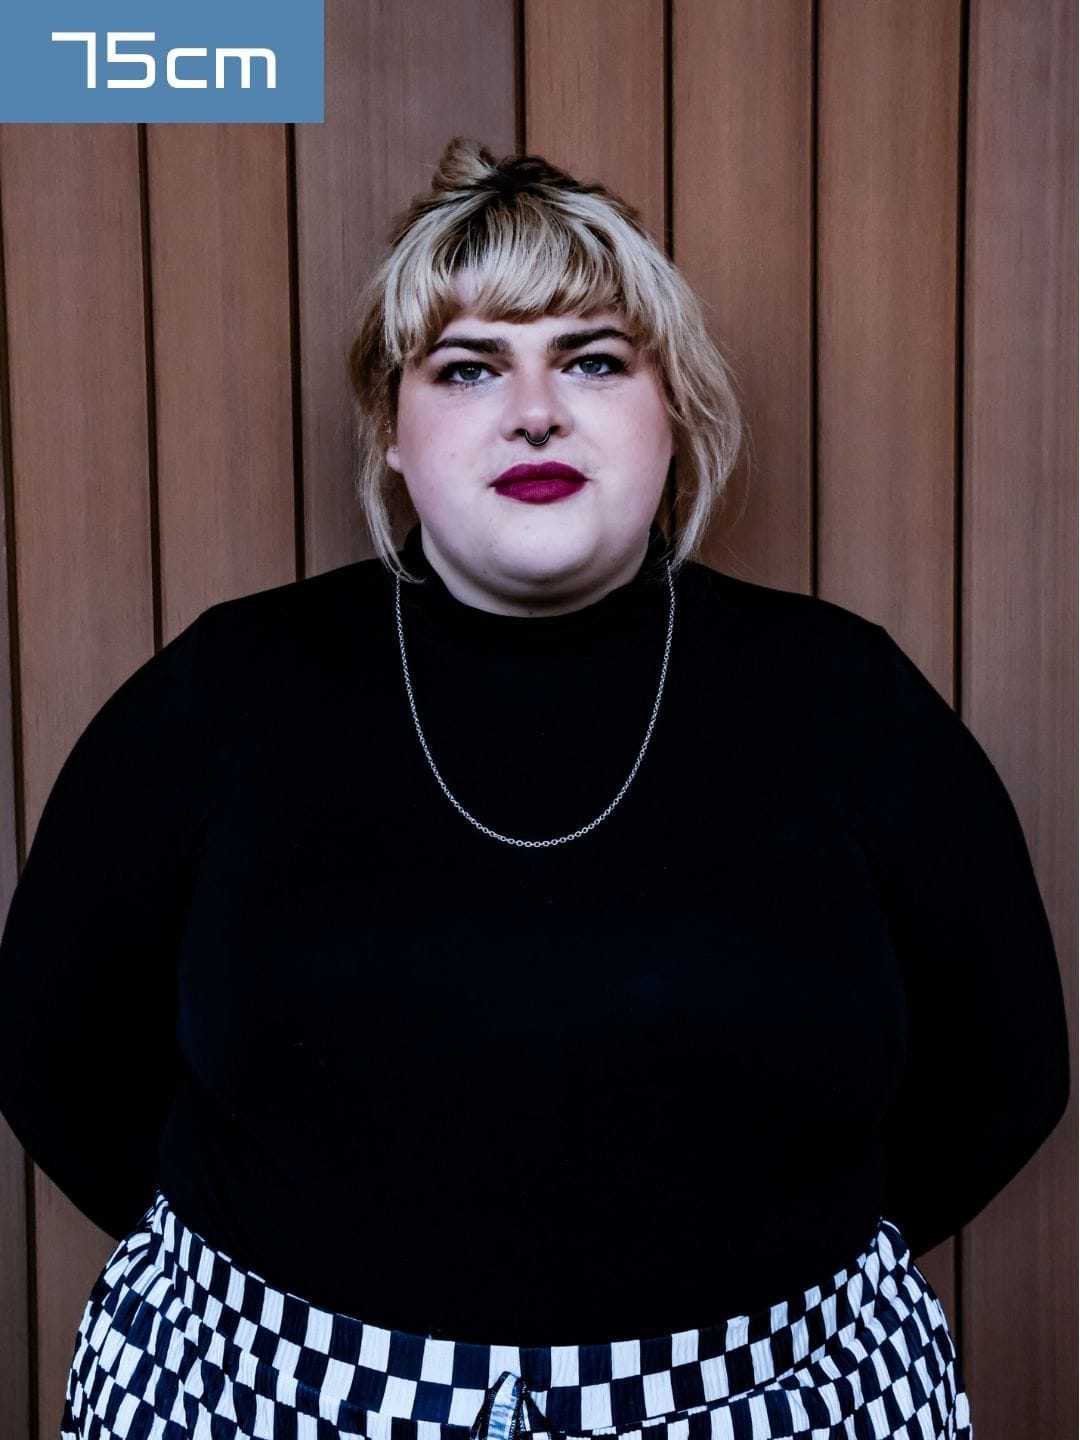

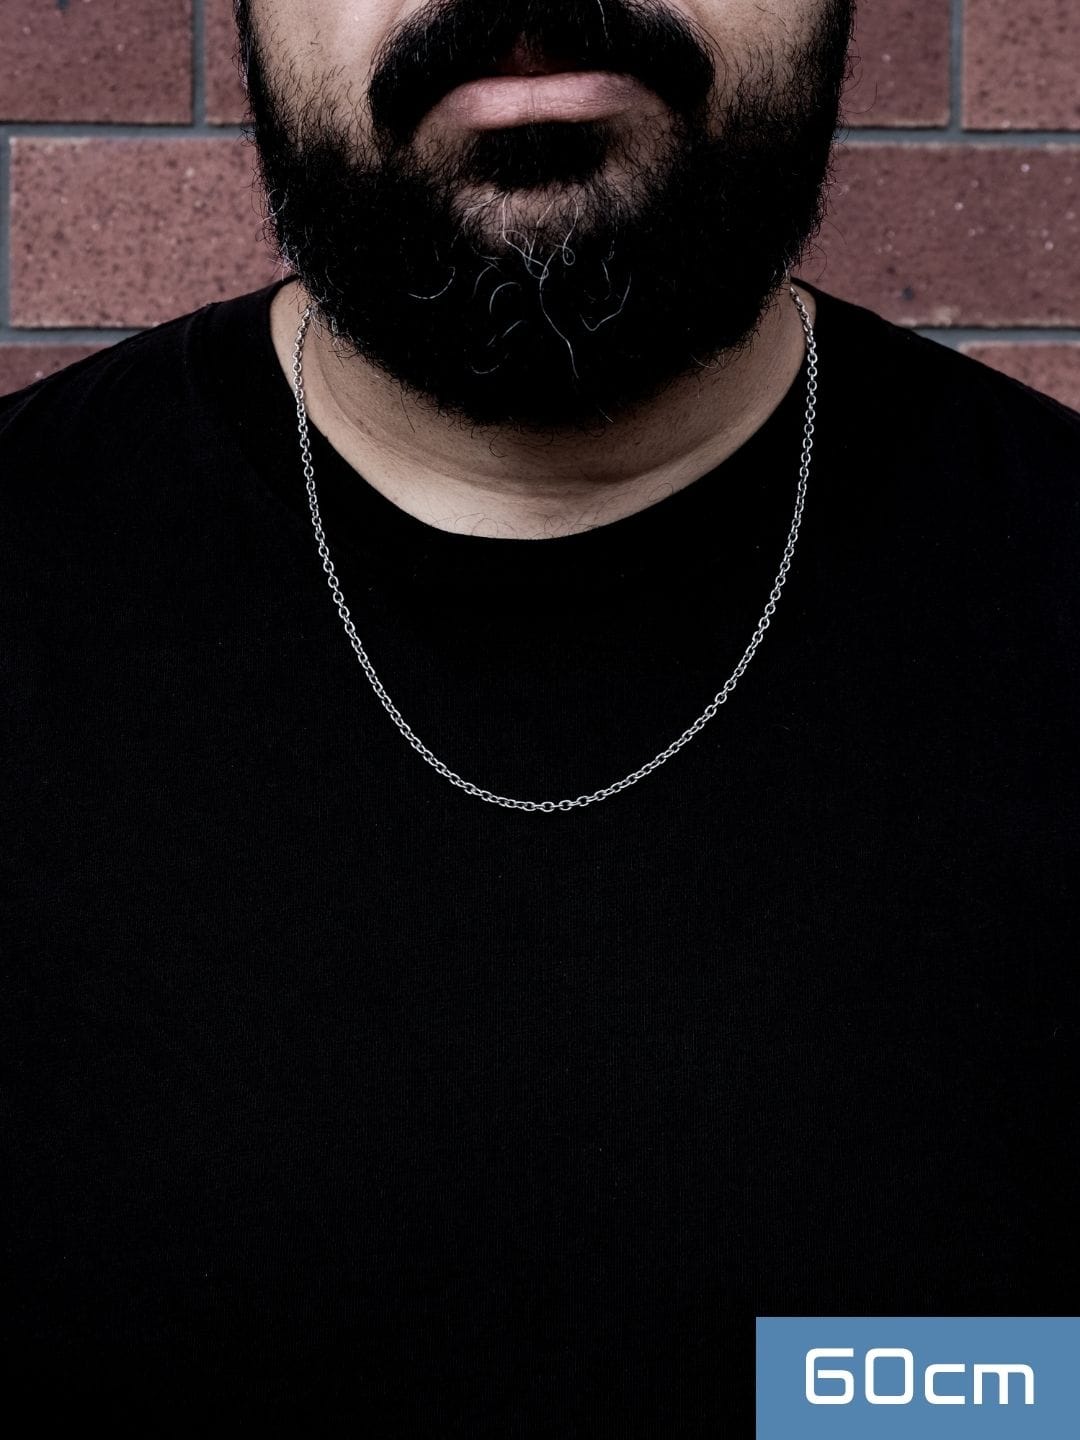
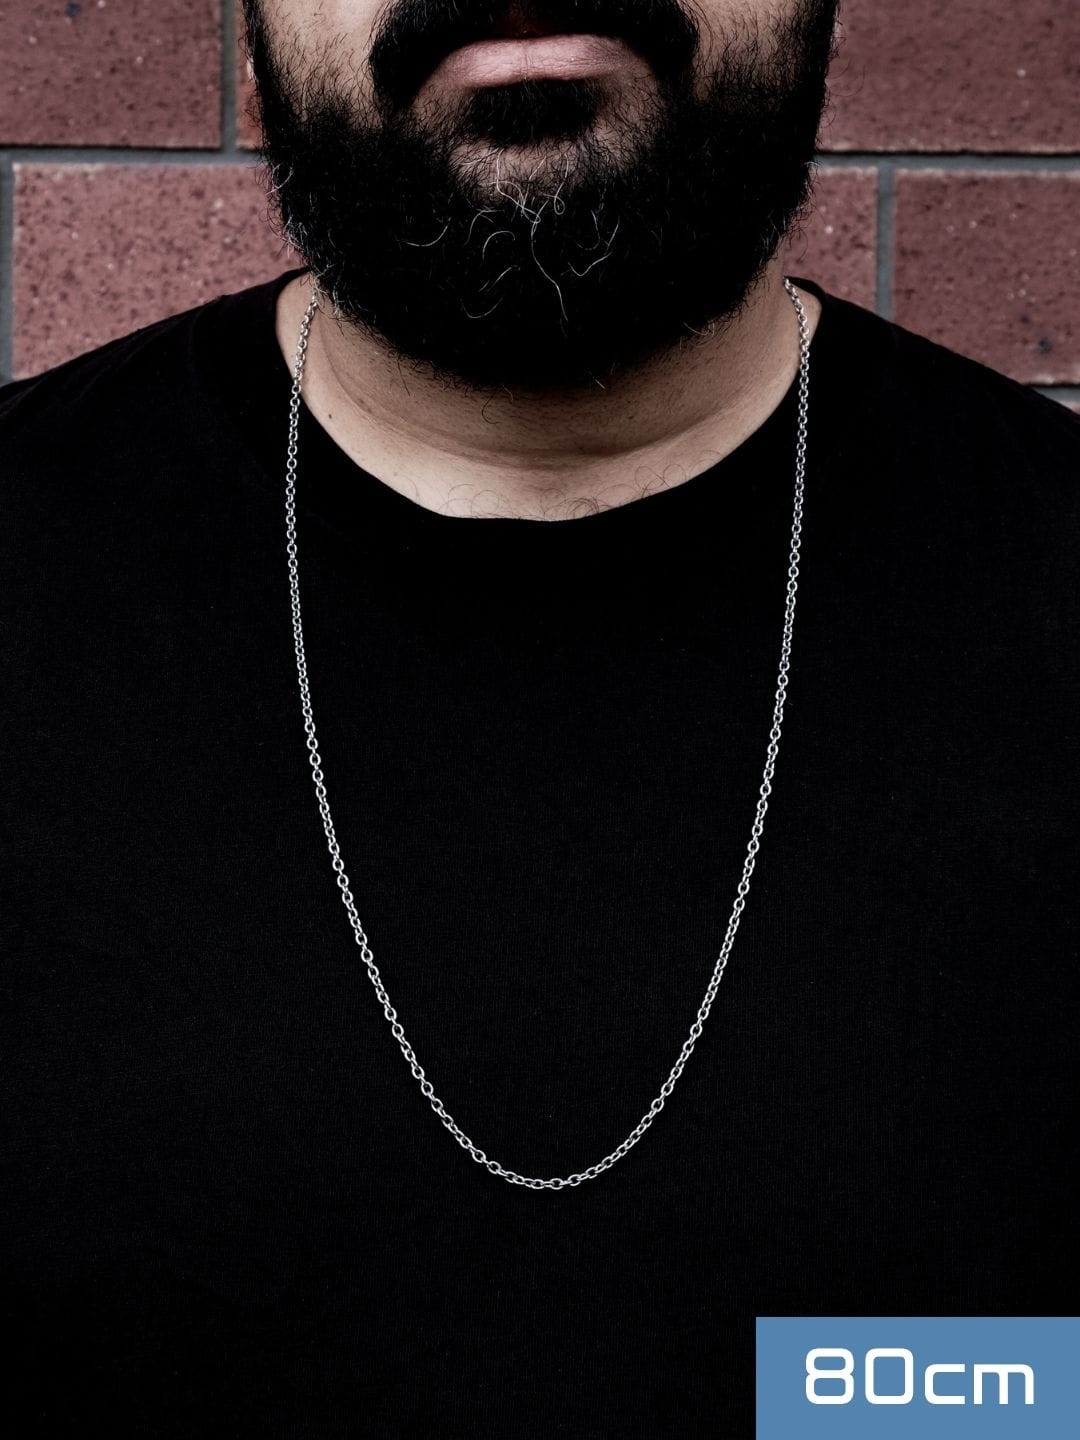

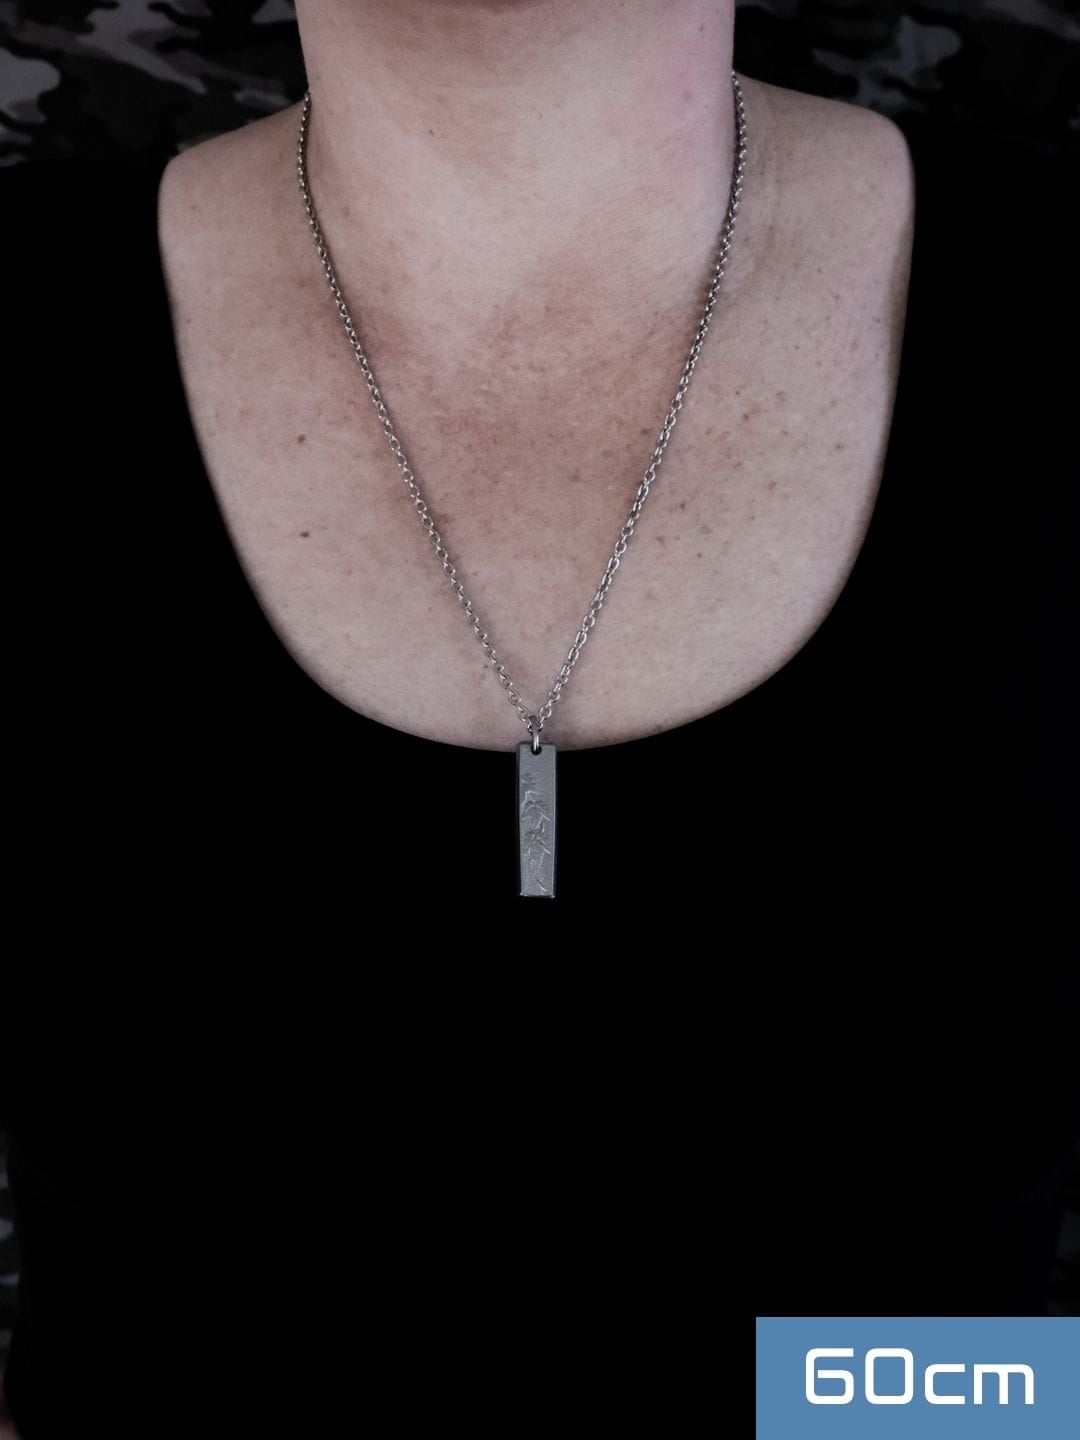
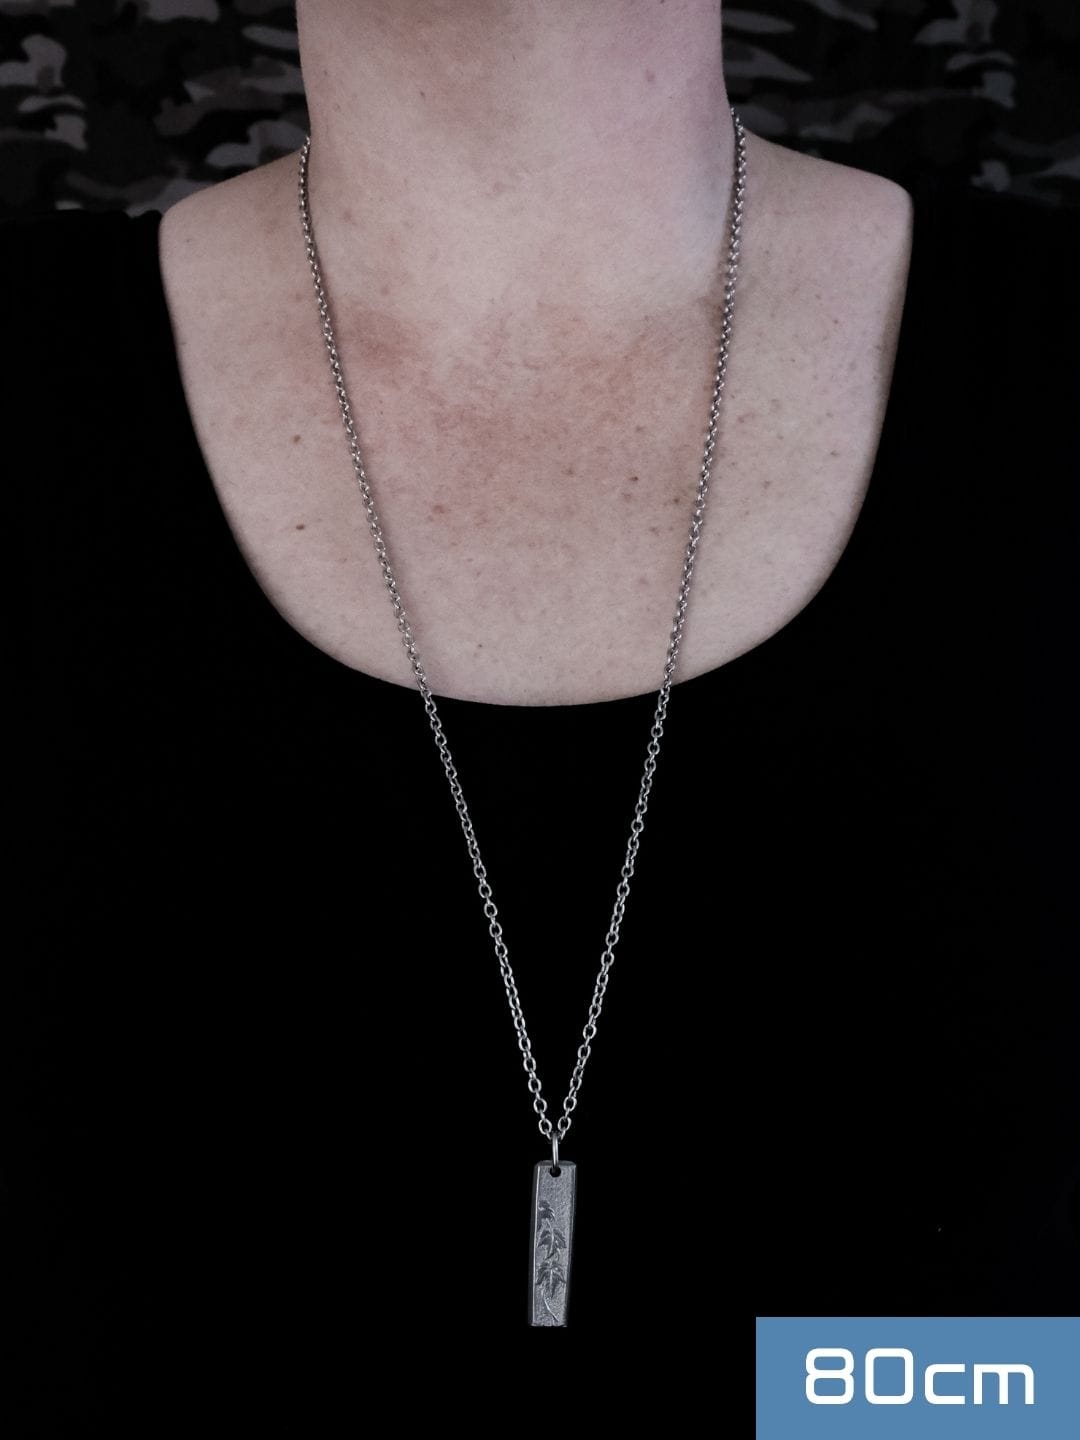
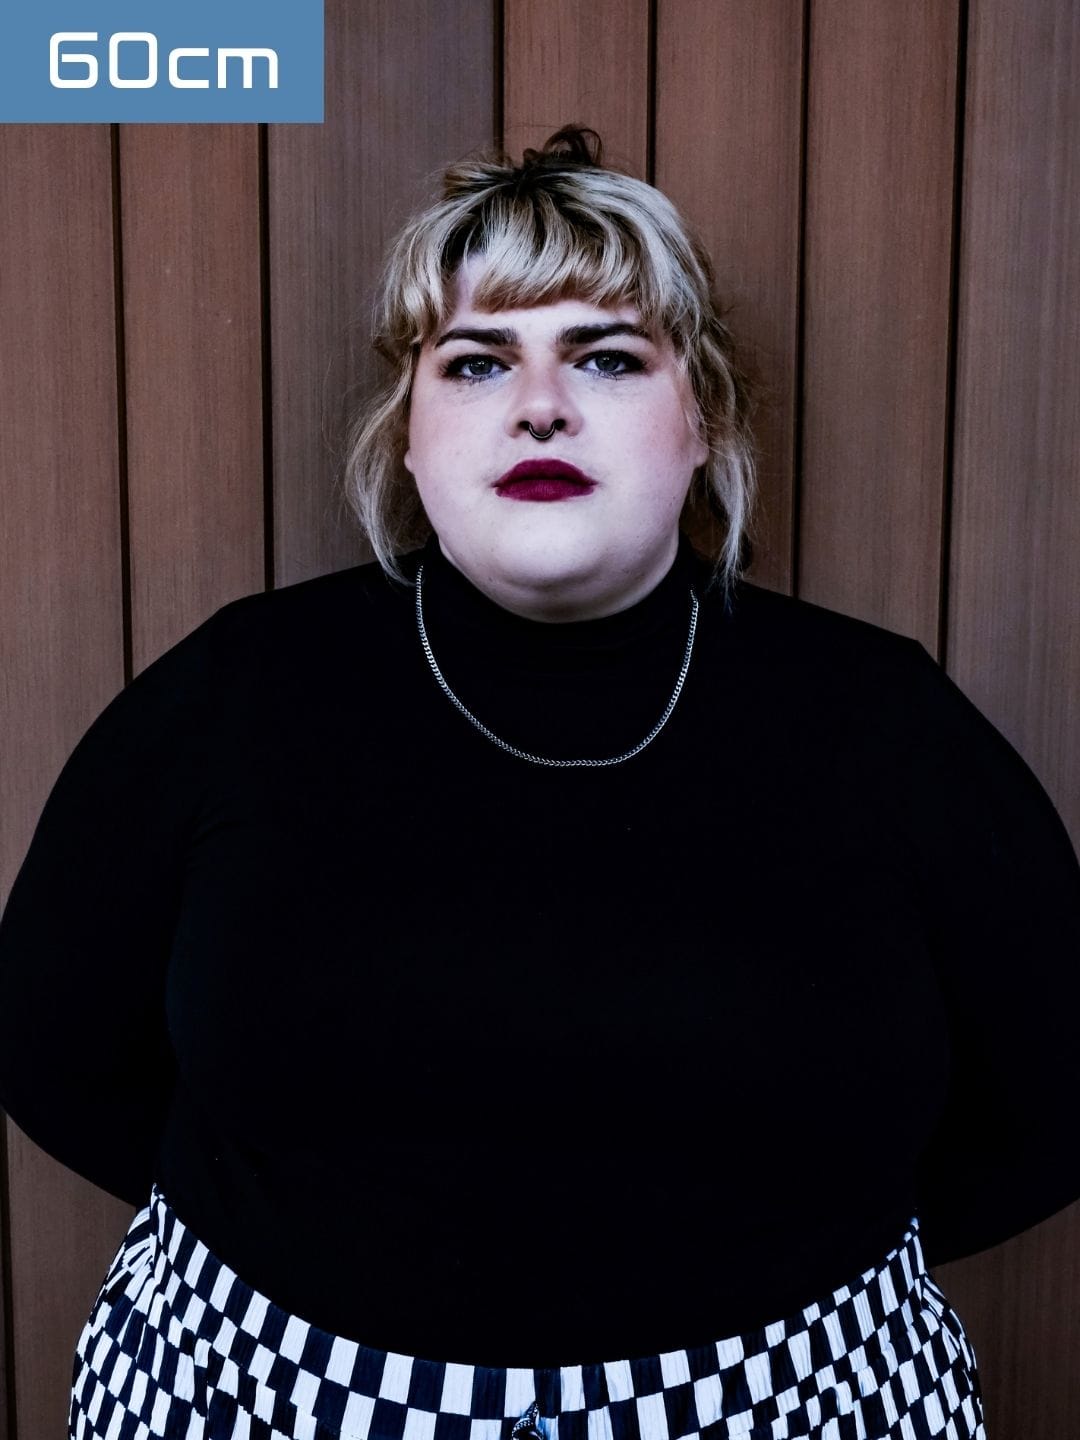
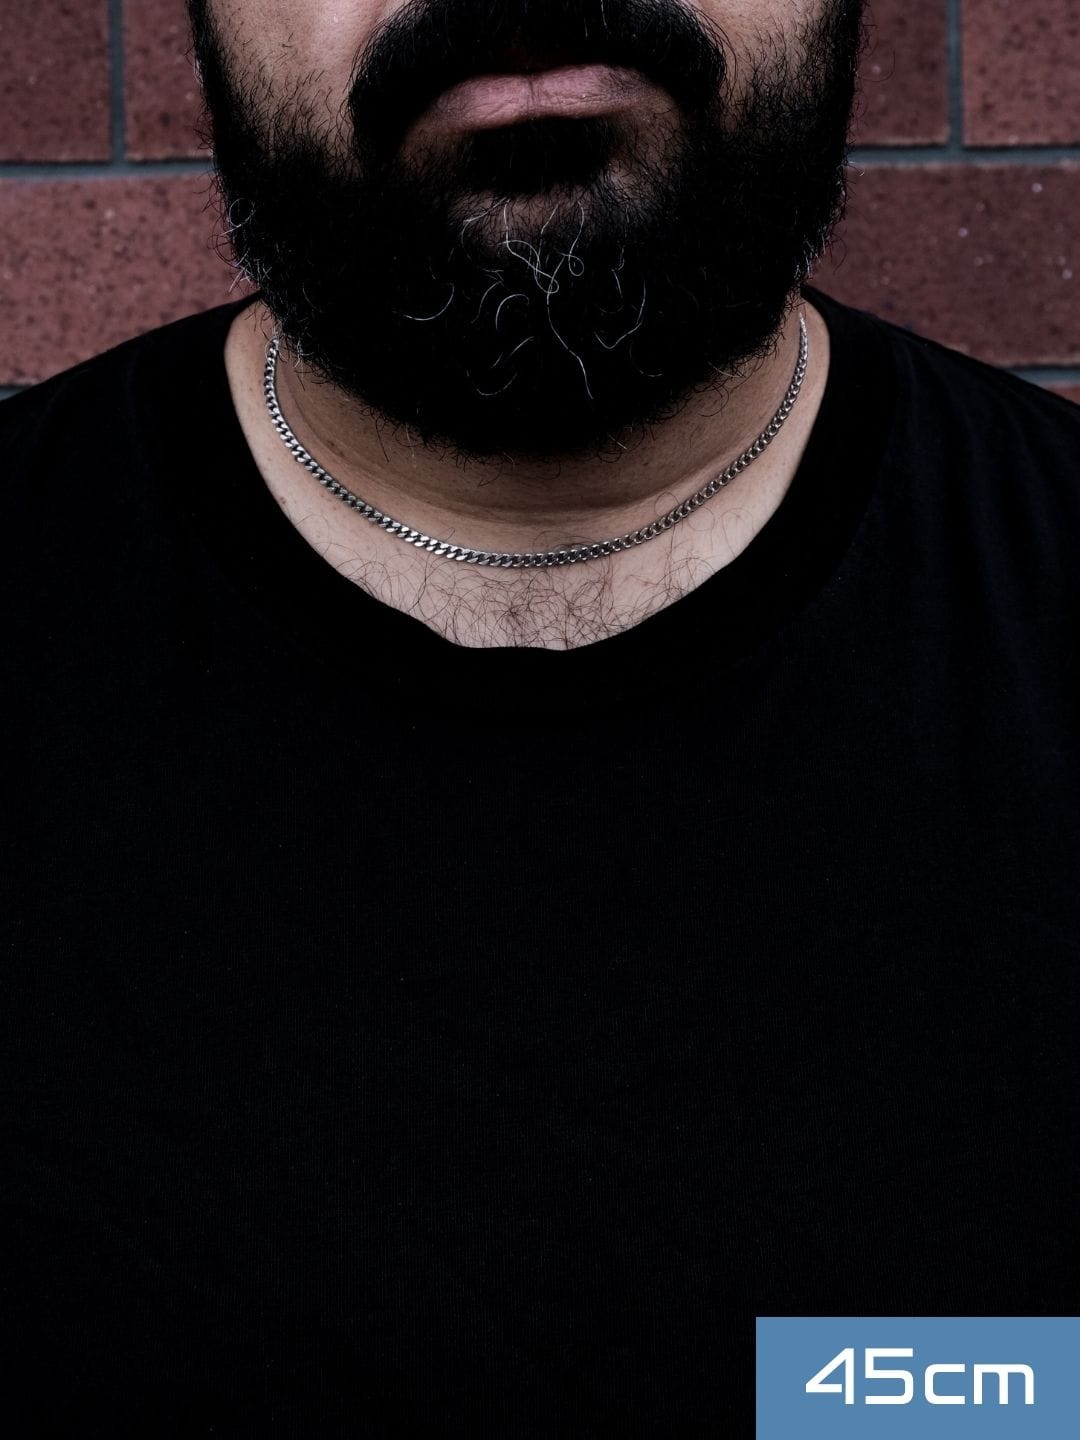
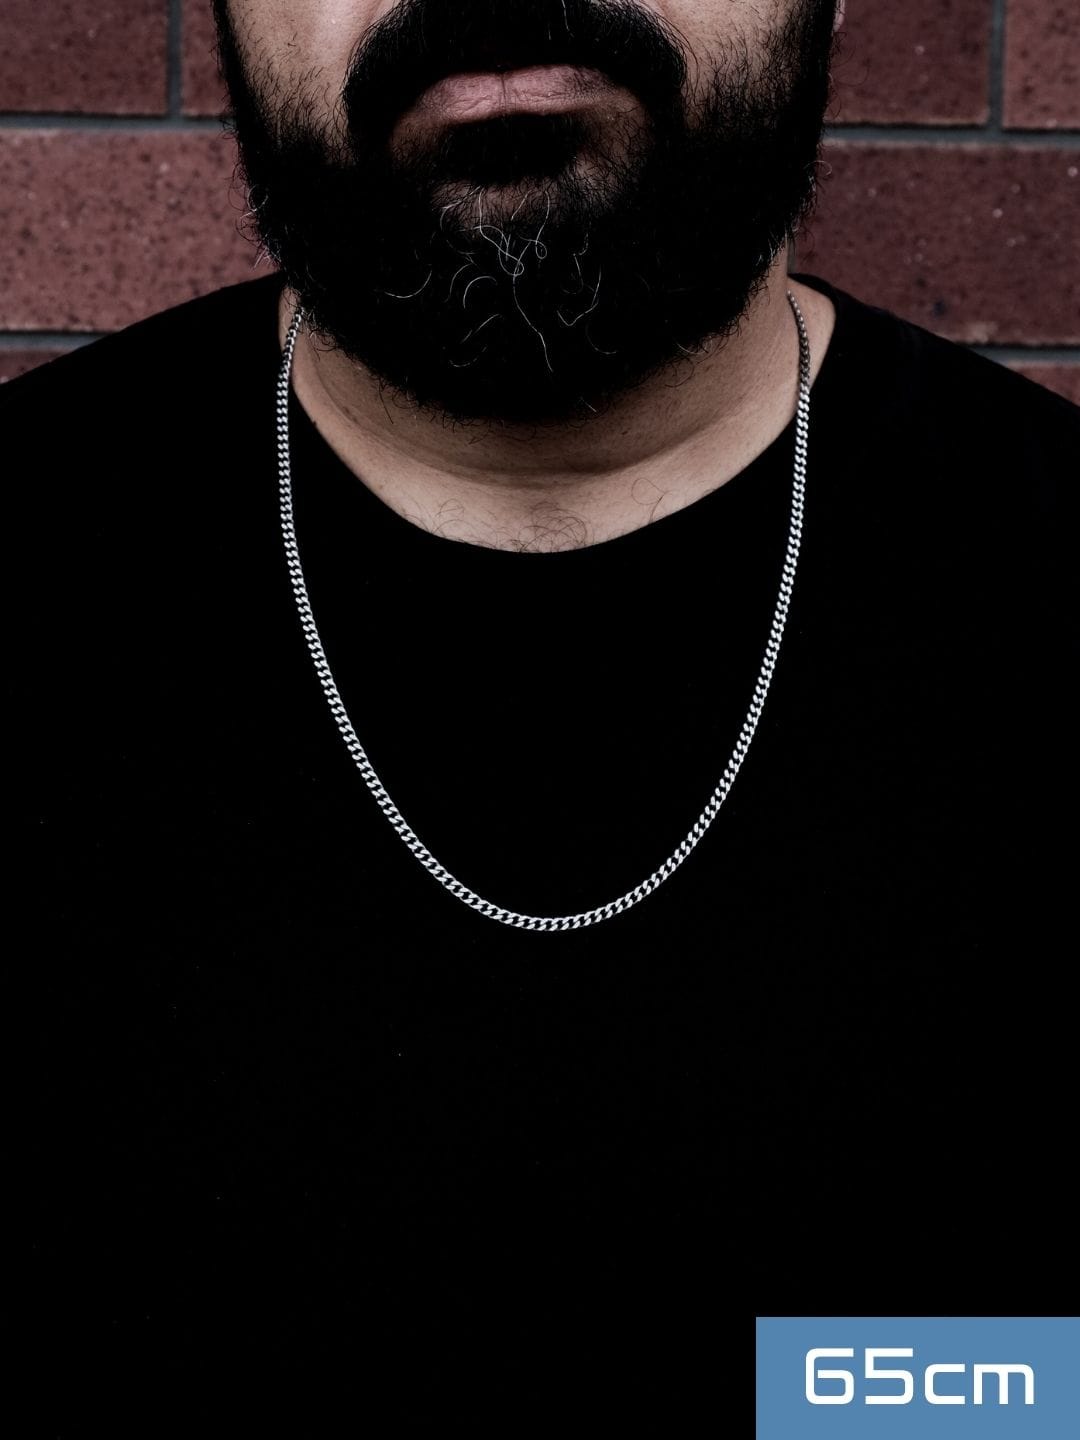
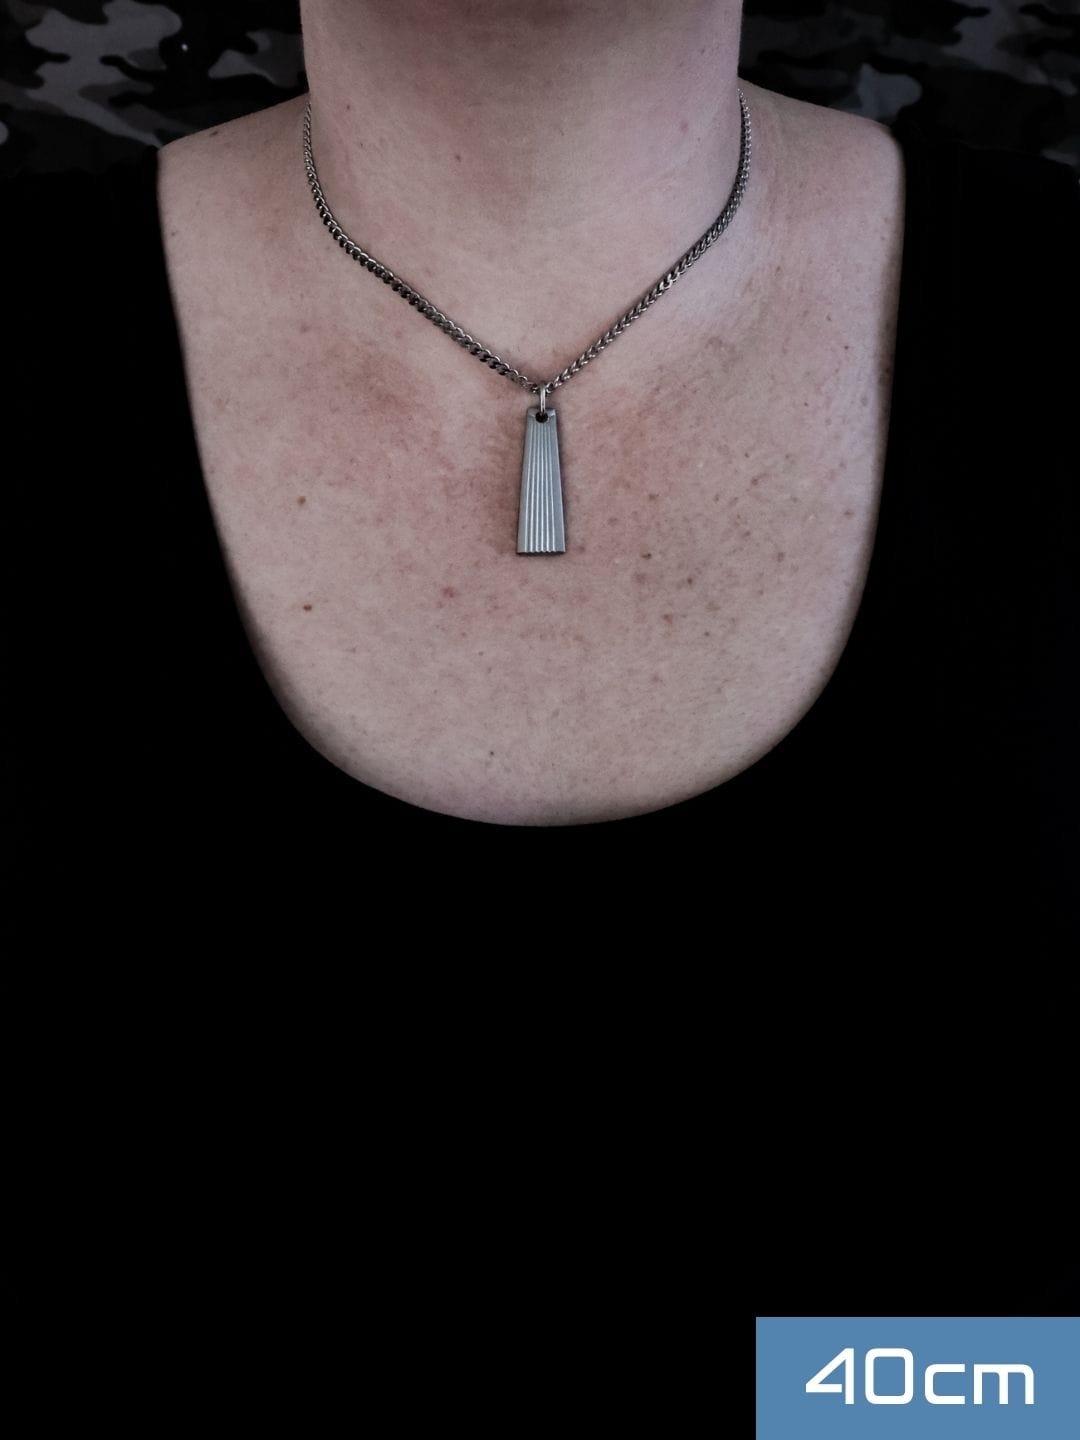
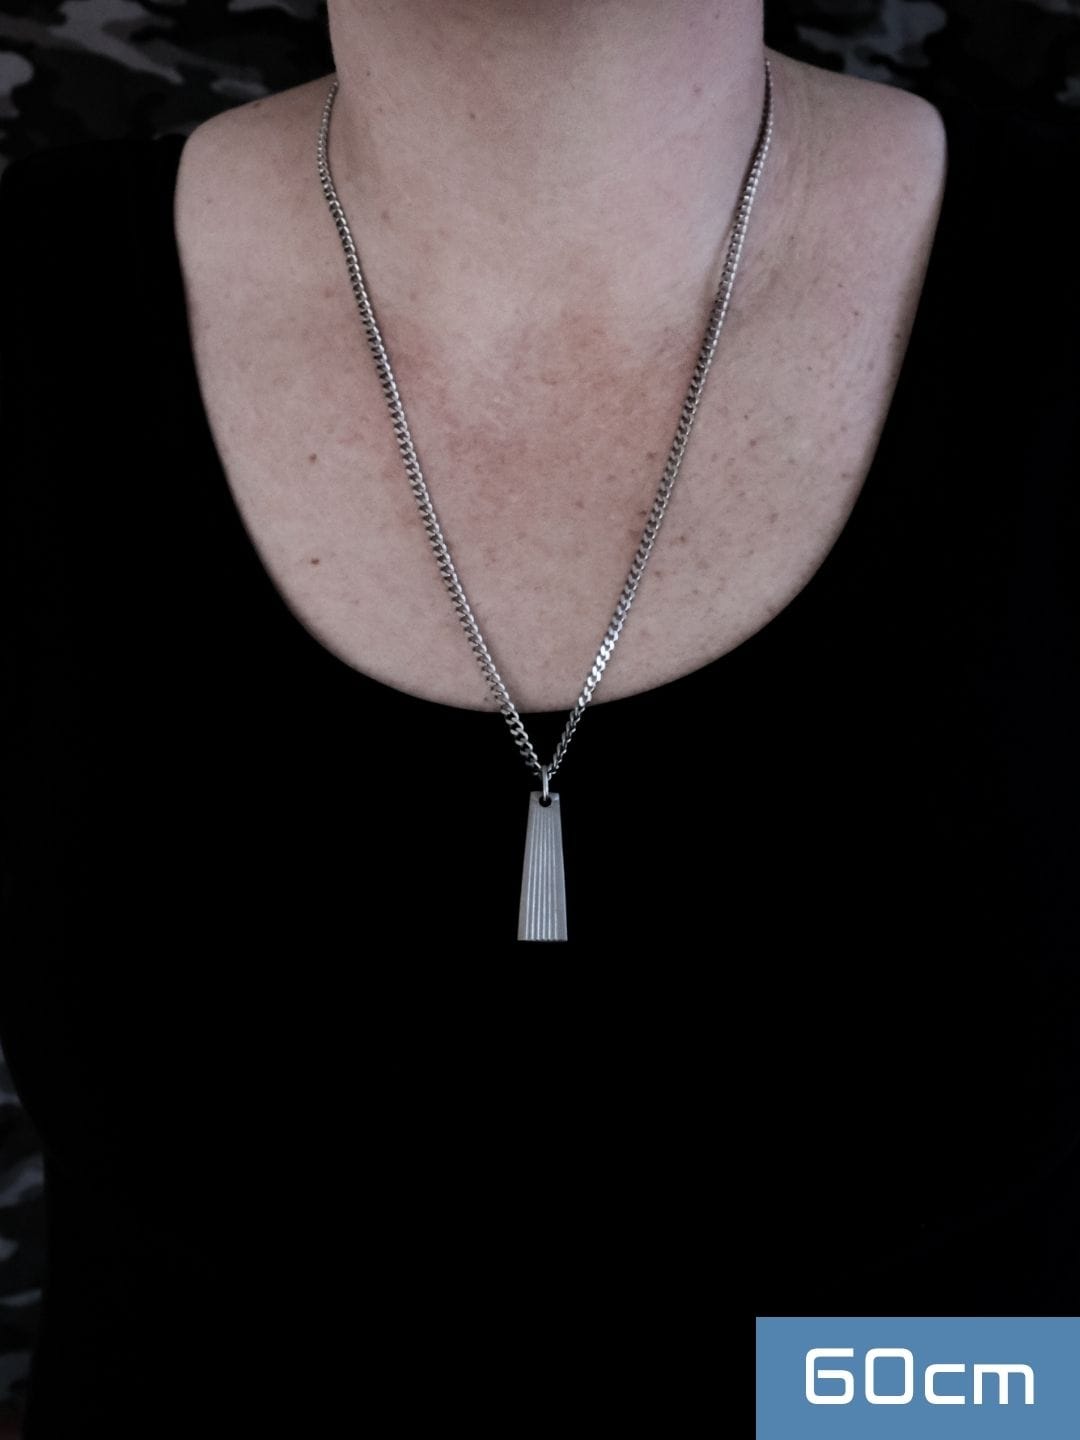
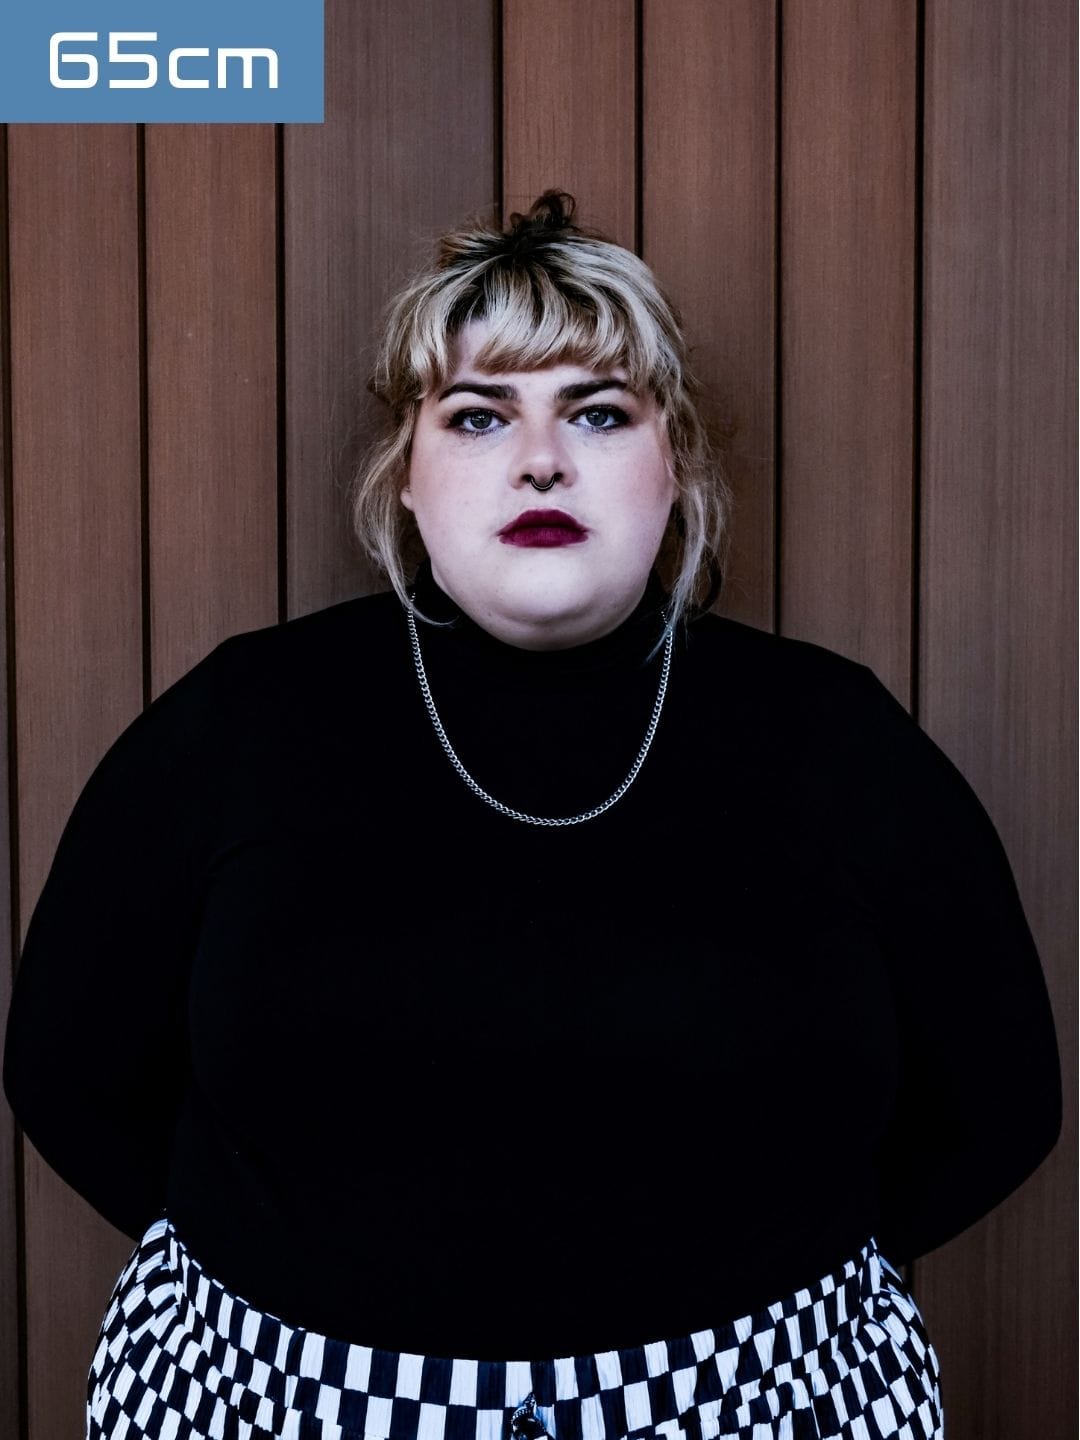
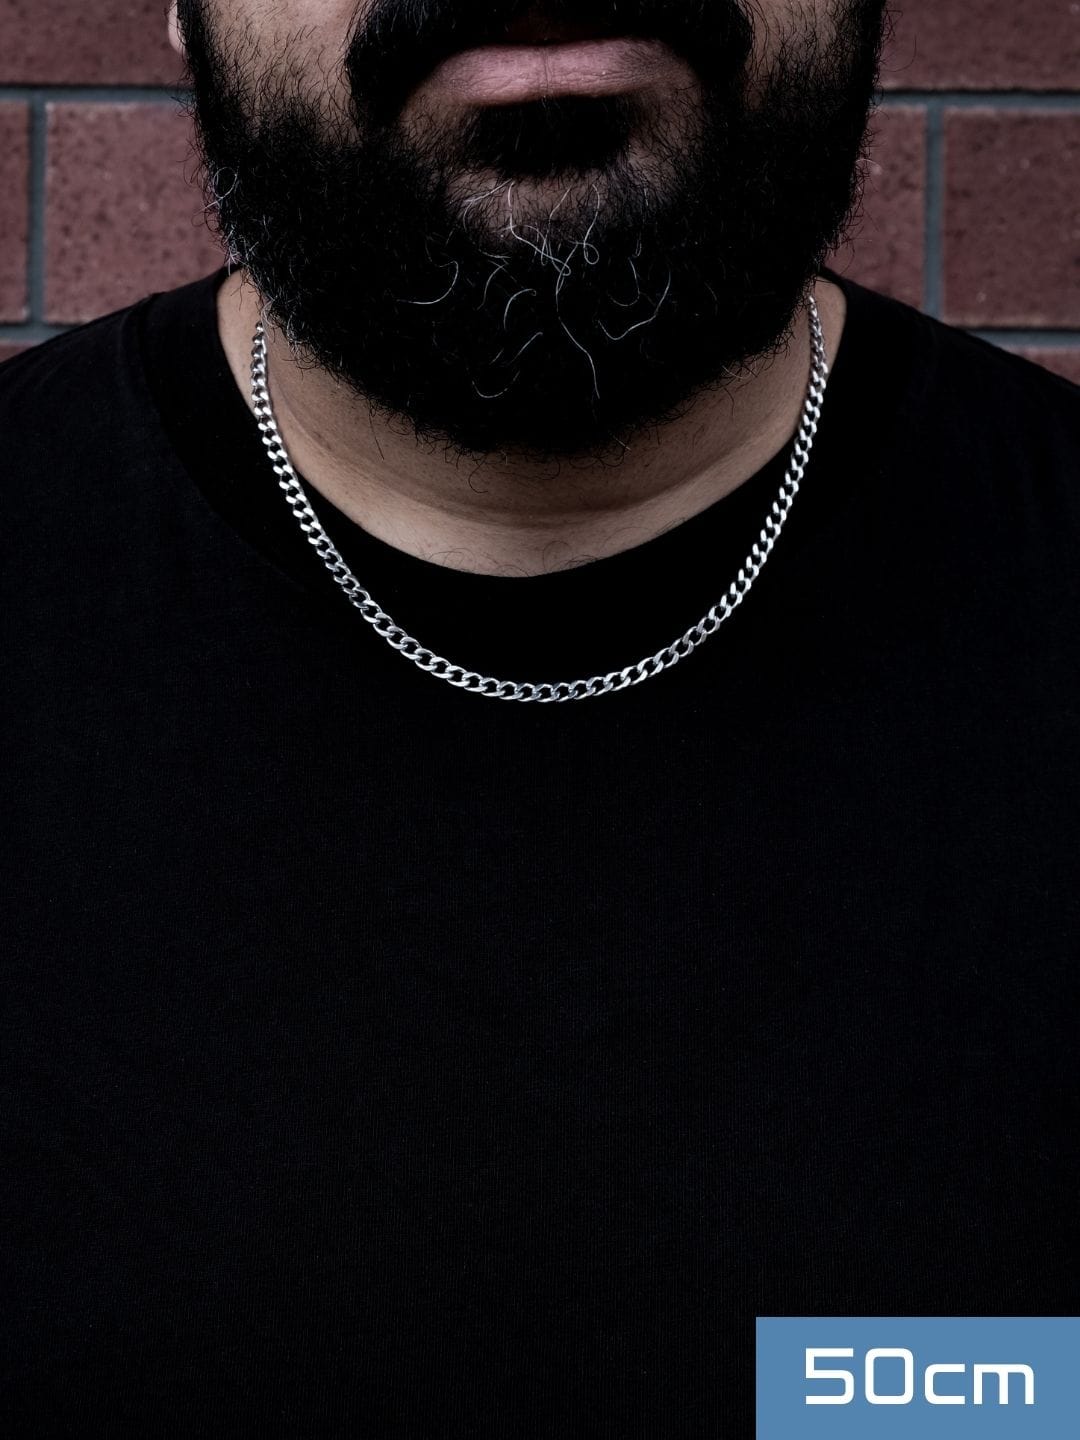
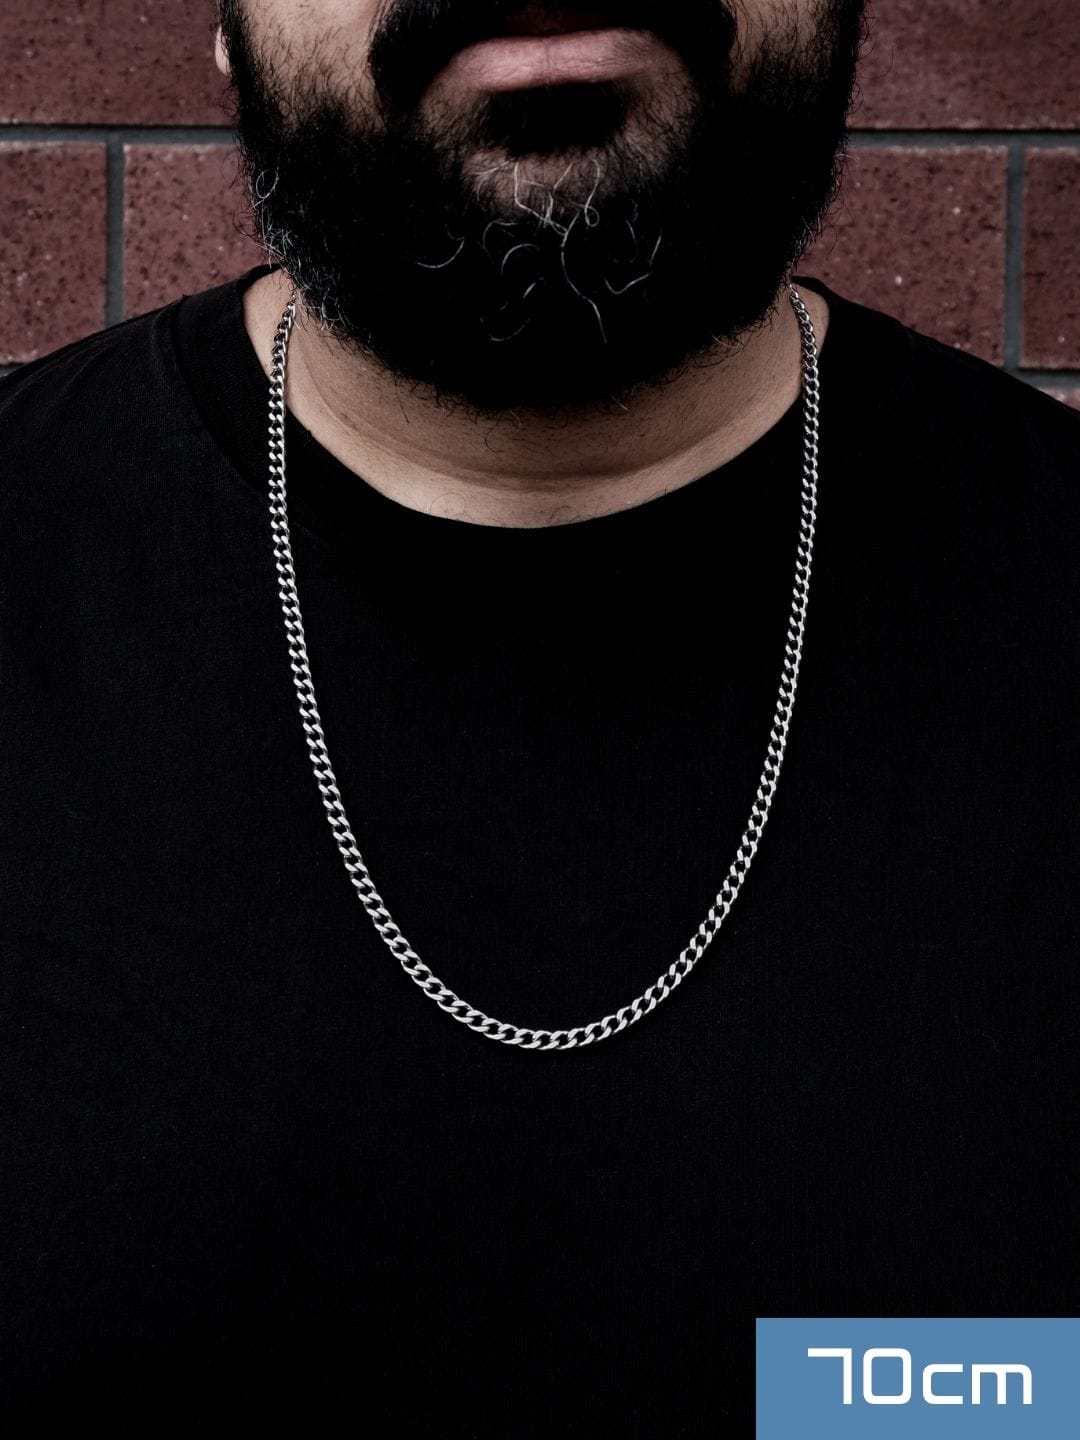
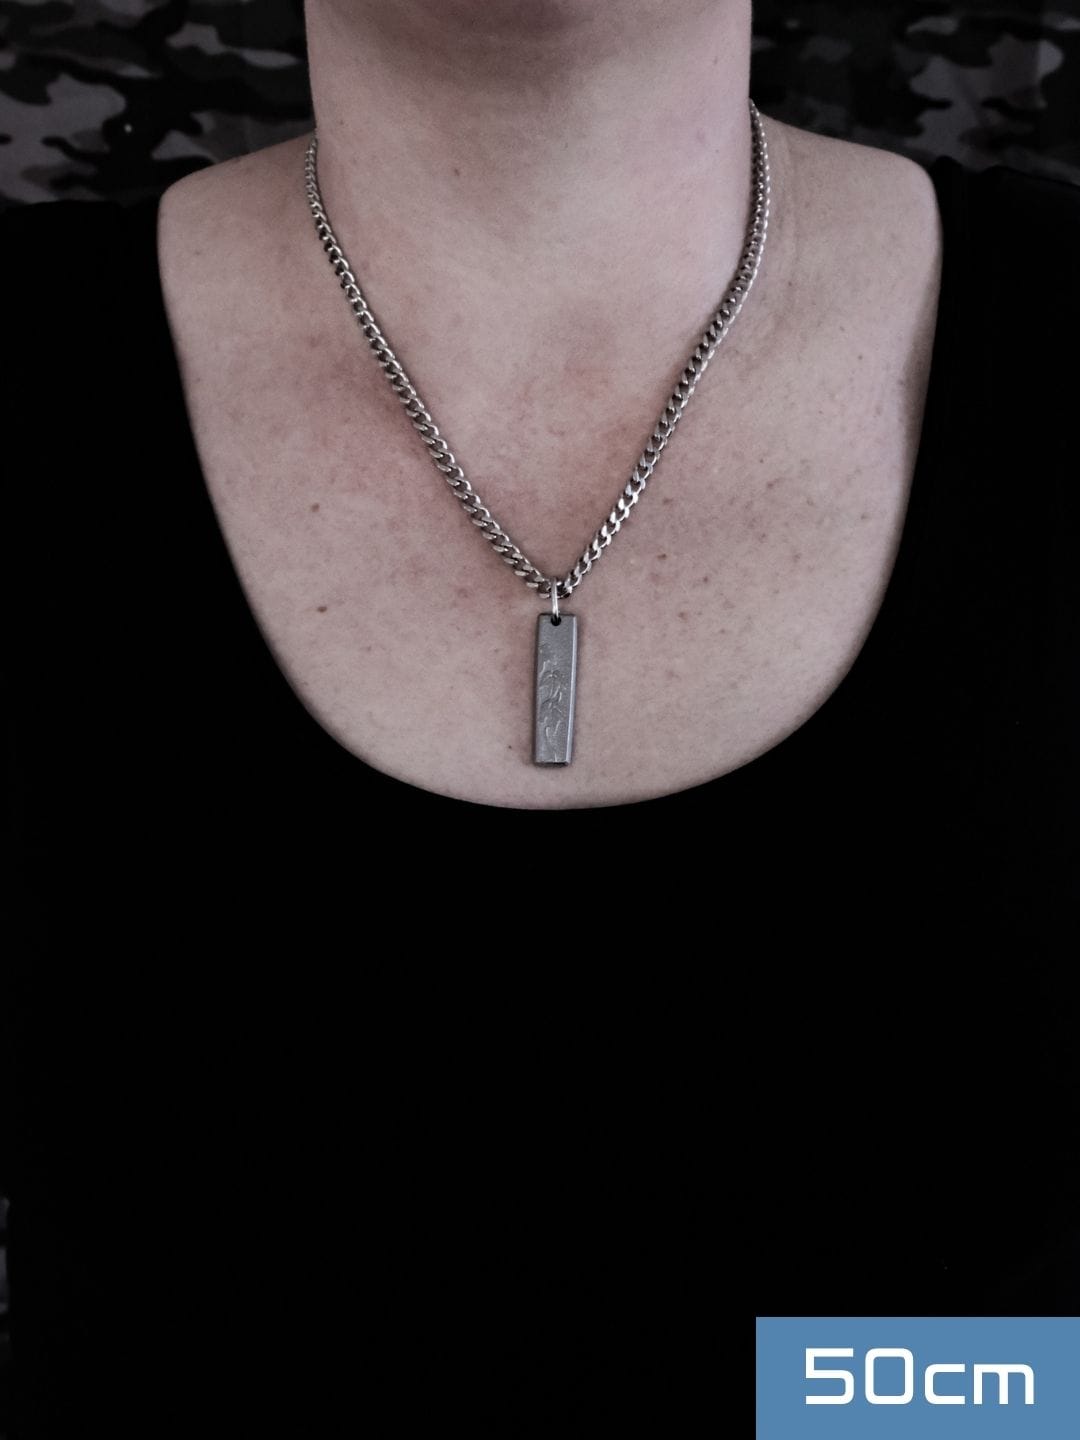
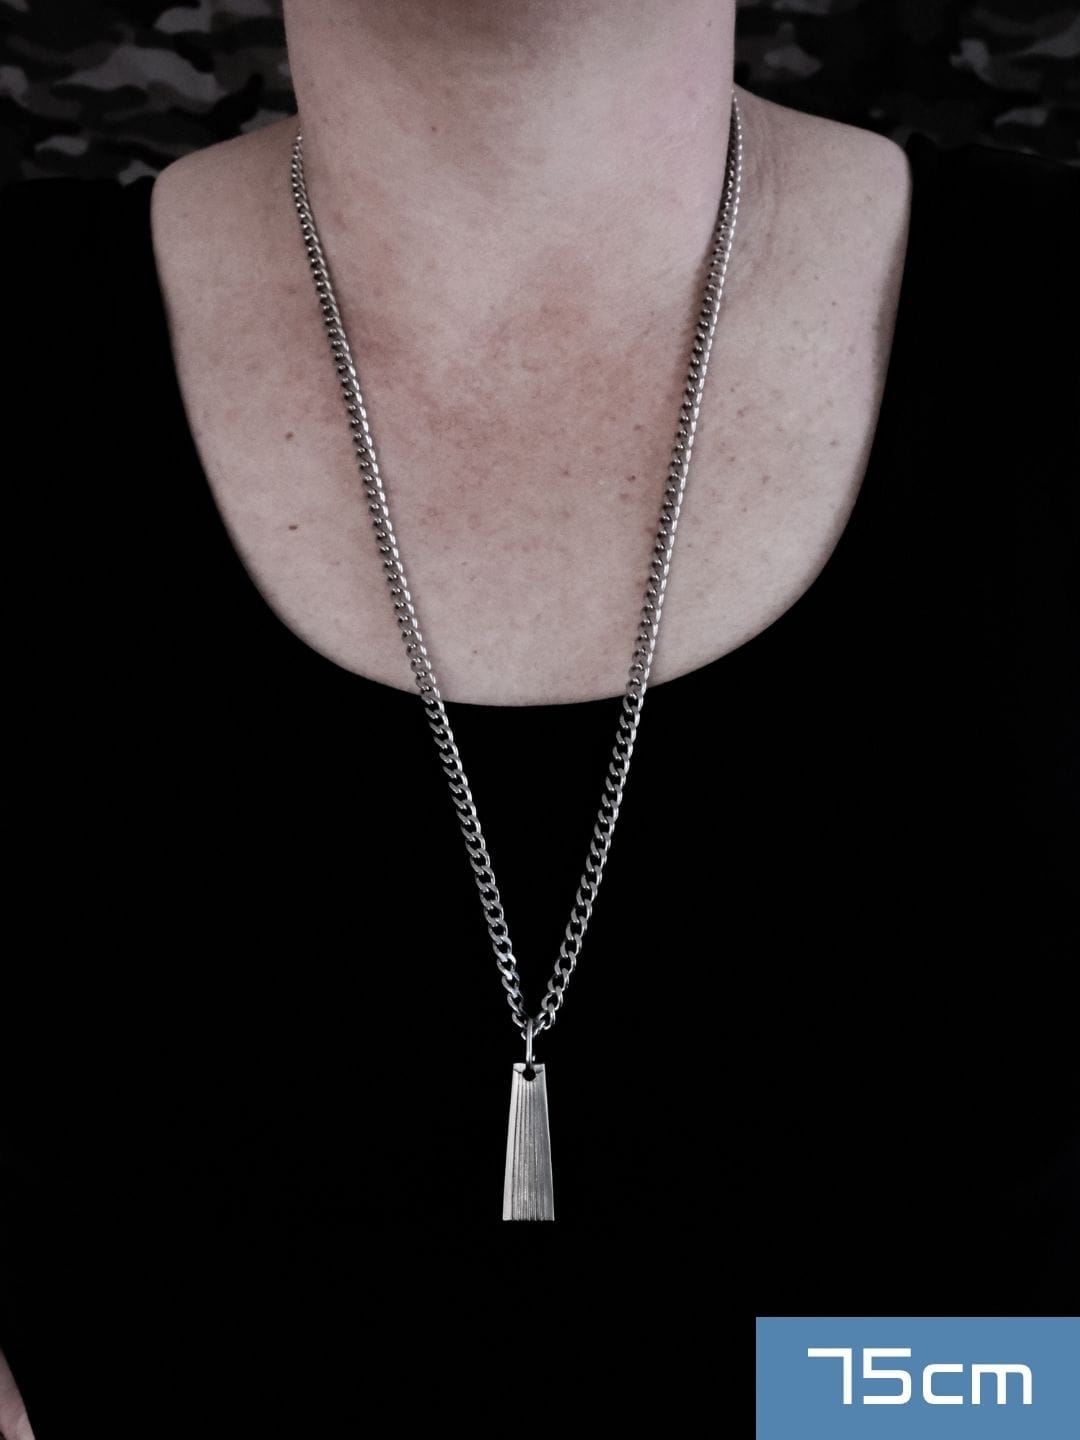
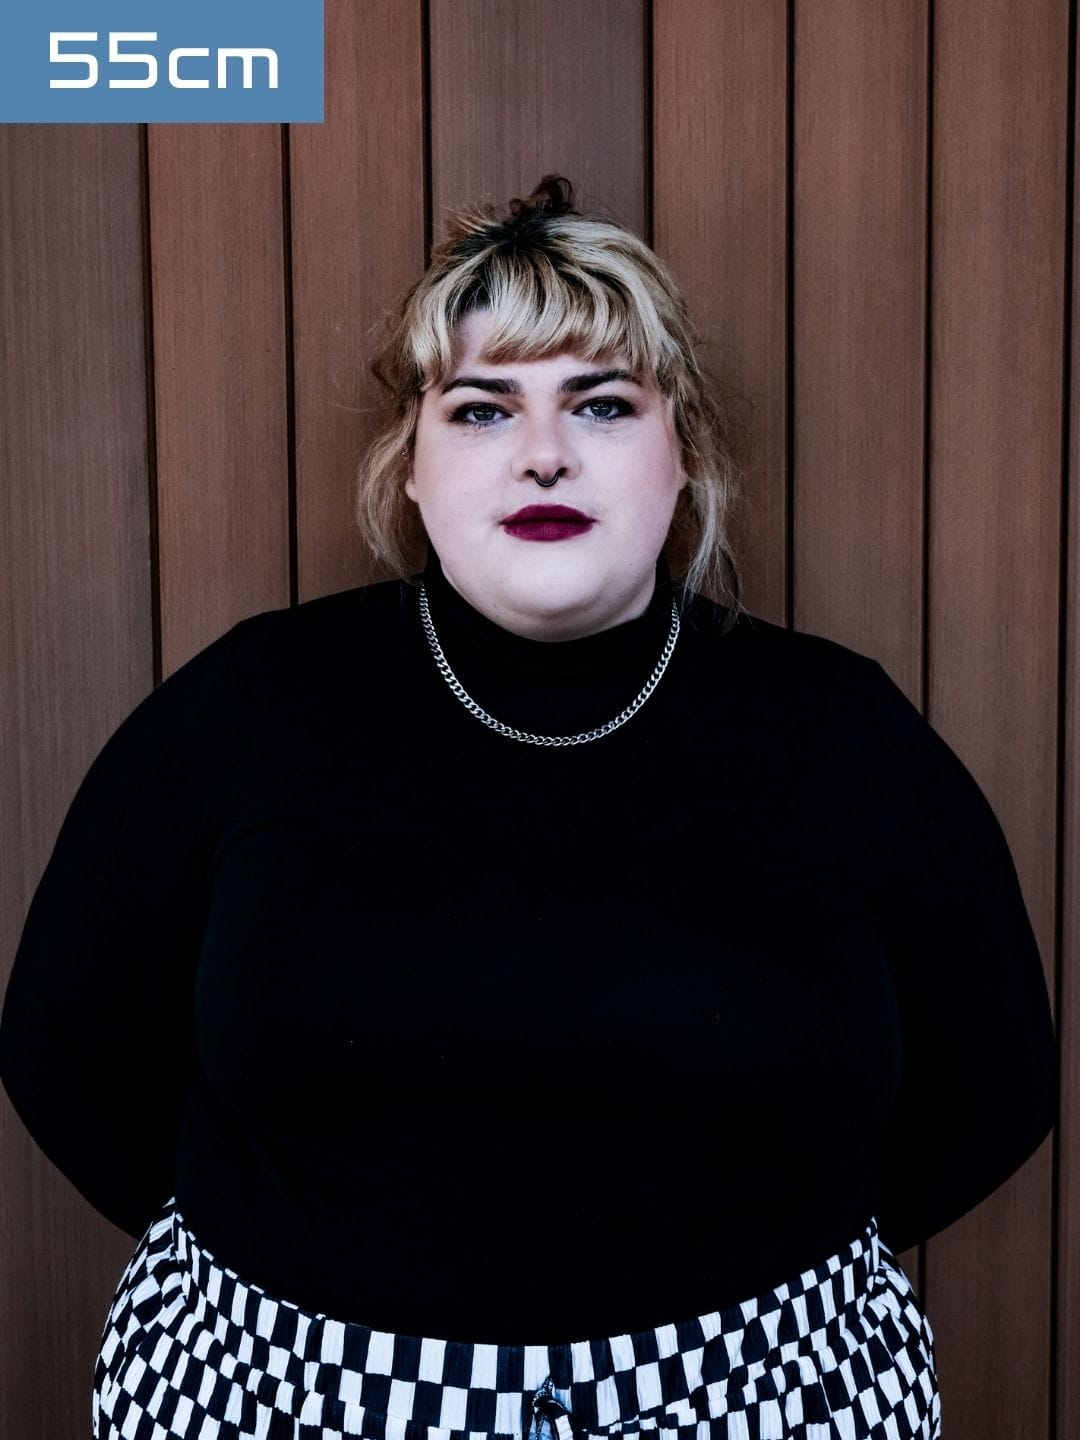
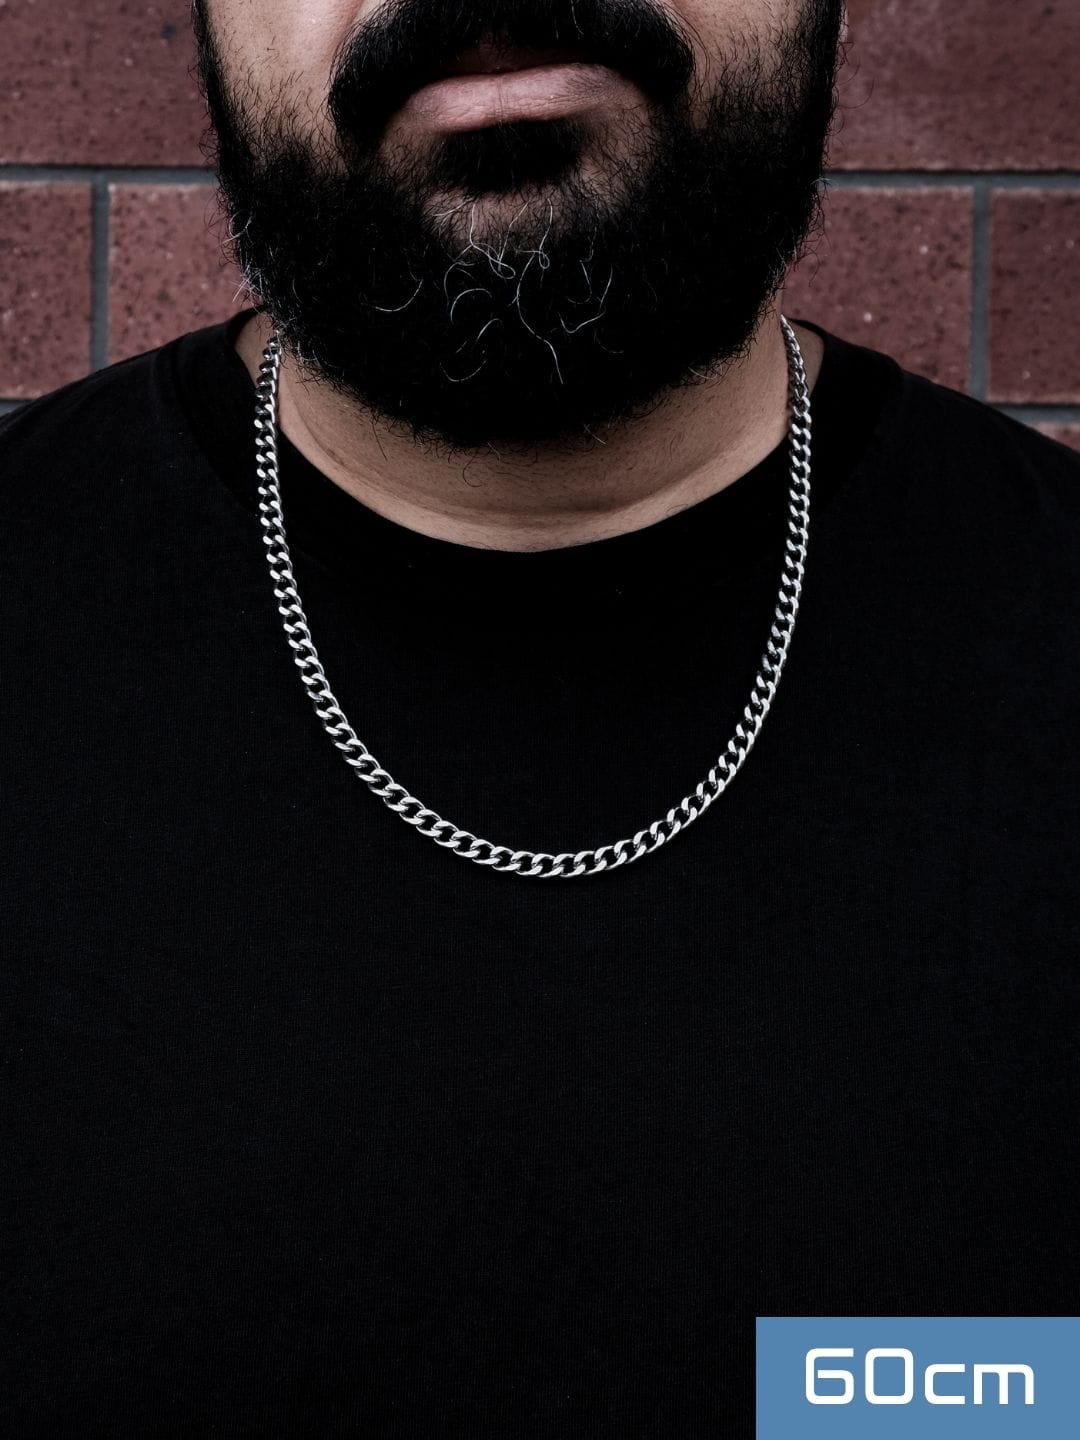
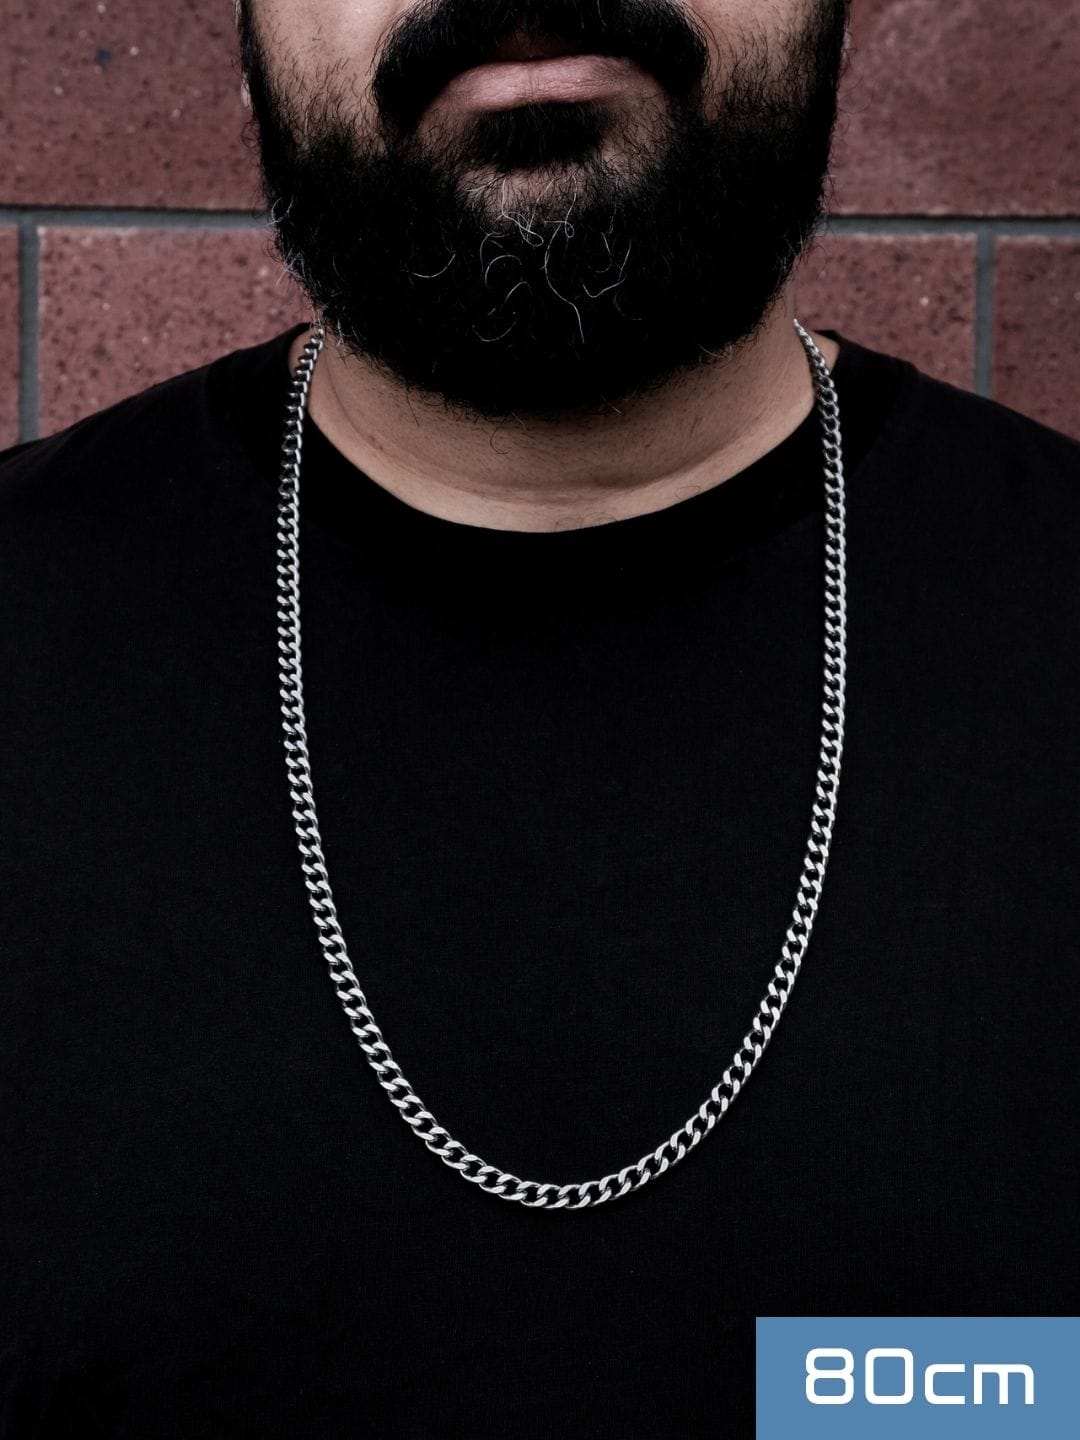
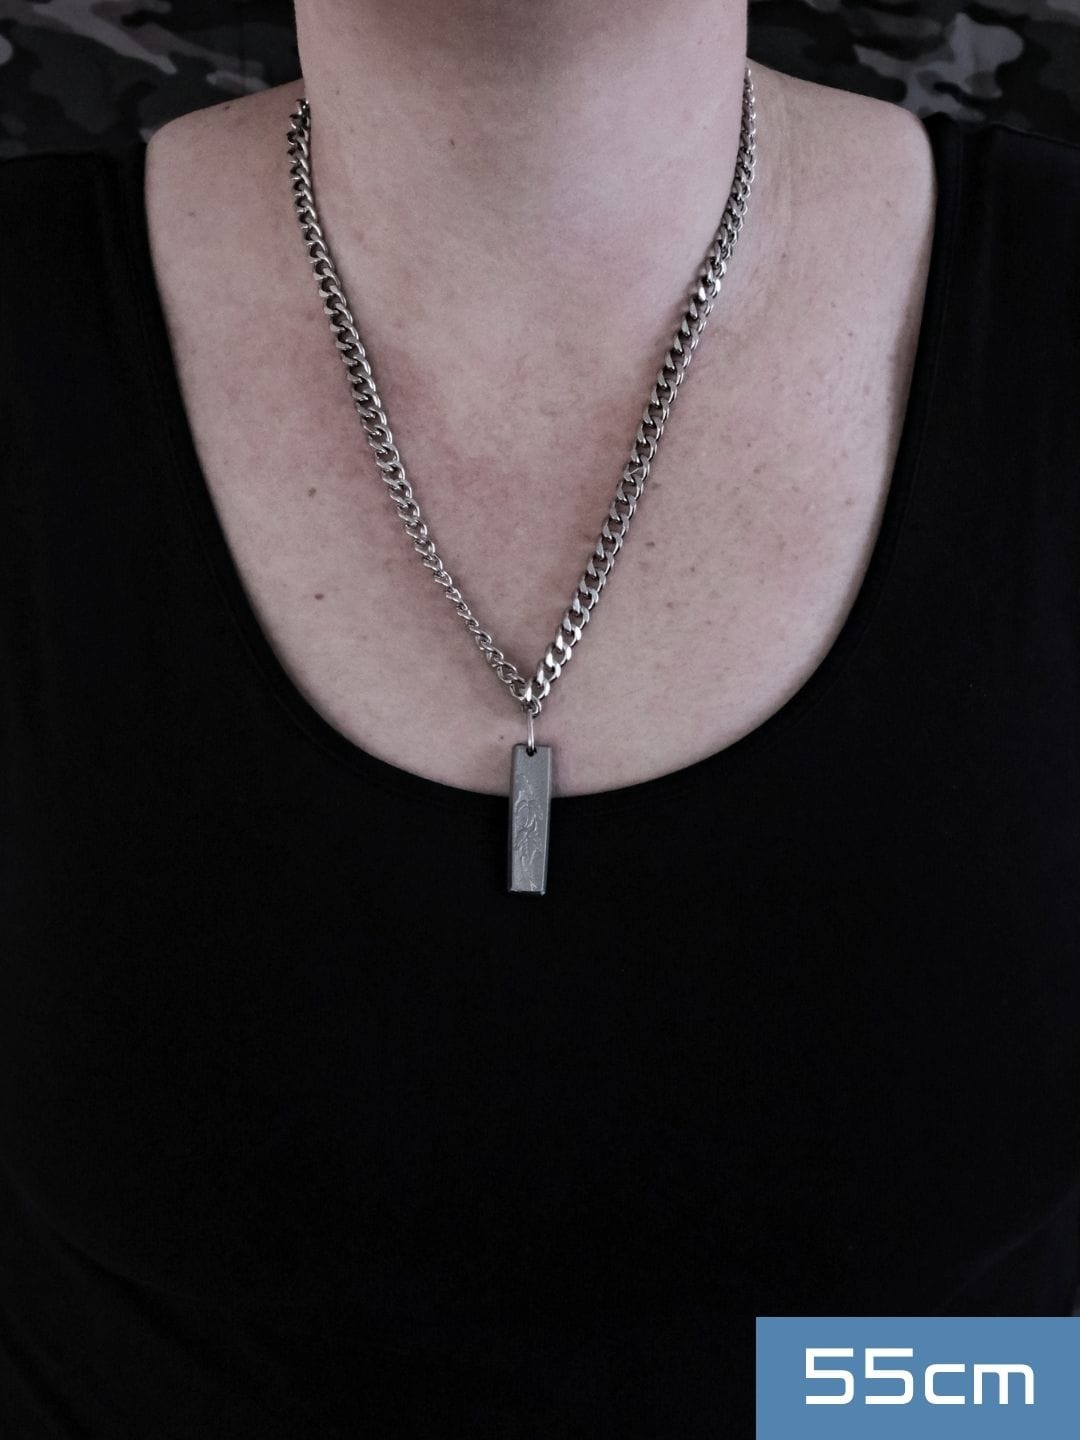
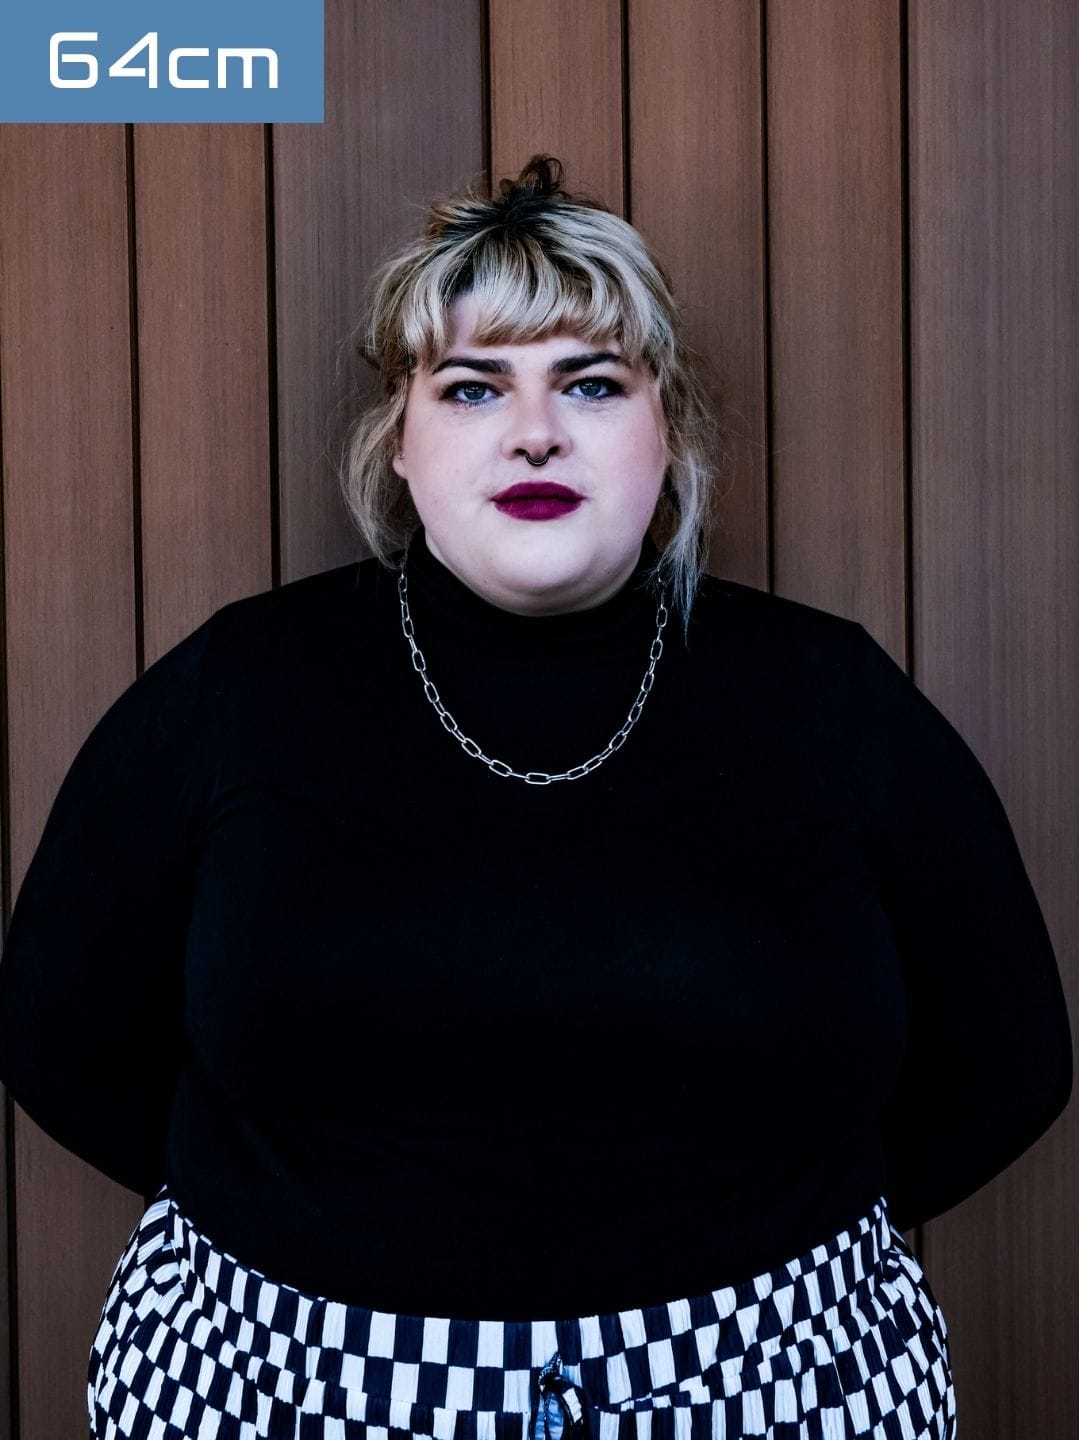
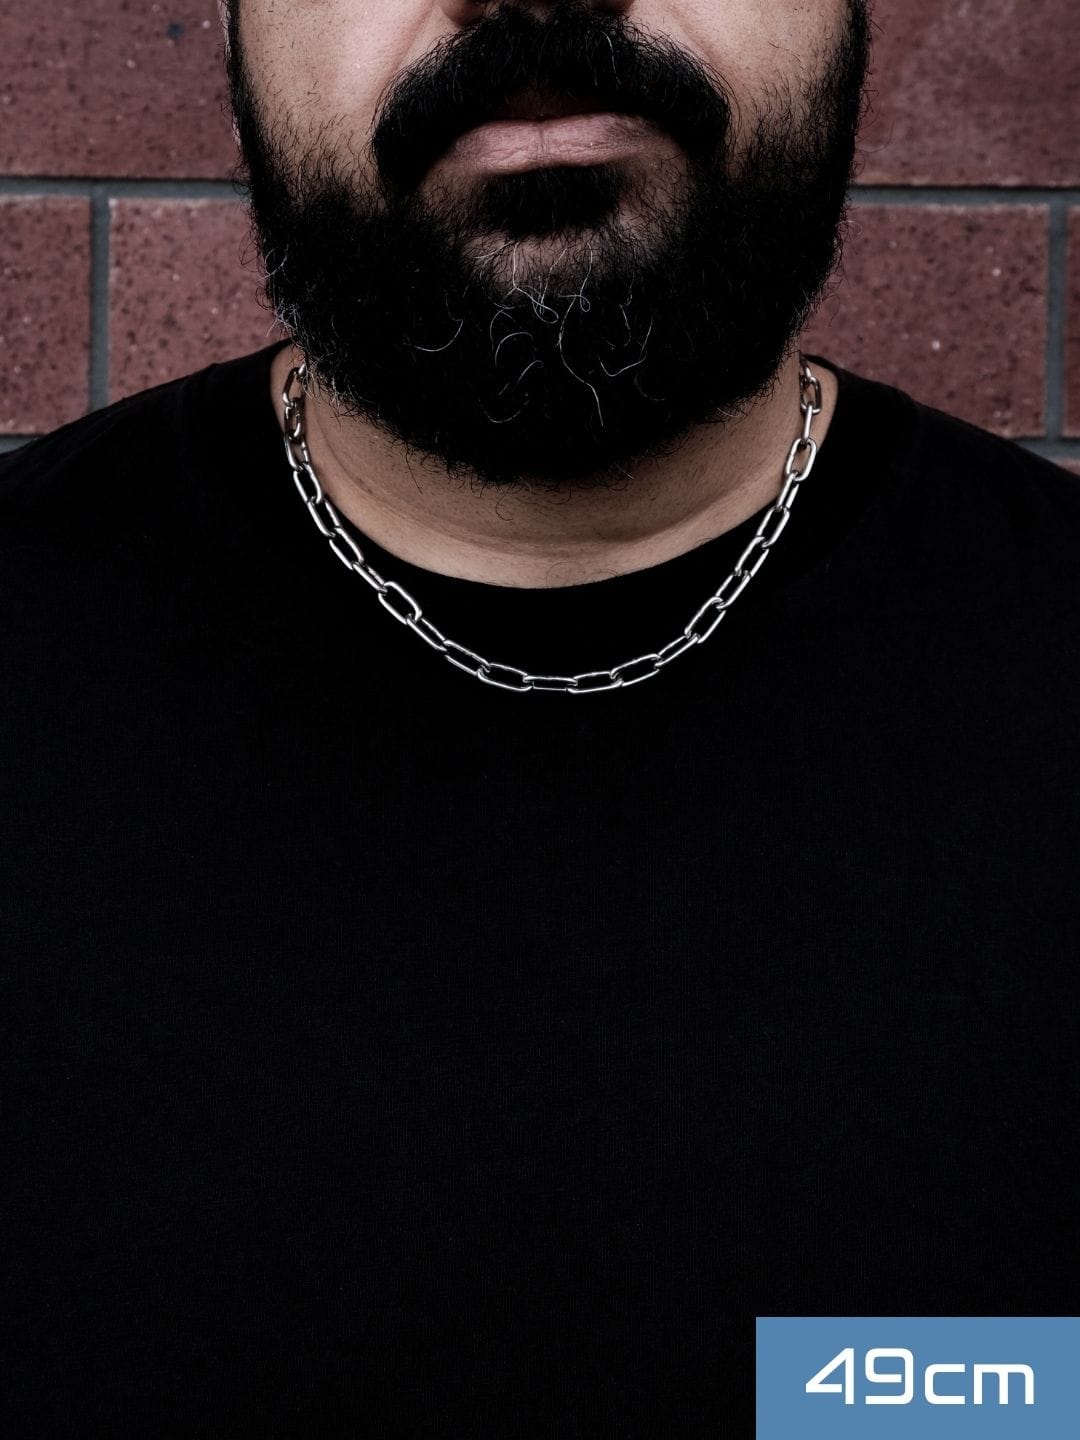
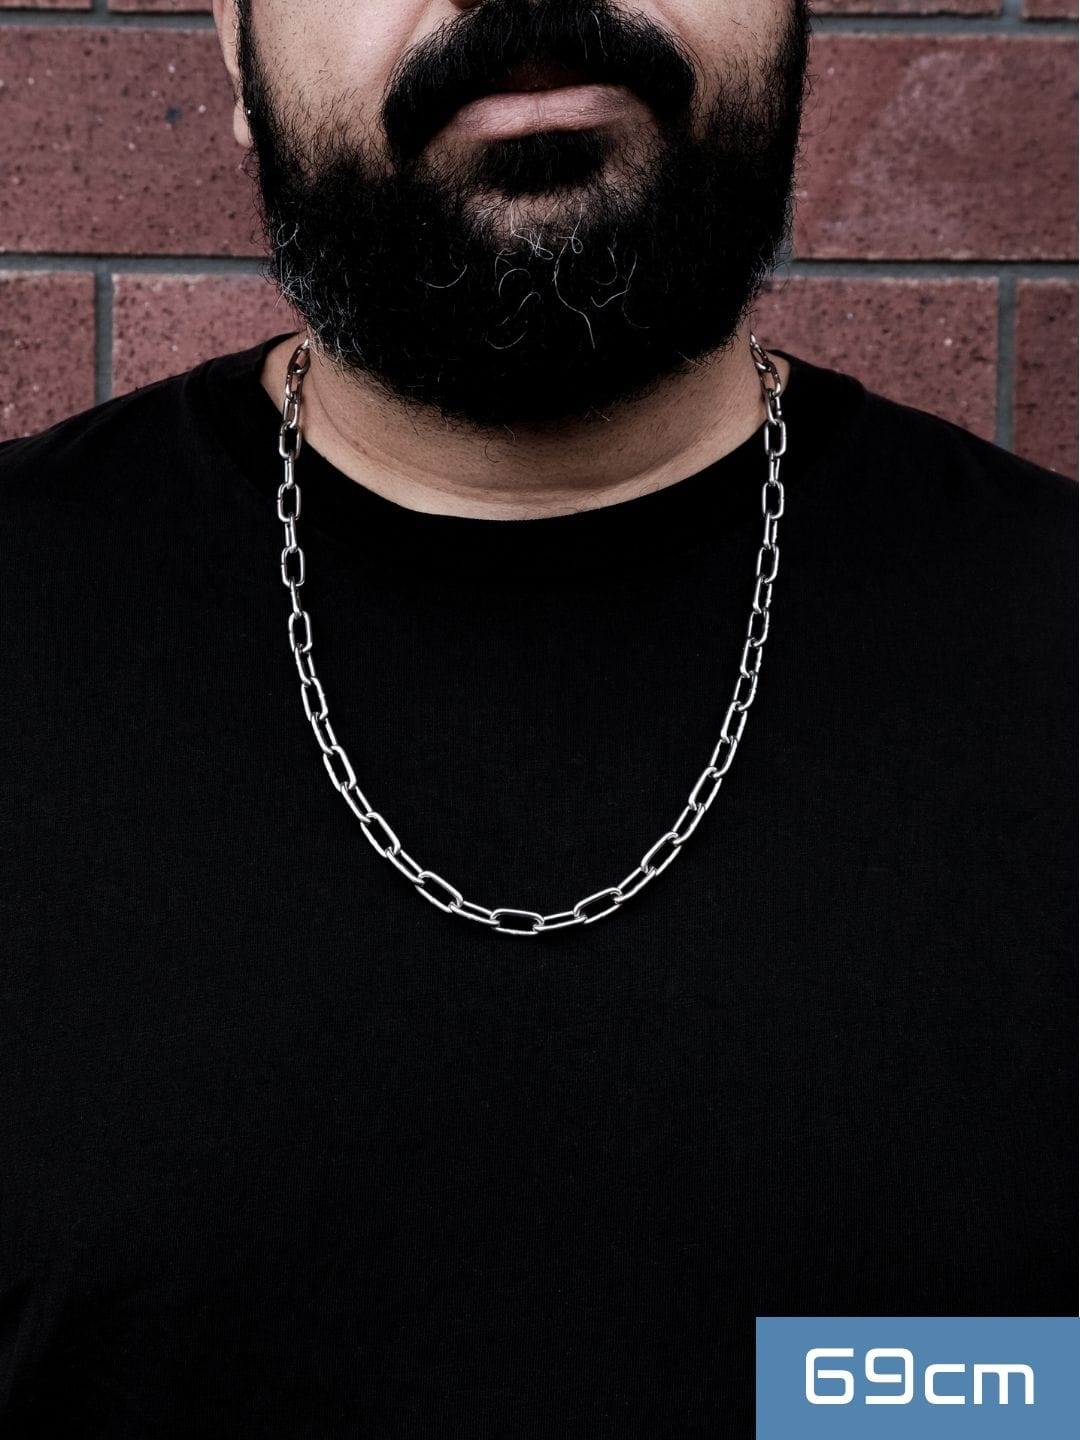
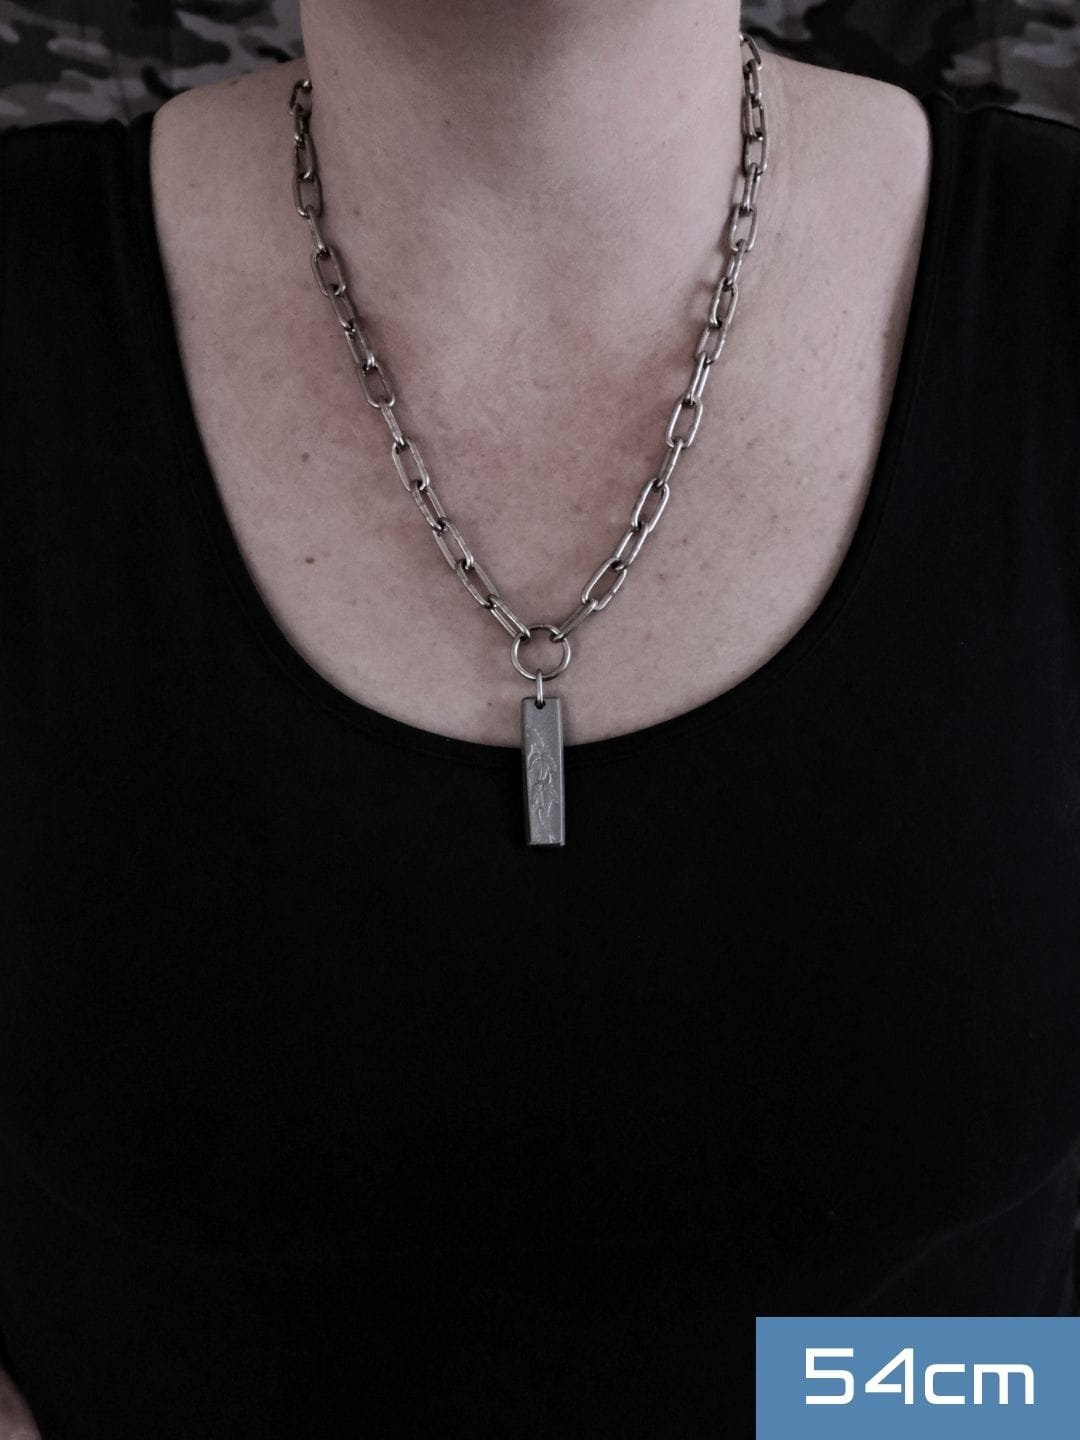
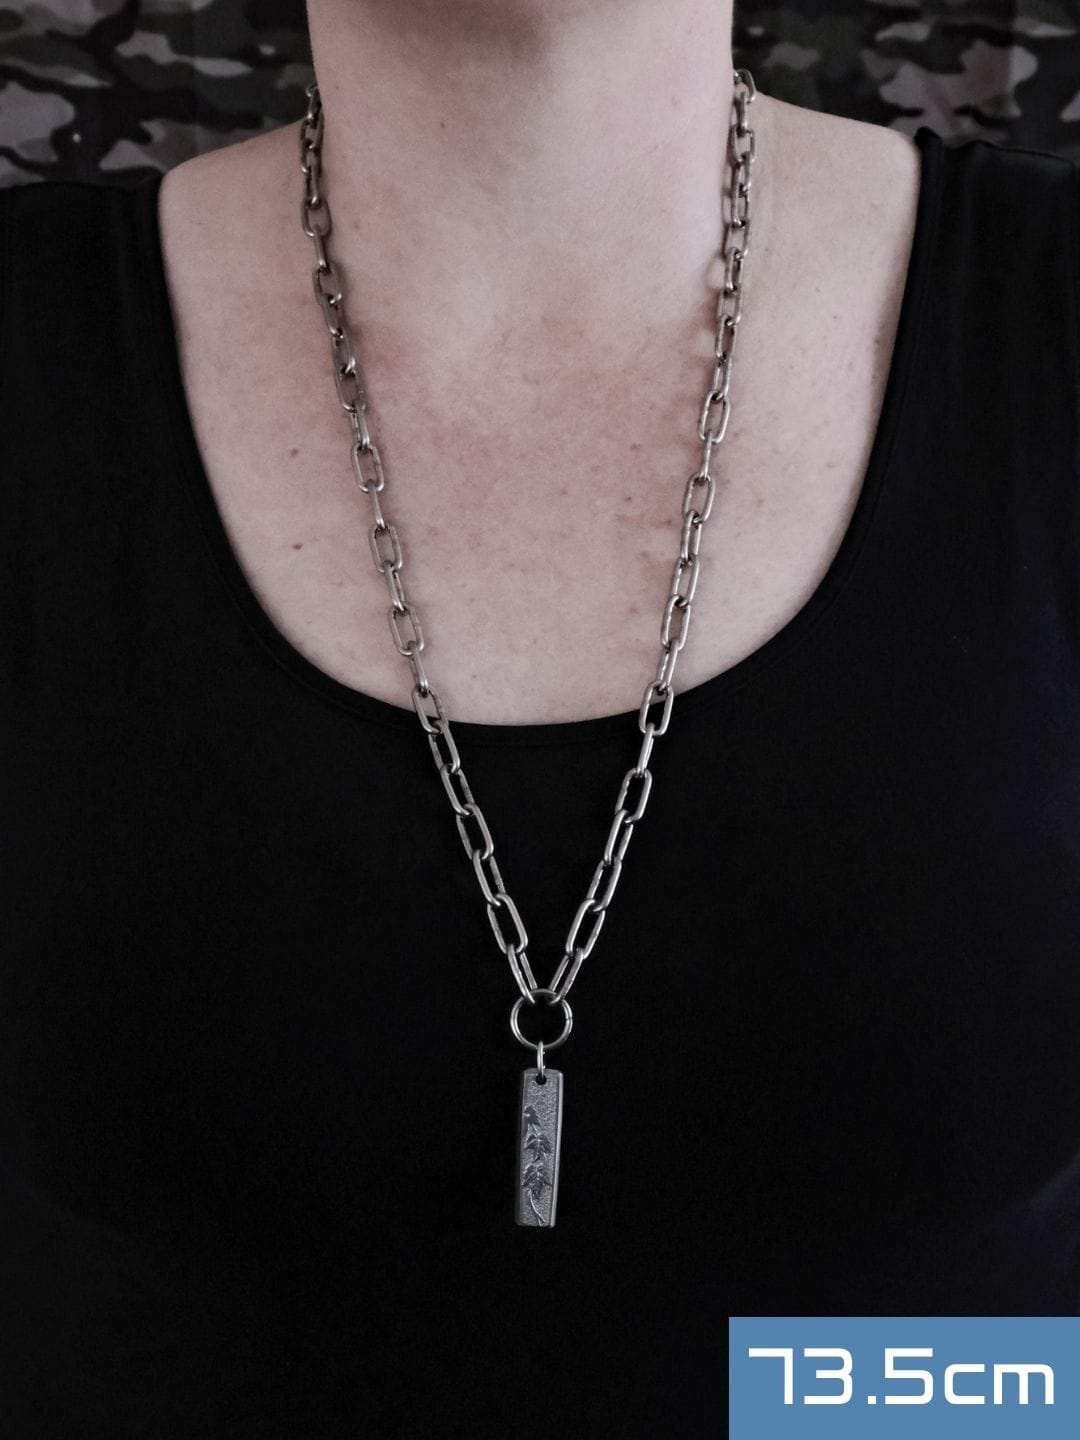
Check out the images below to see how the chain sits on various neck sizes. Keep in mind that if a pendant is added, it pulls down the chain by approx 1.5-2cm.
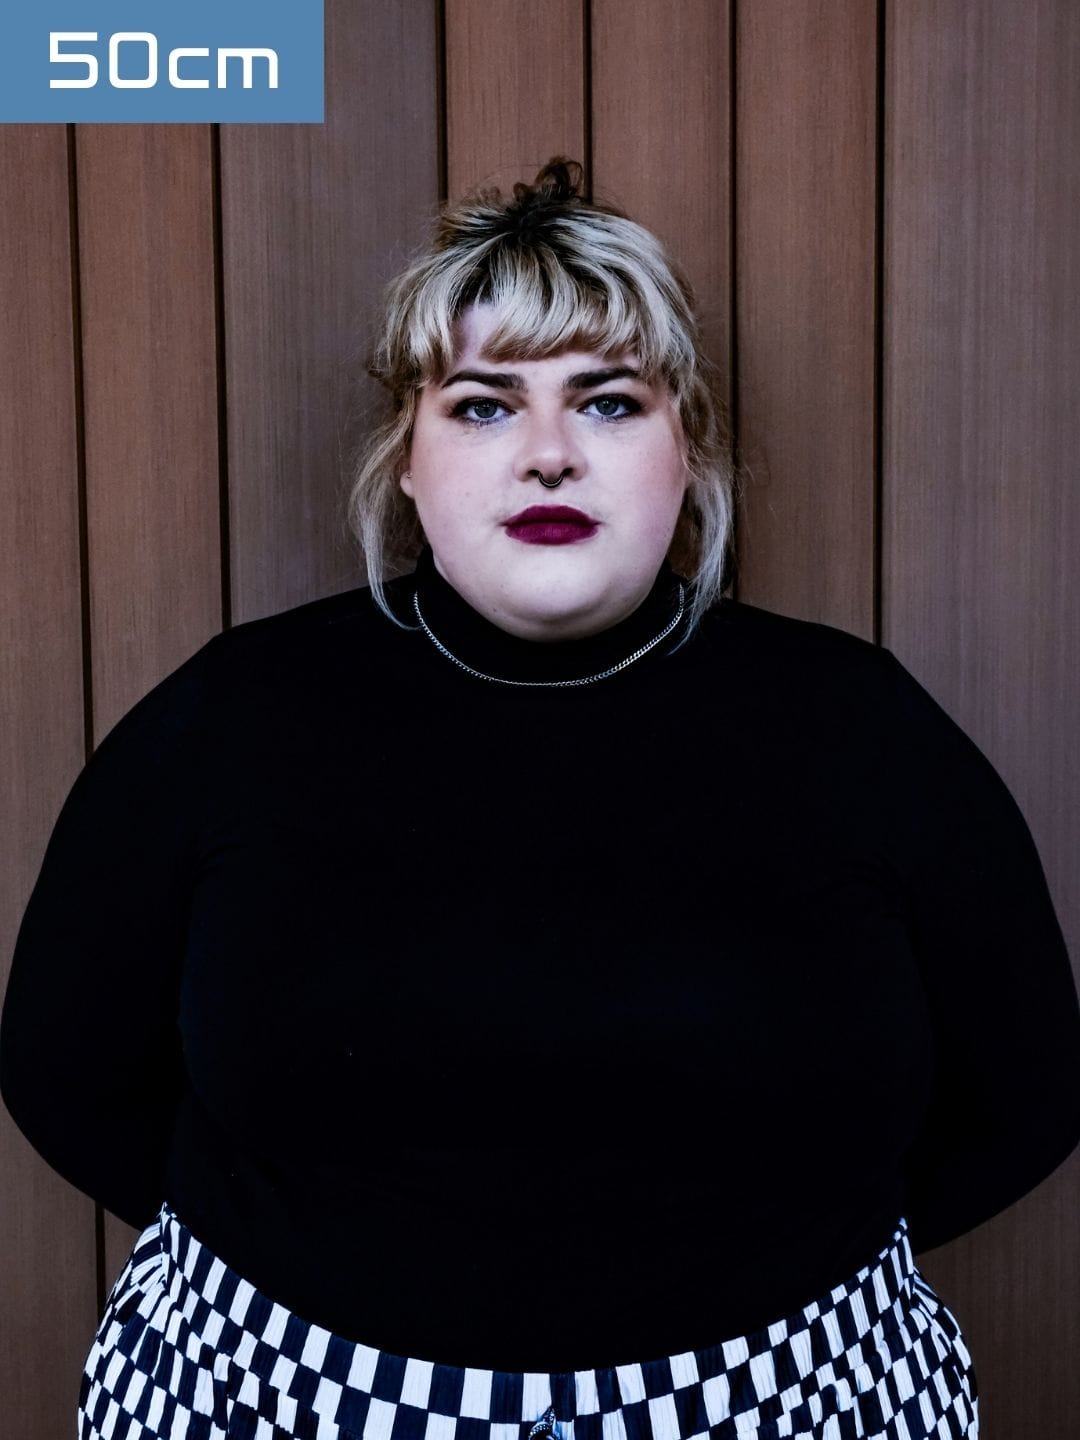

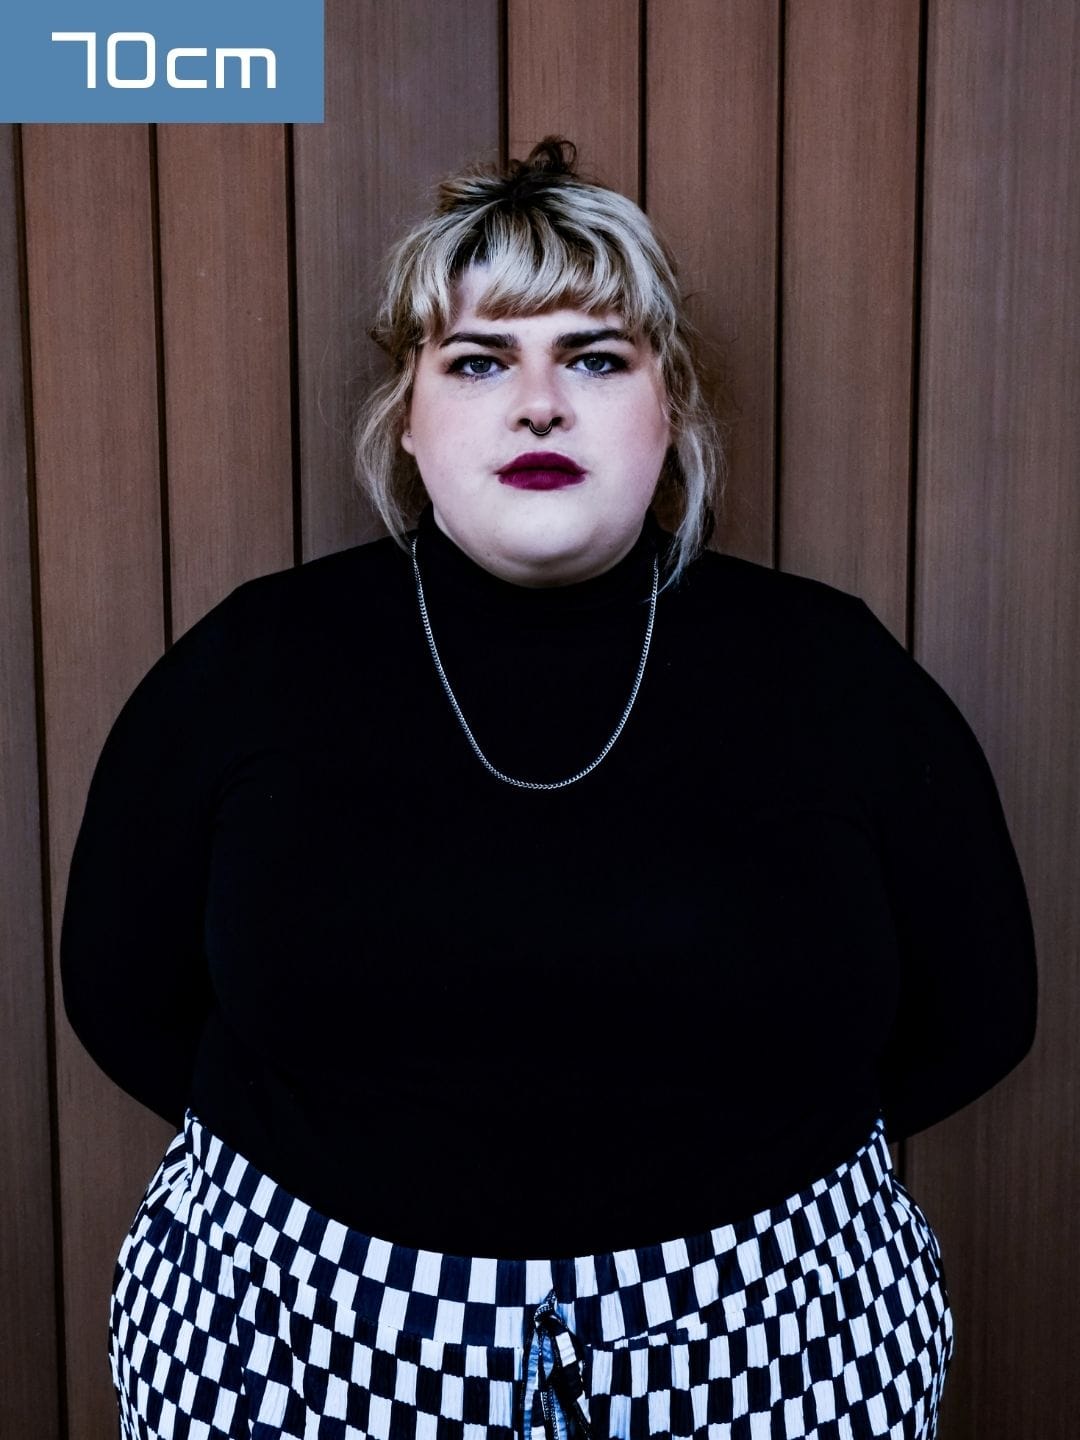
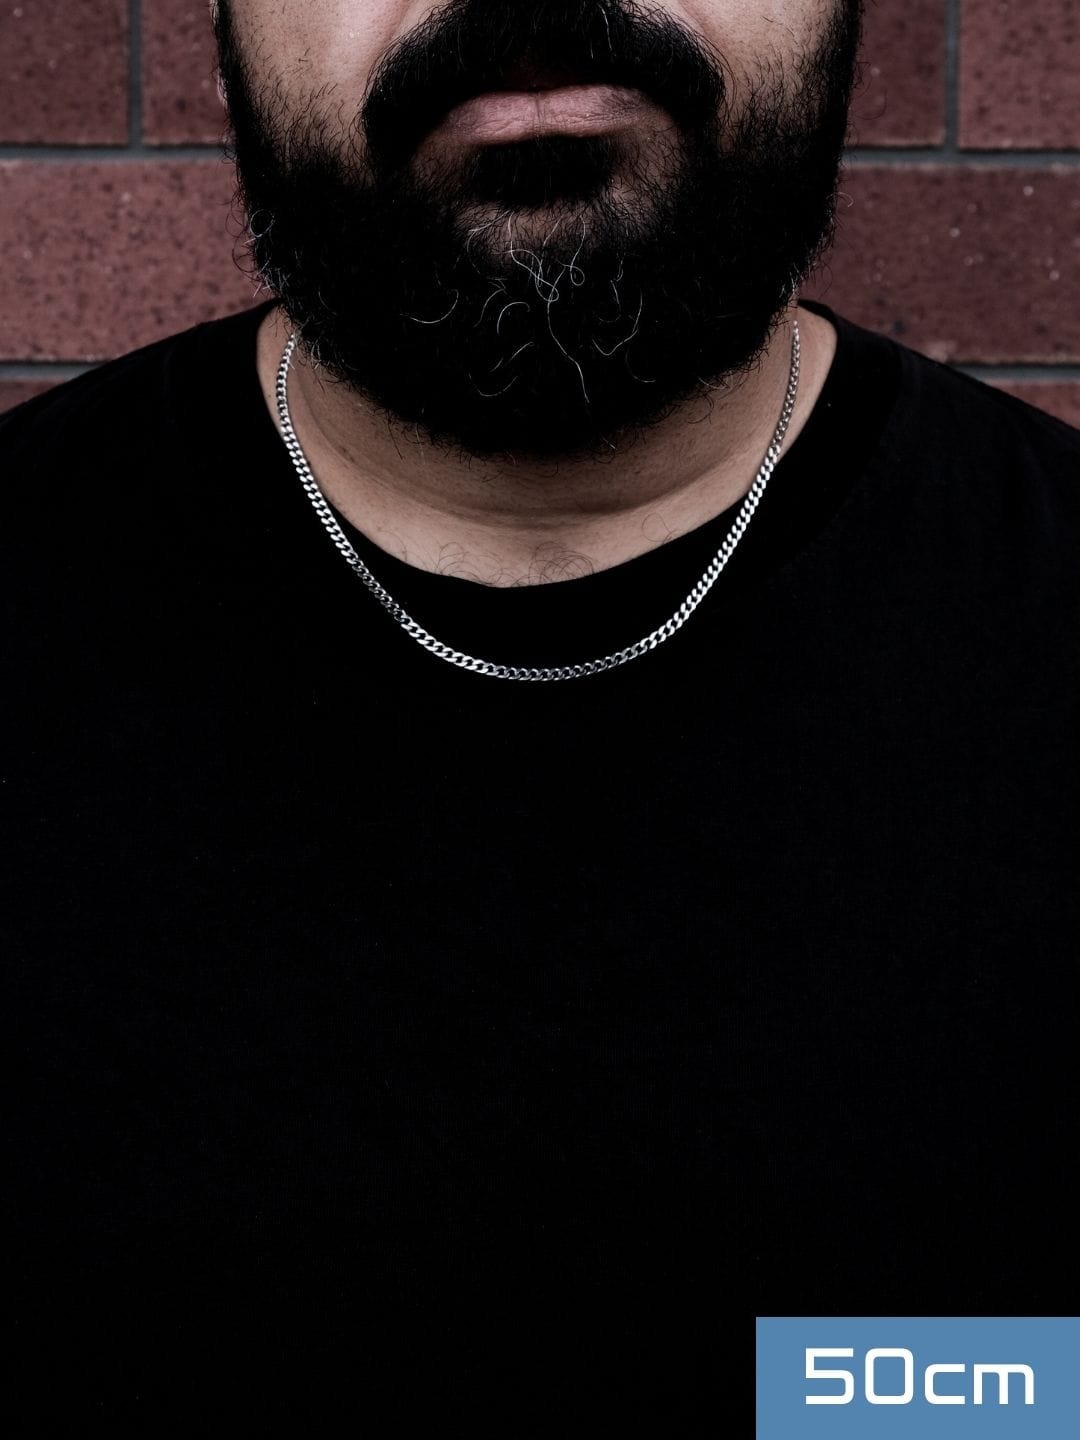
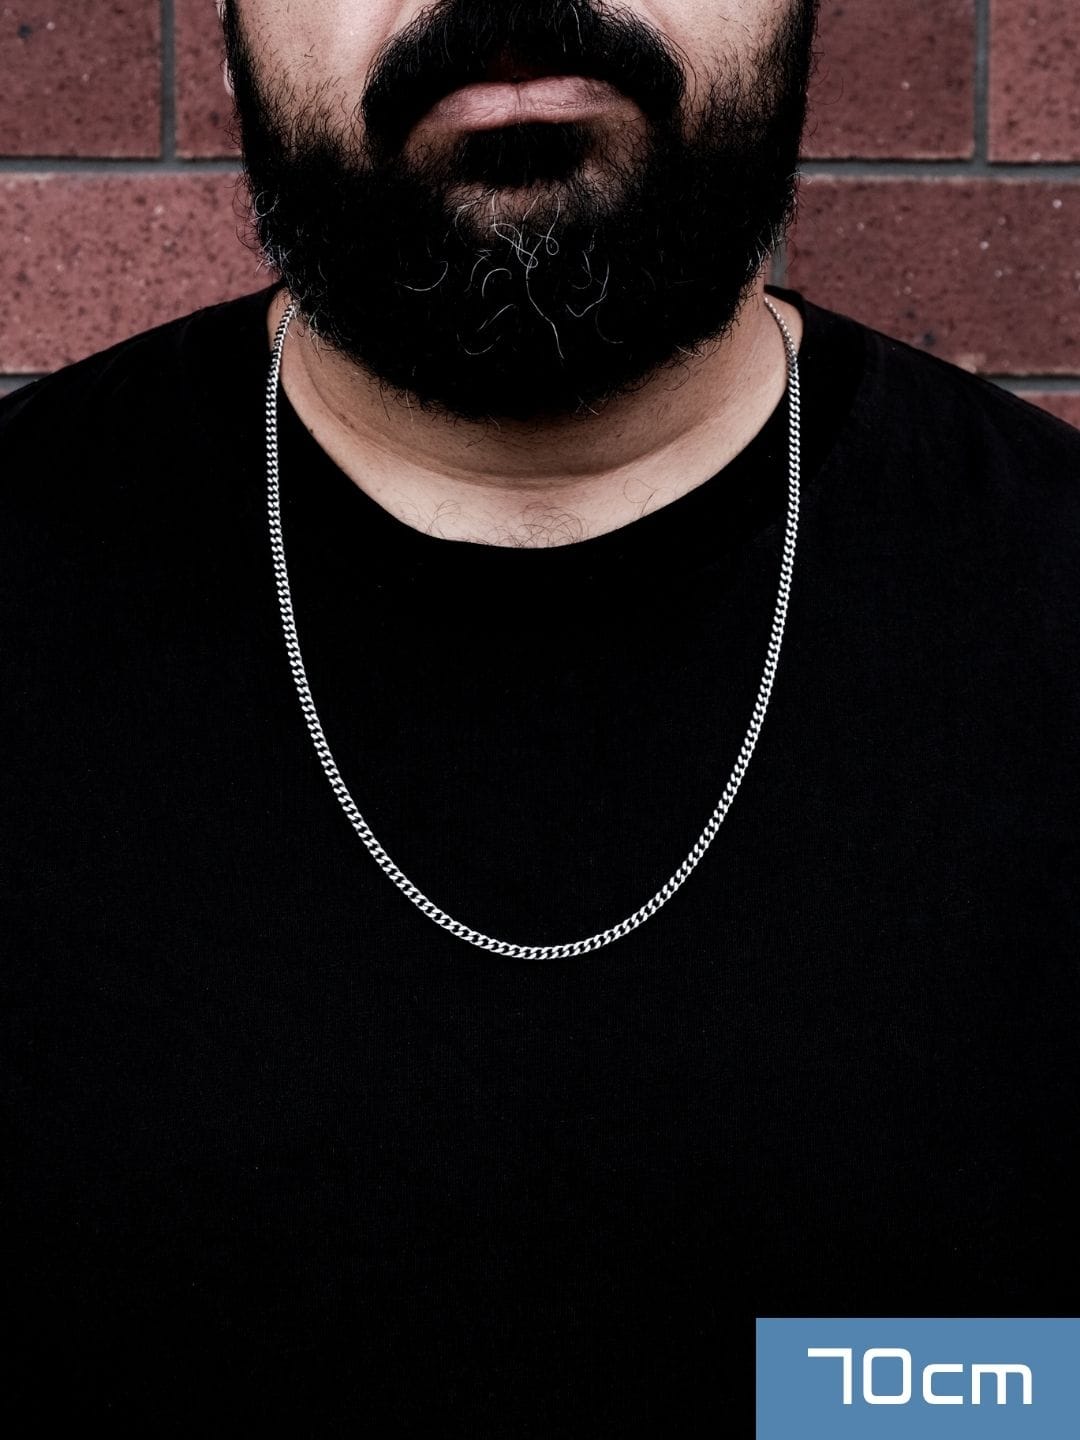
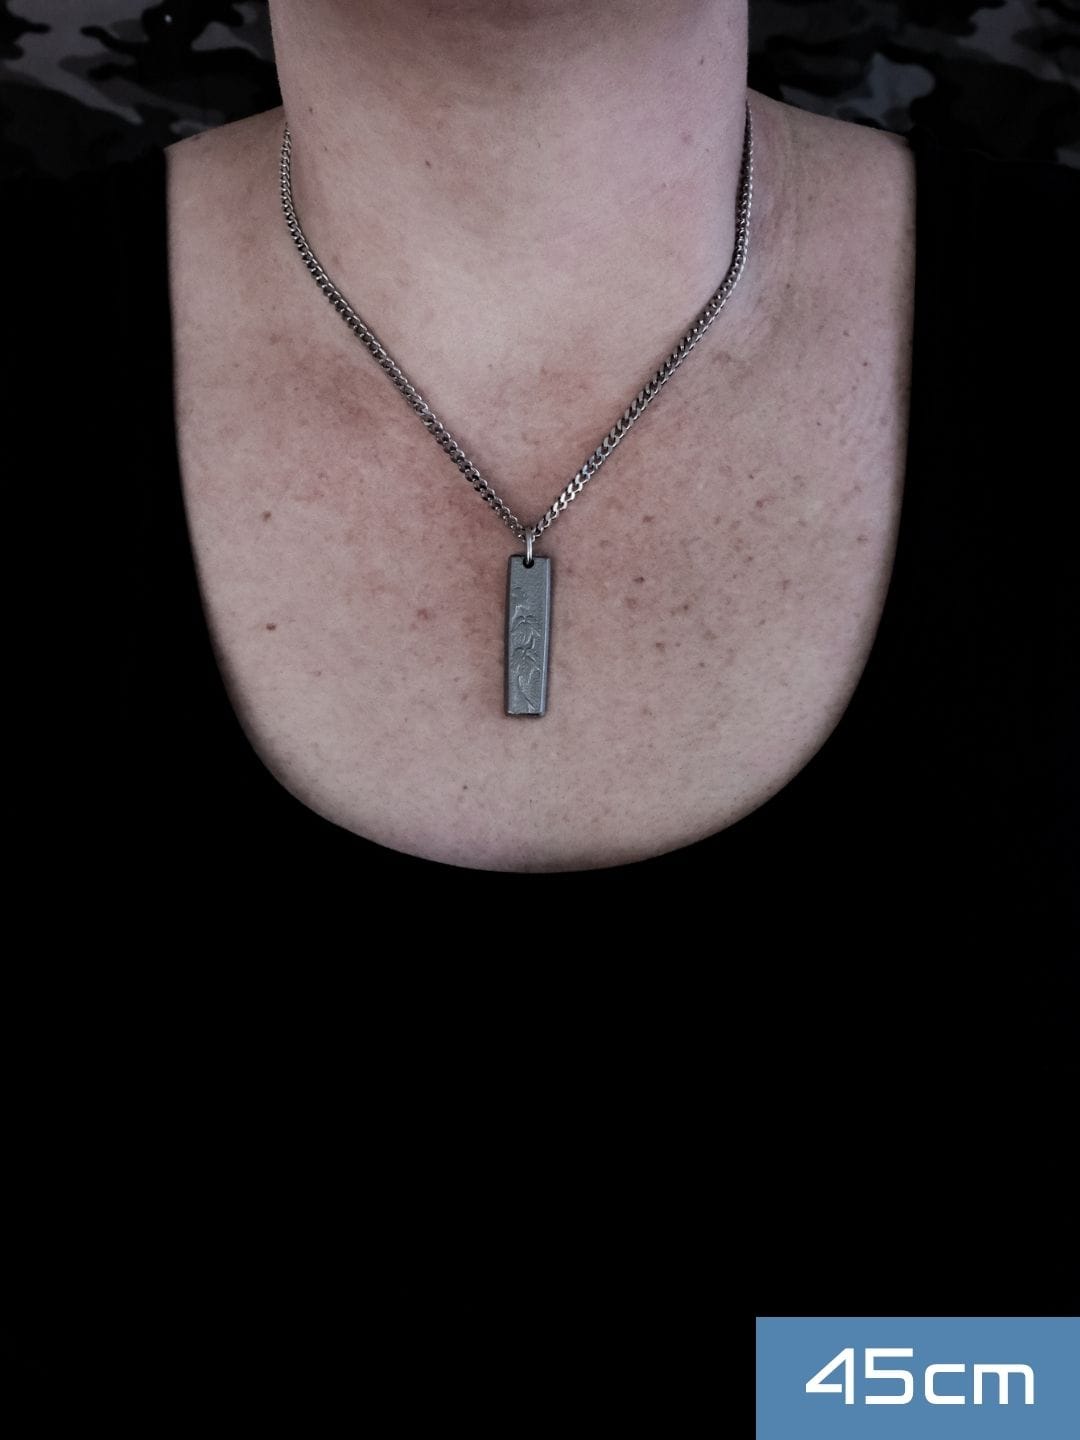
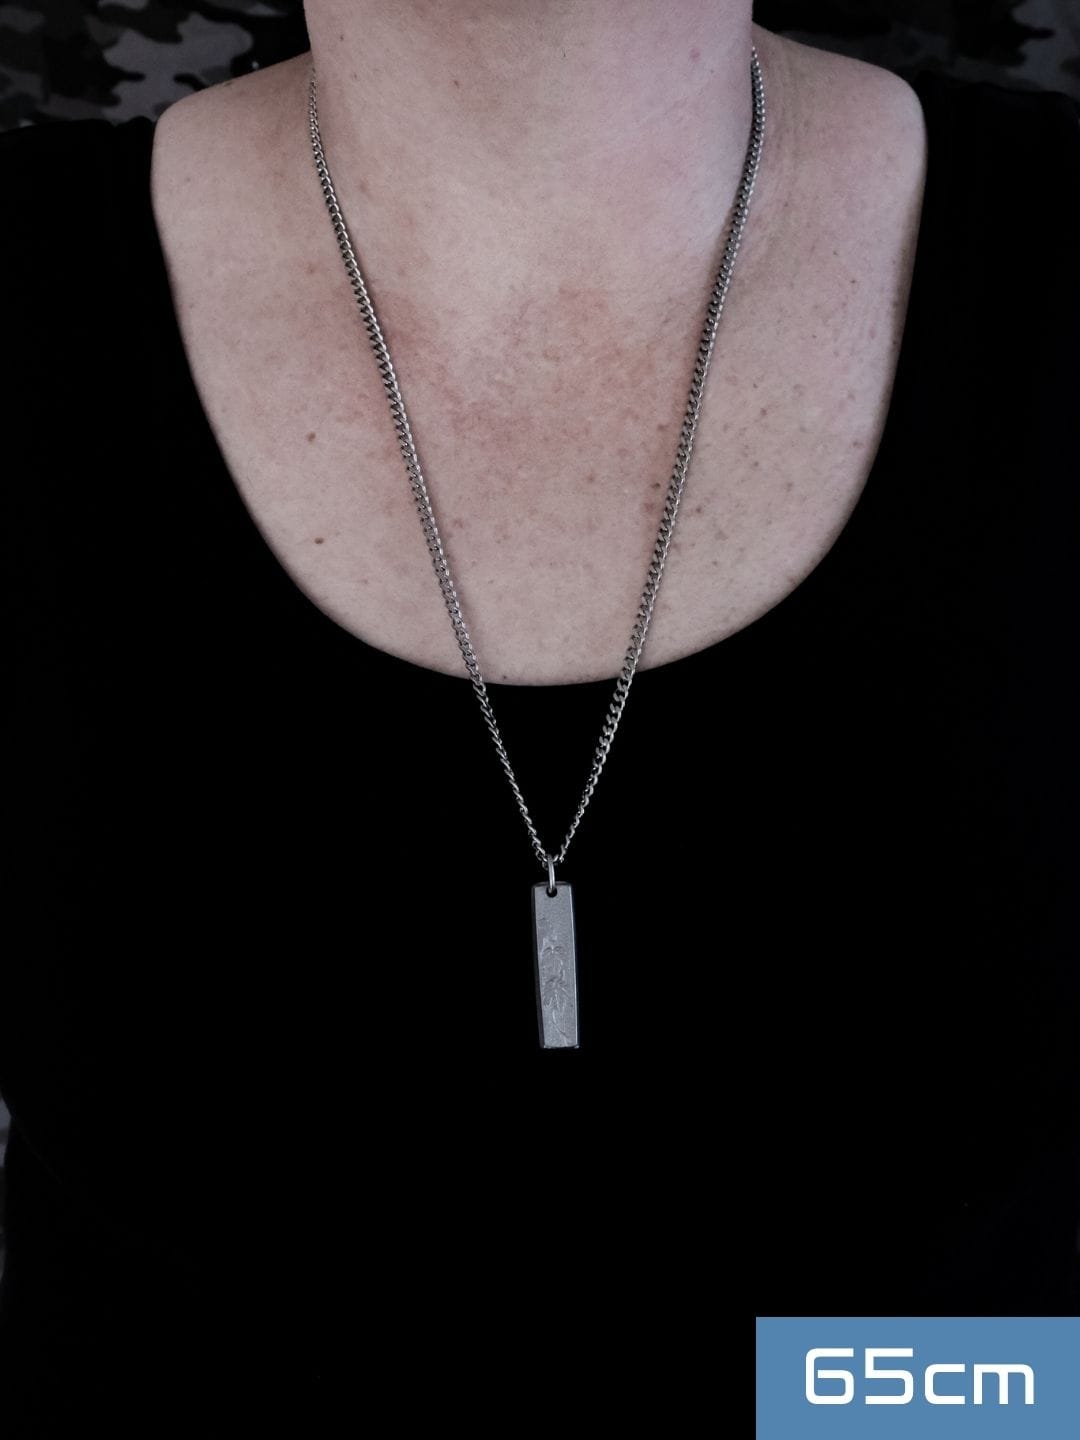

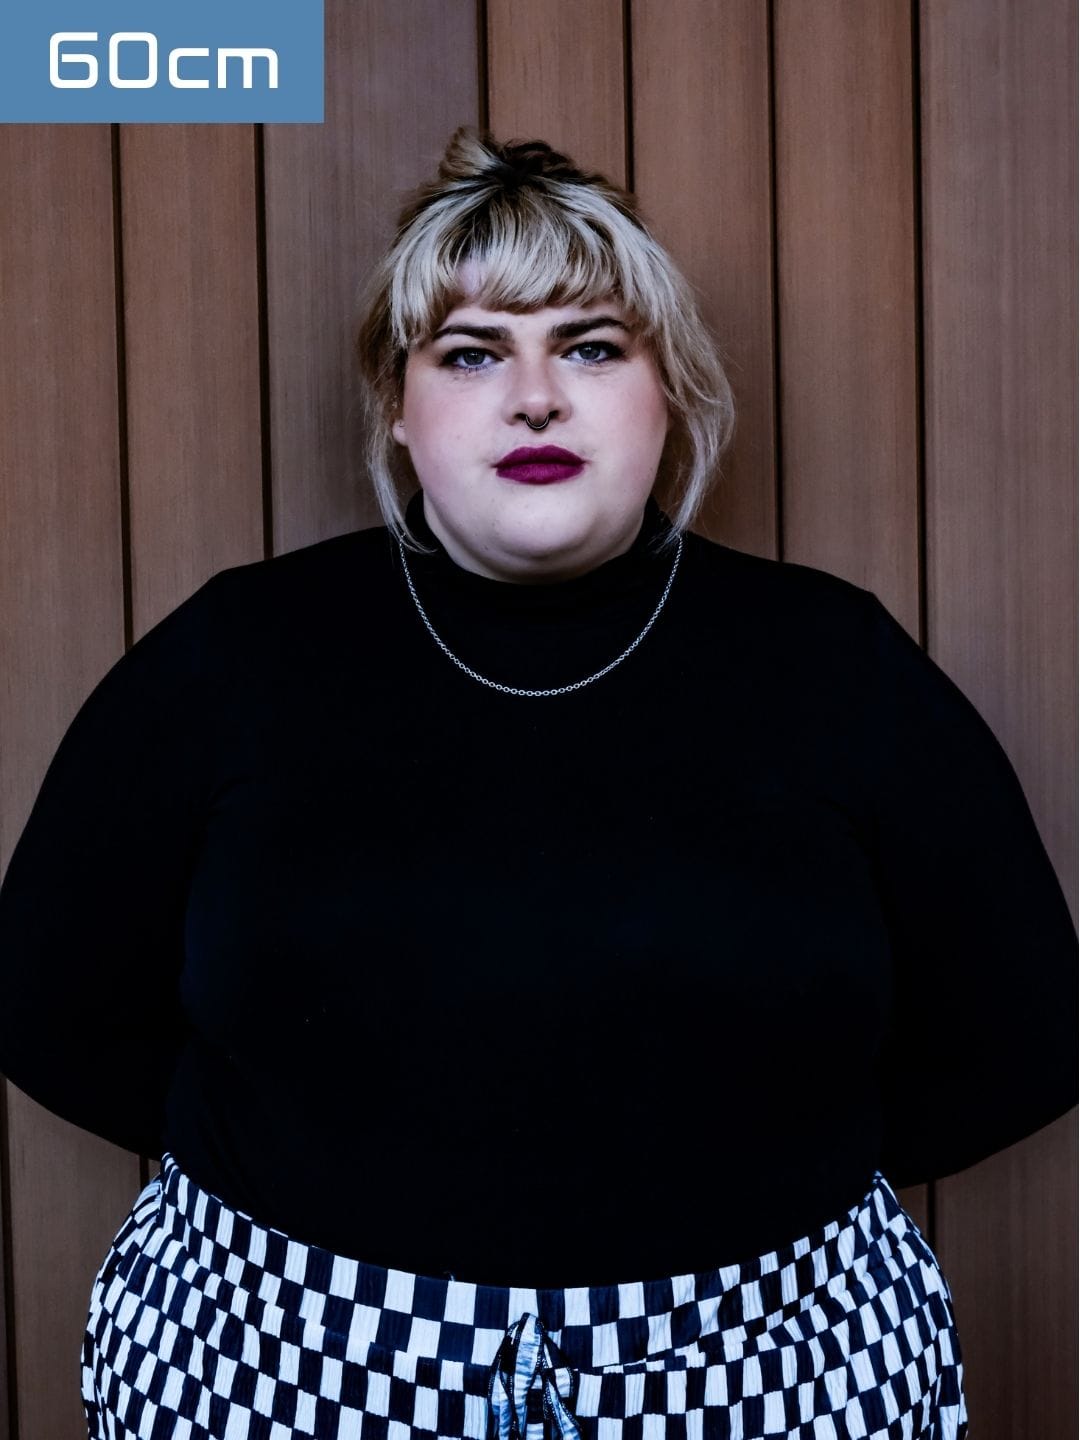
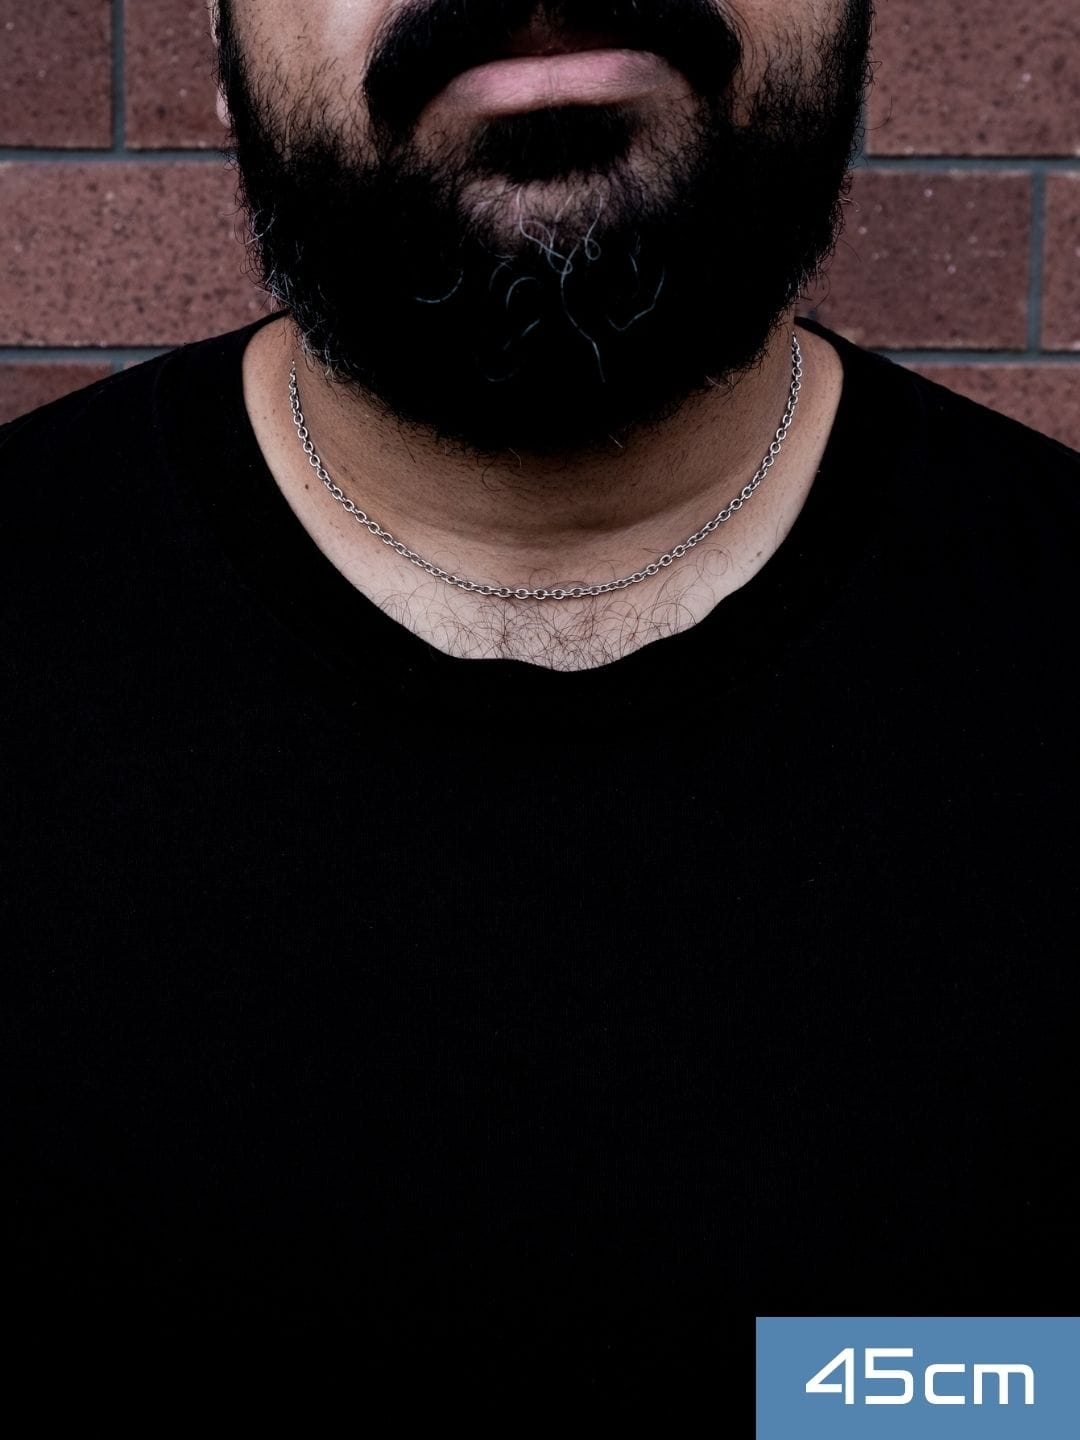
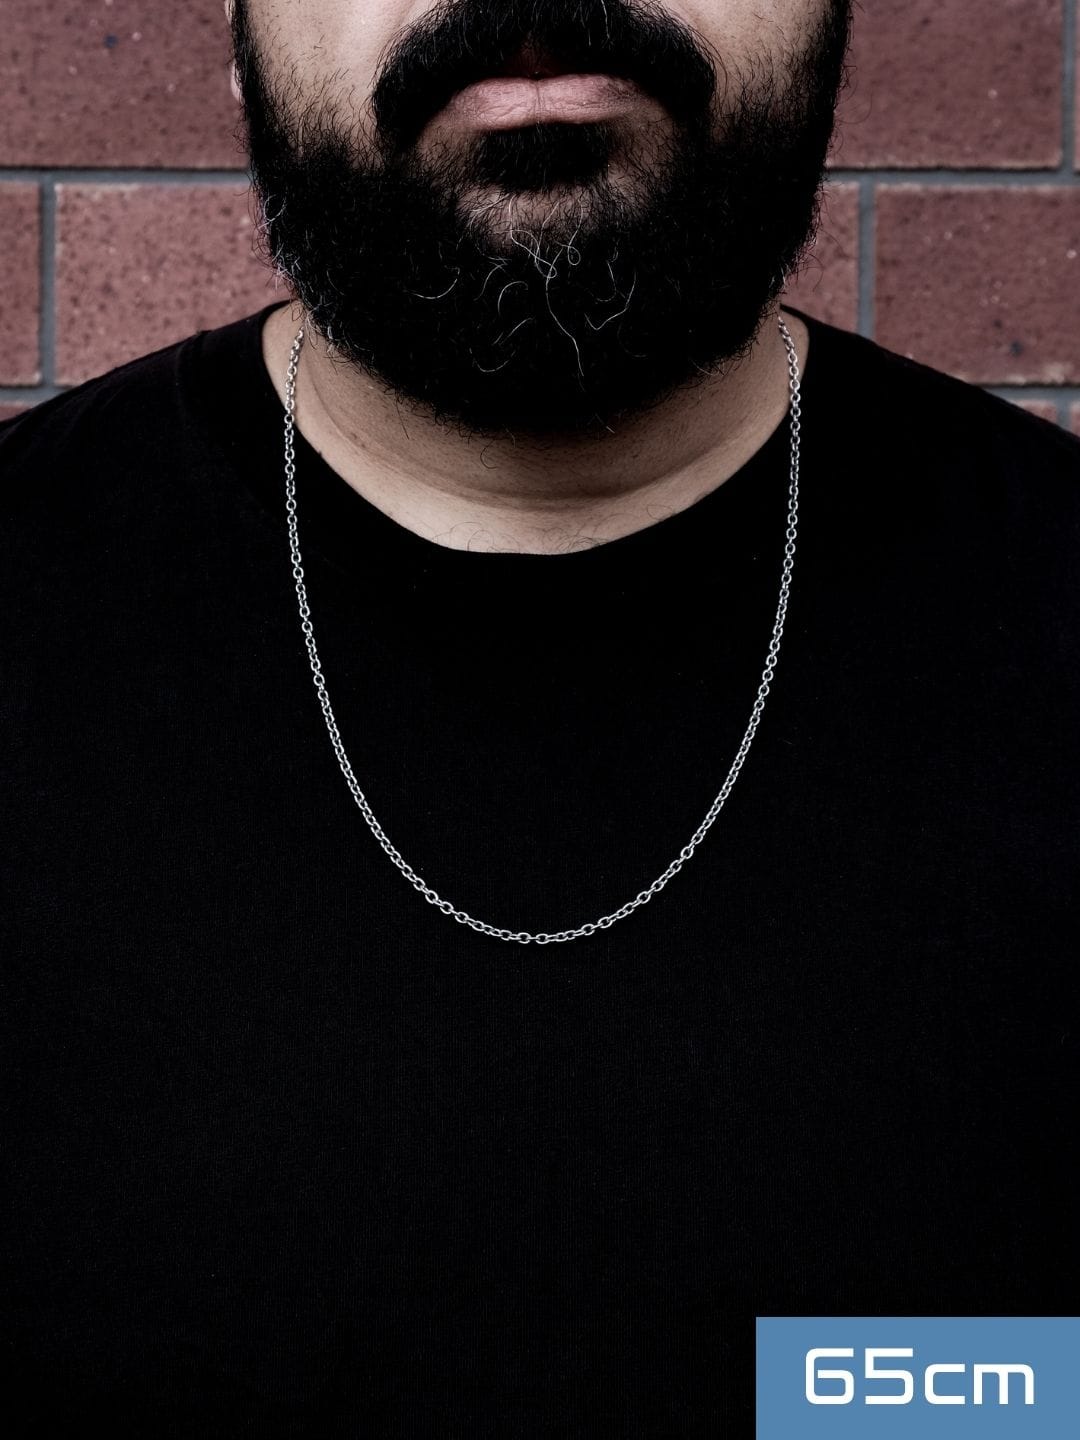
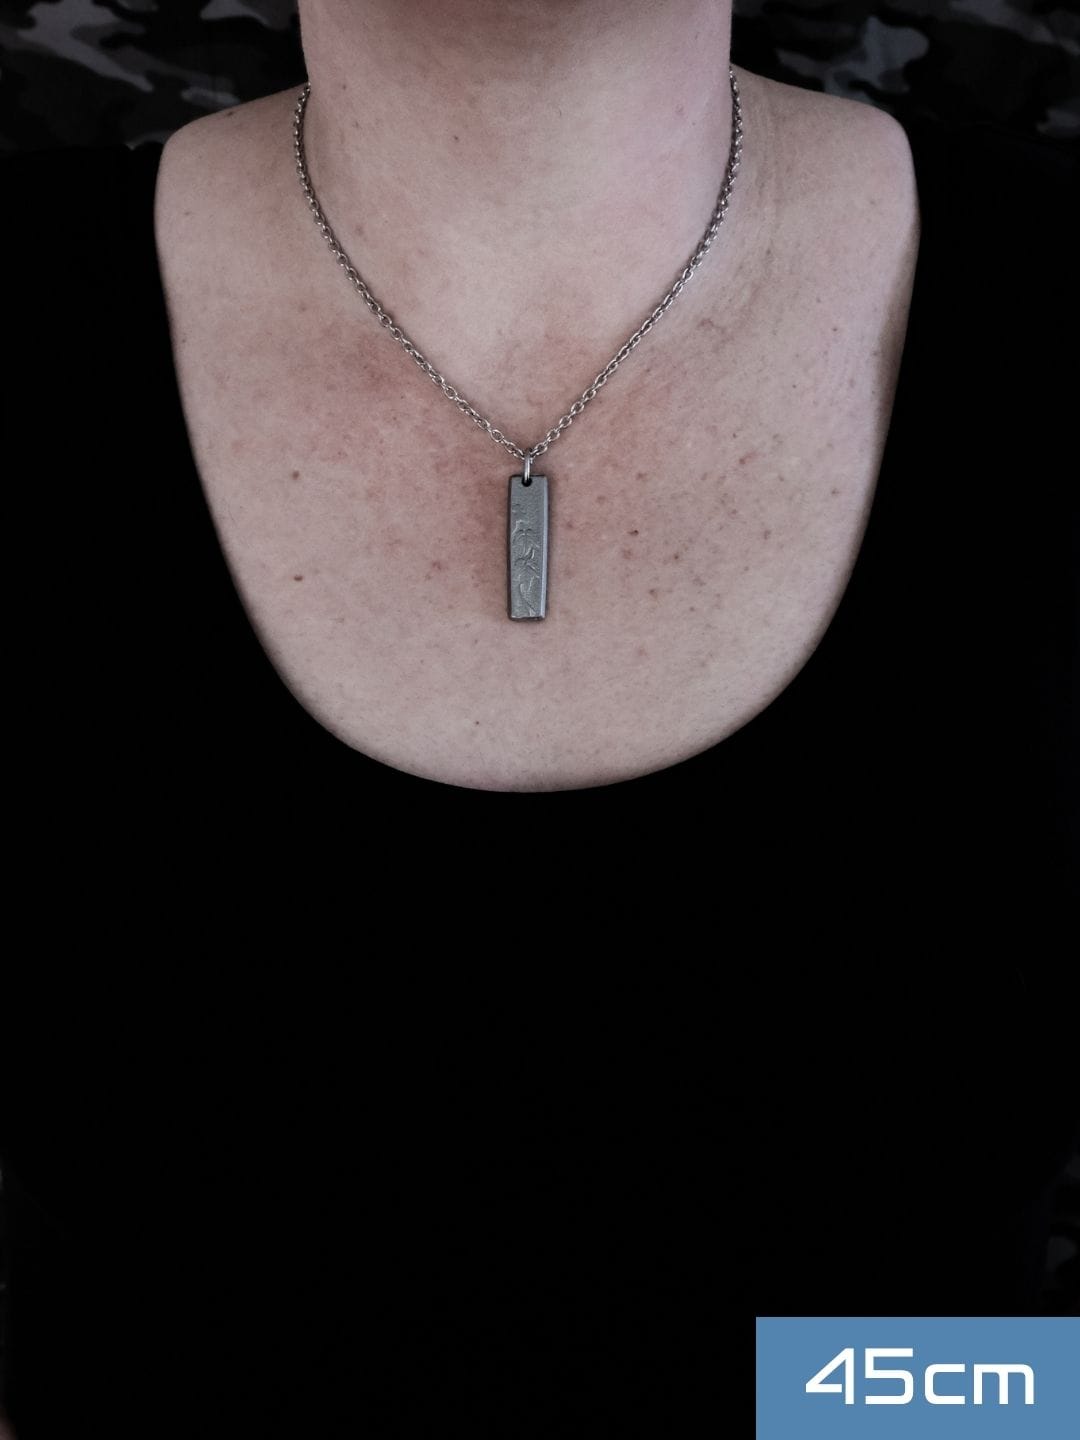
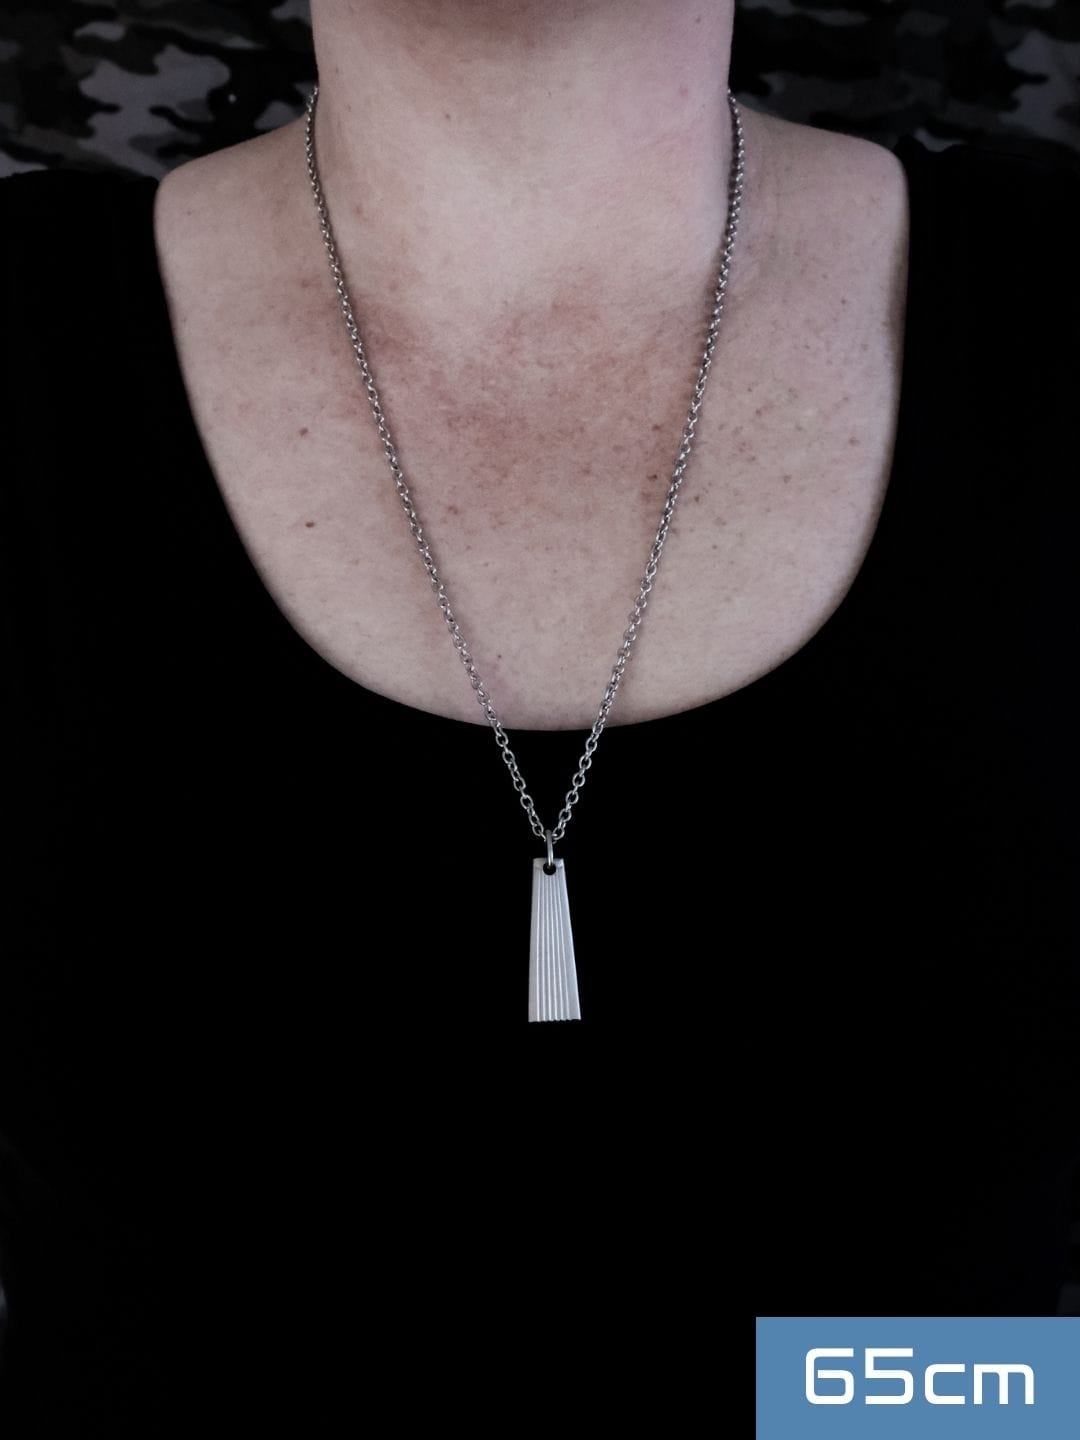
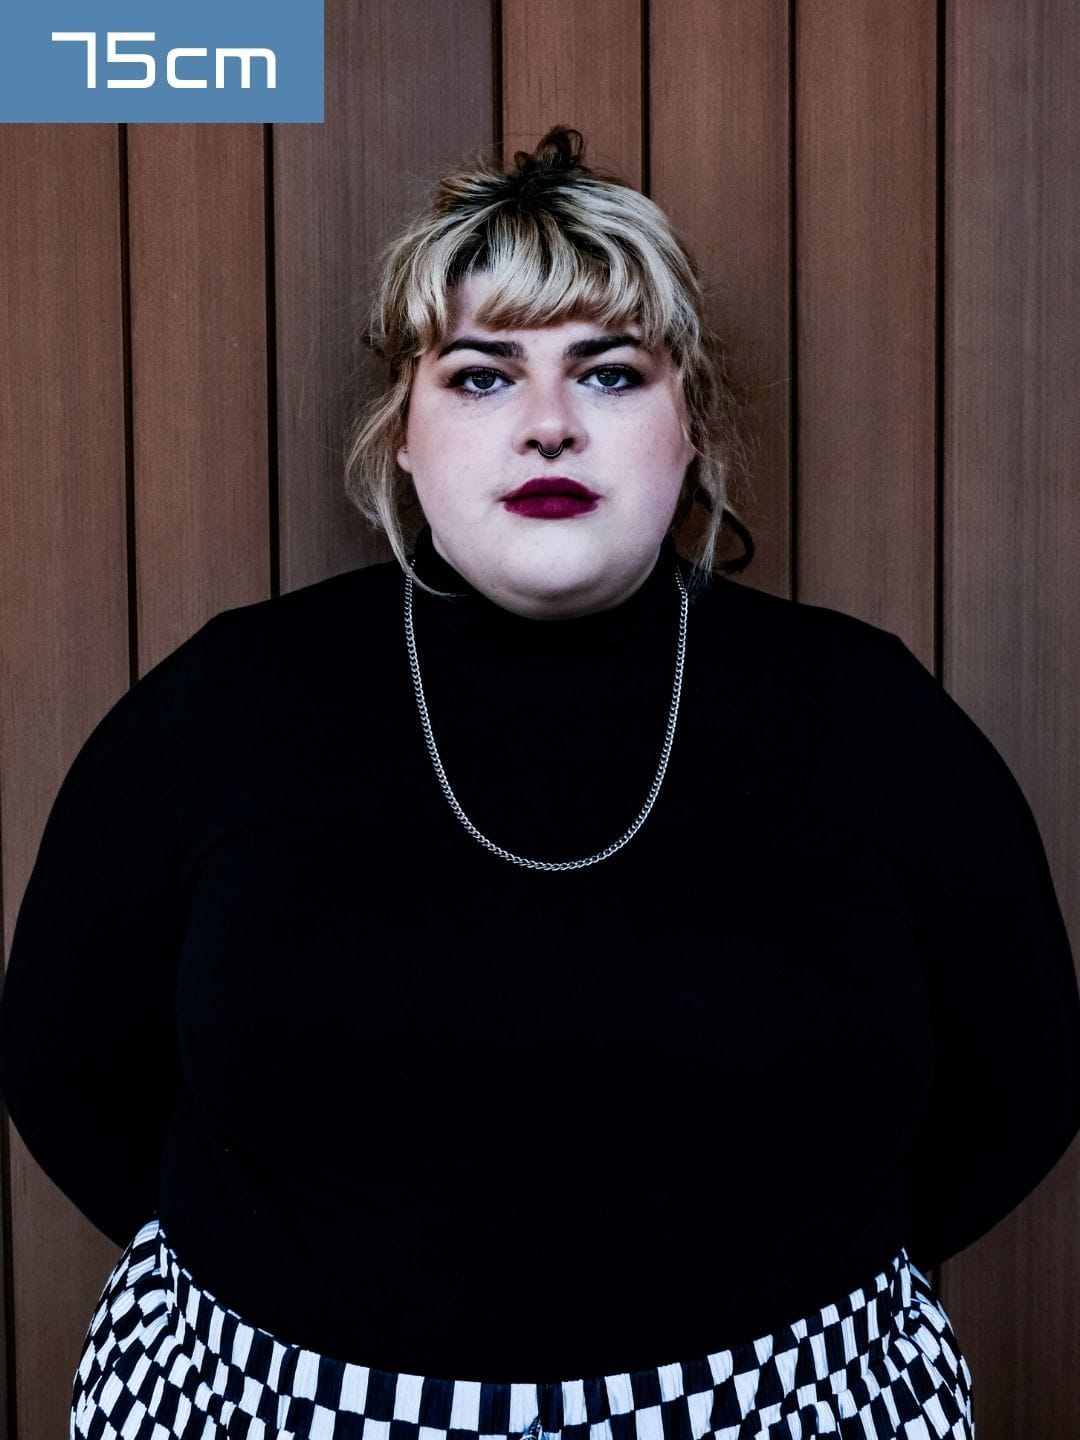
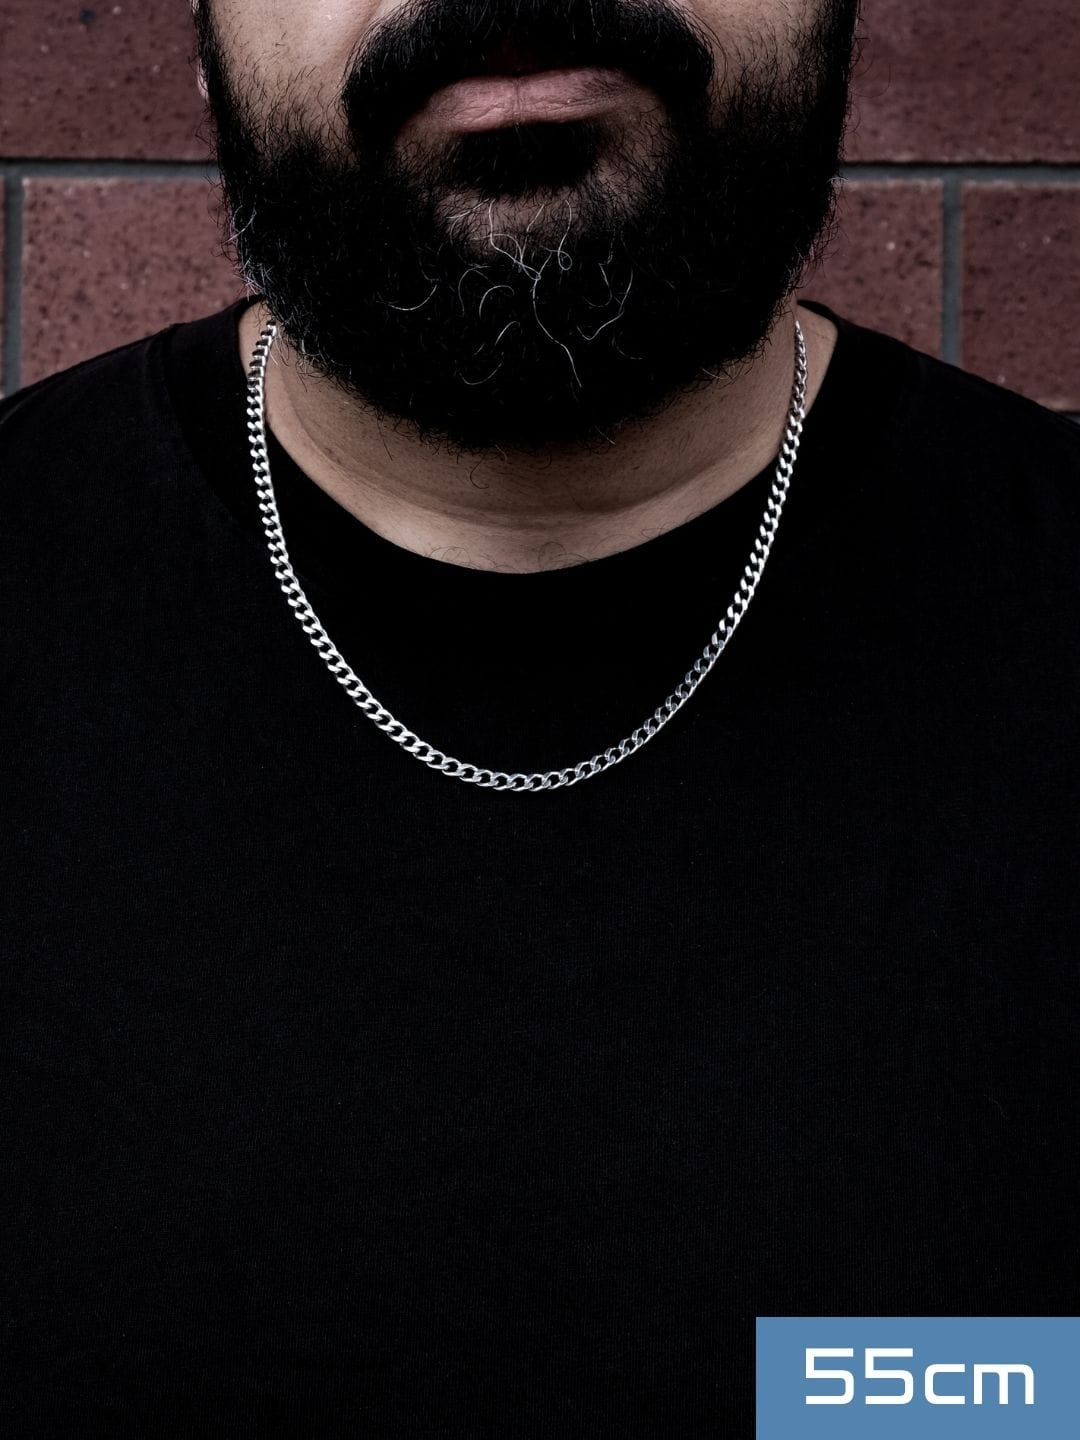
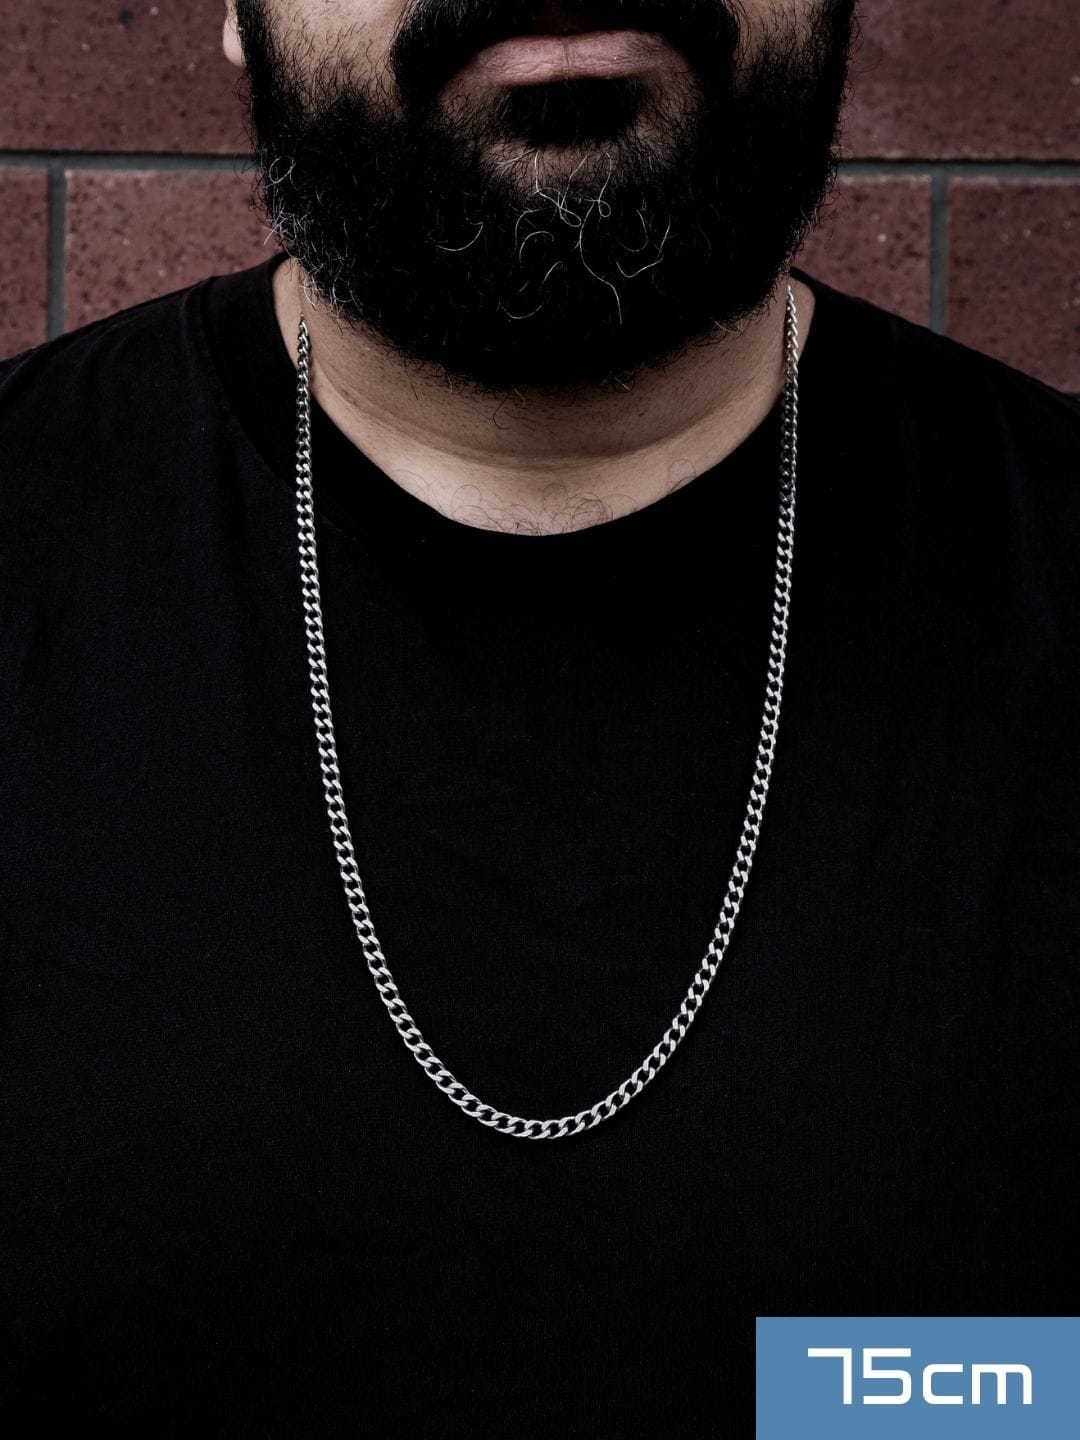
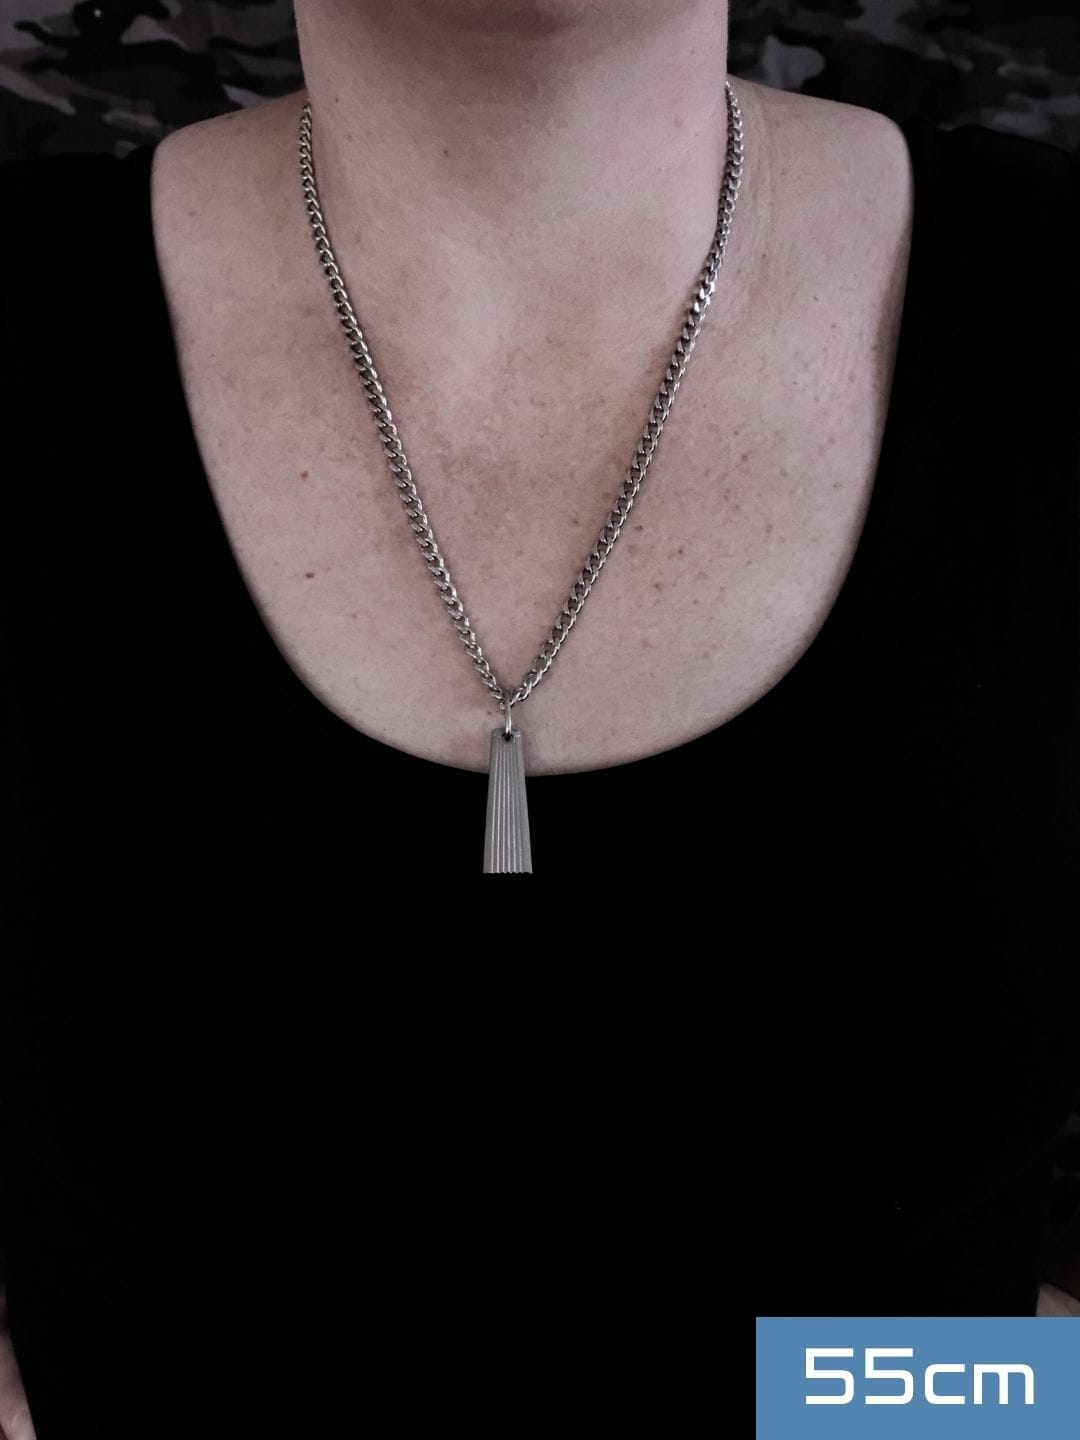
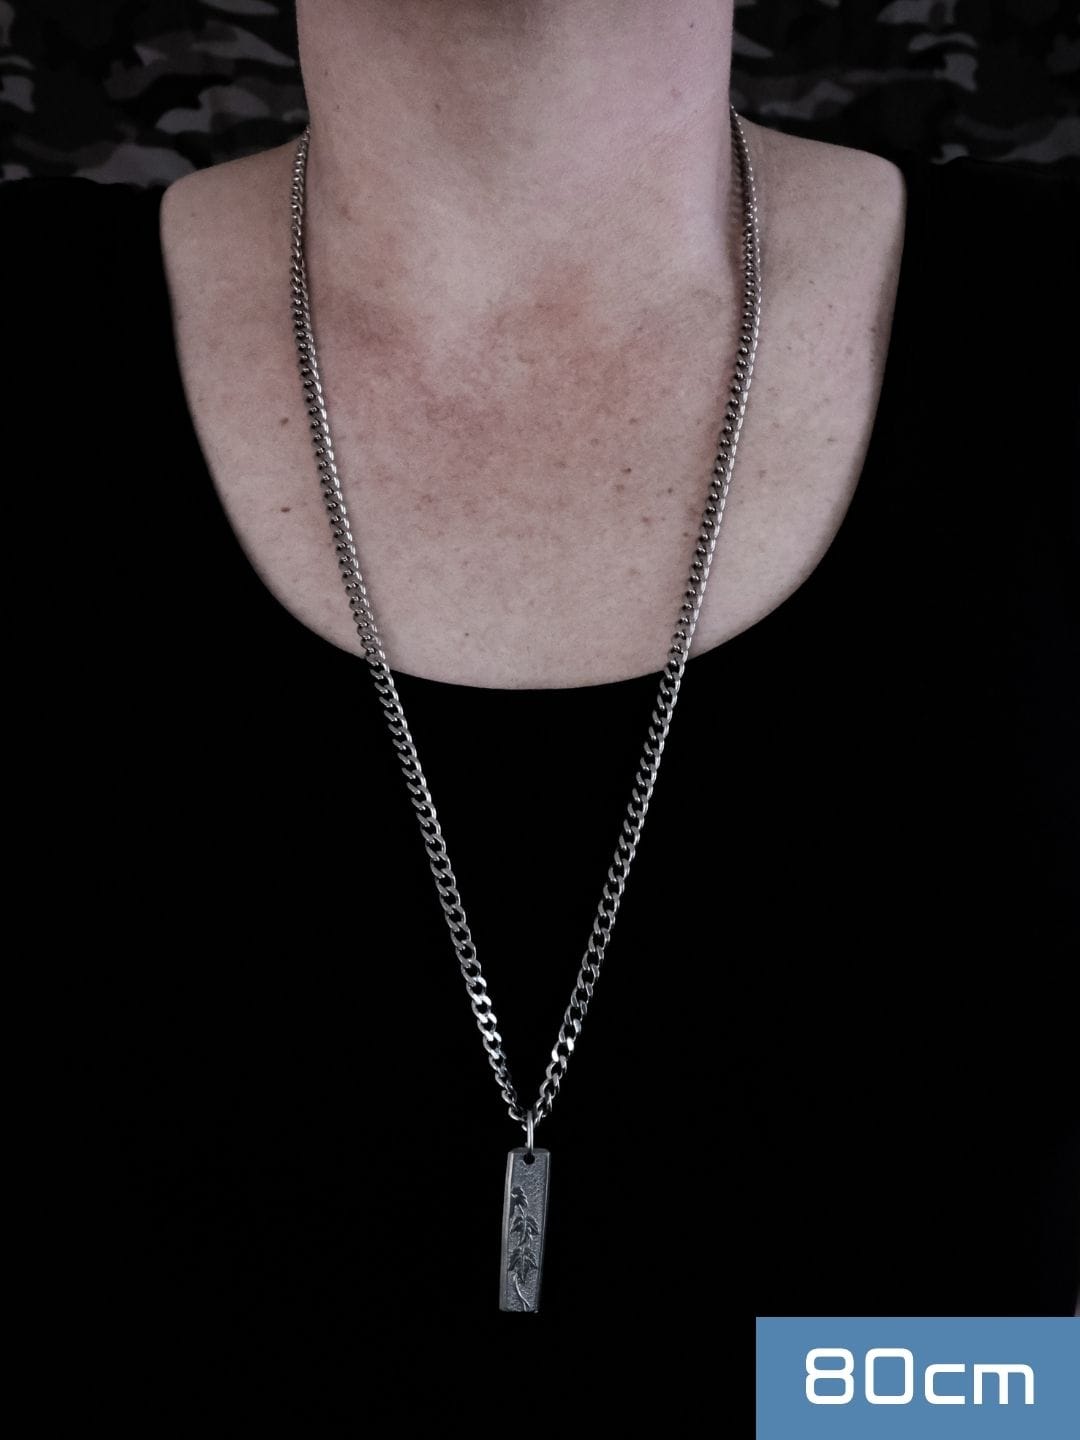
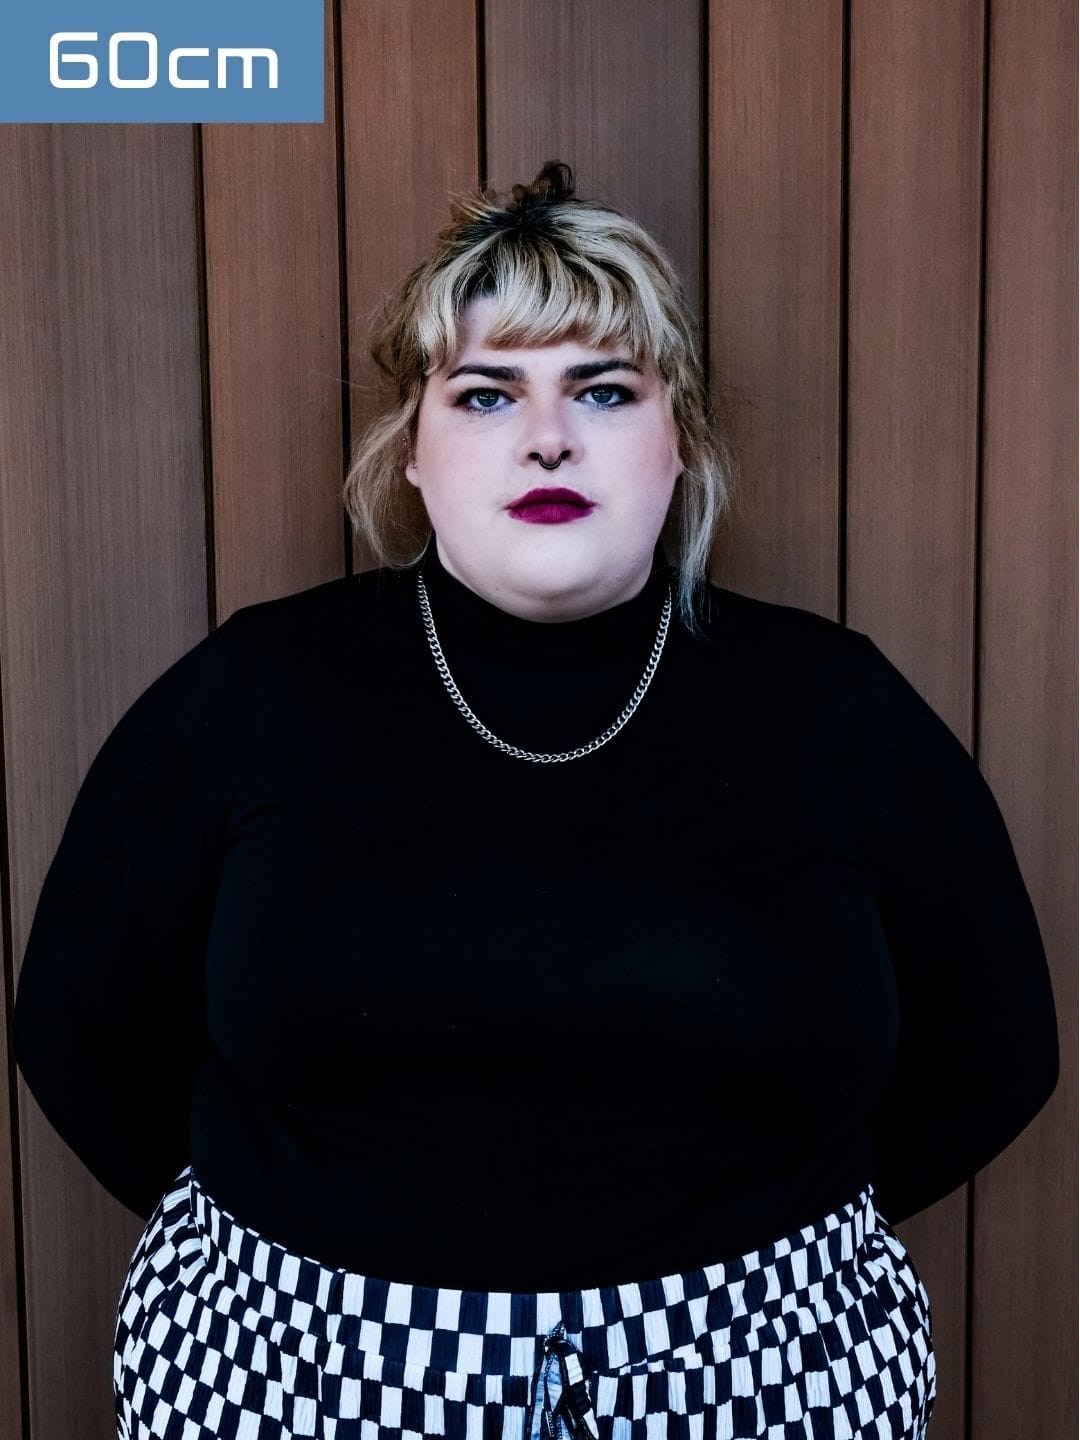
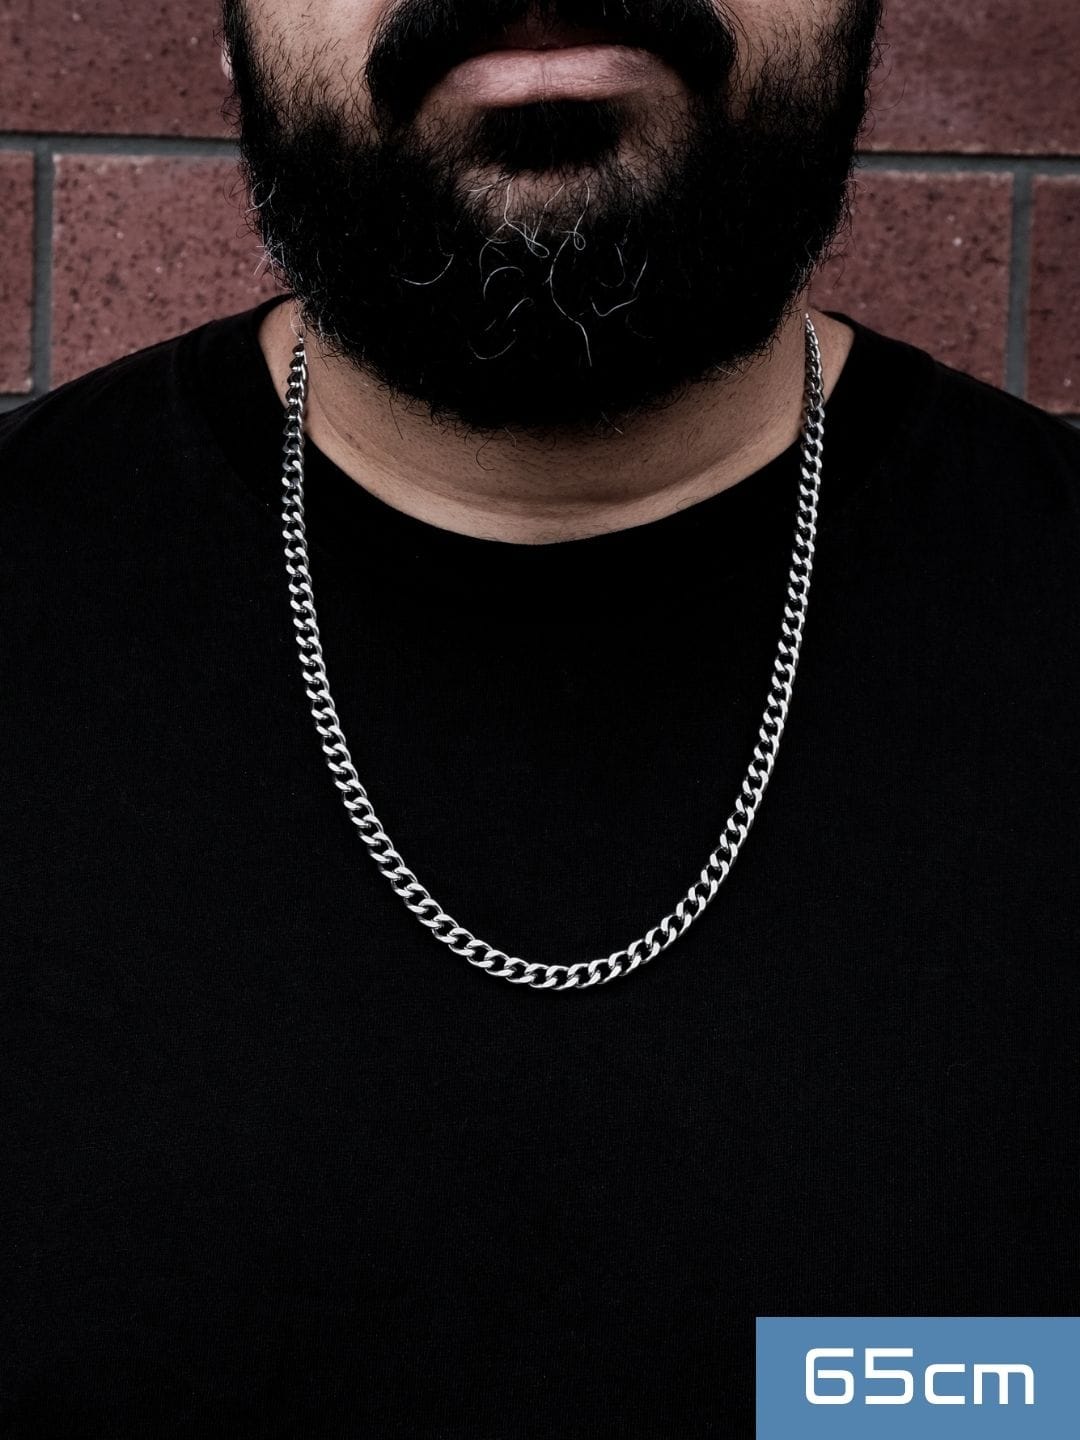
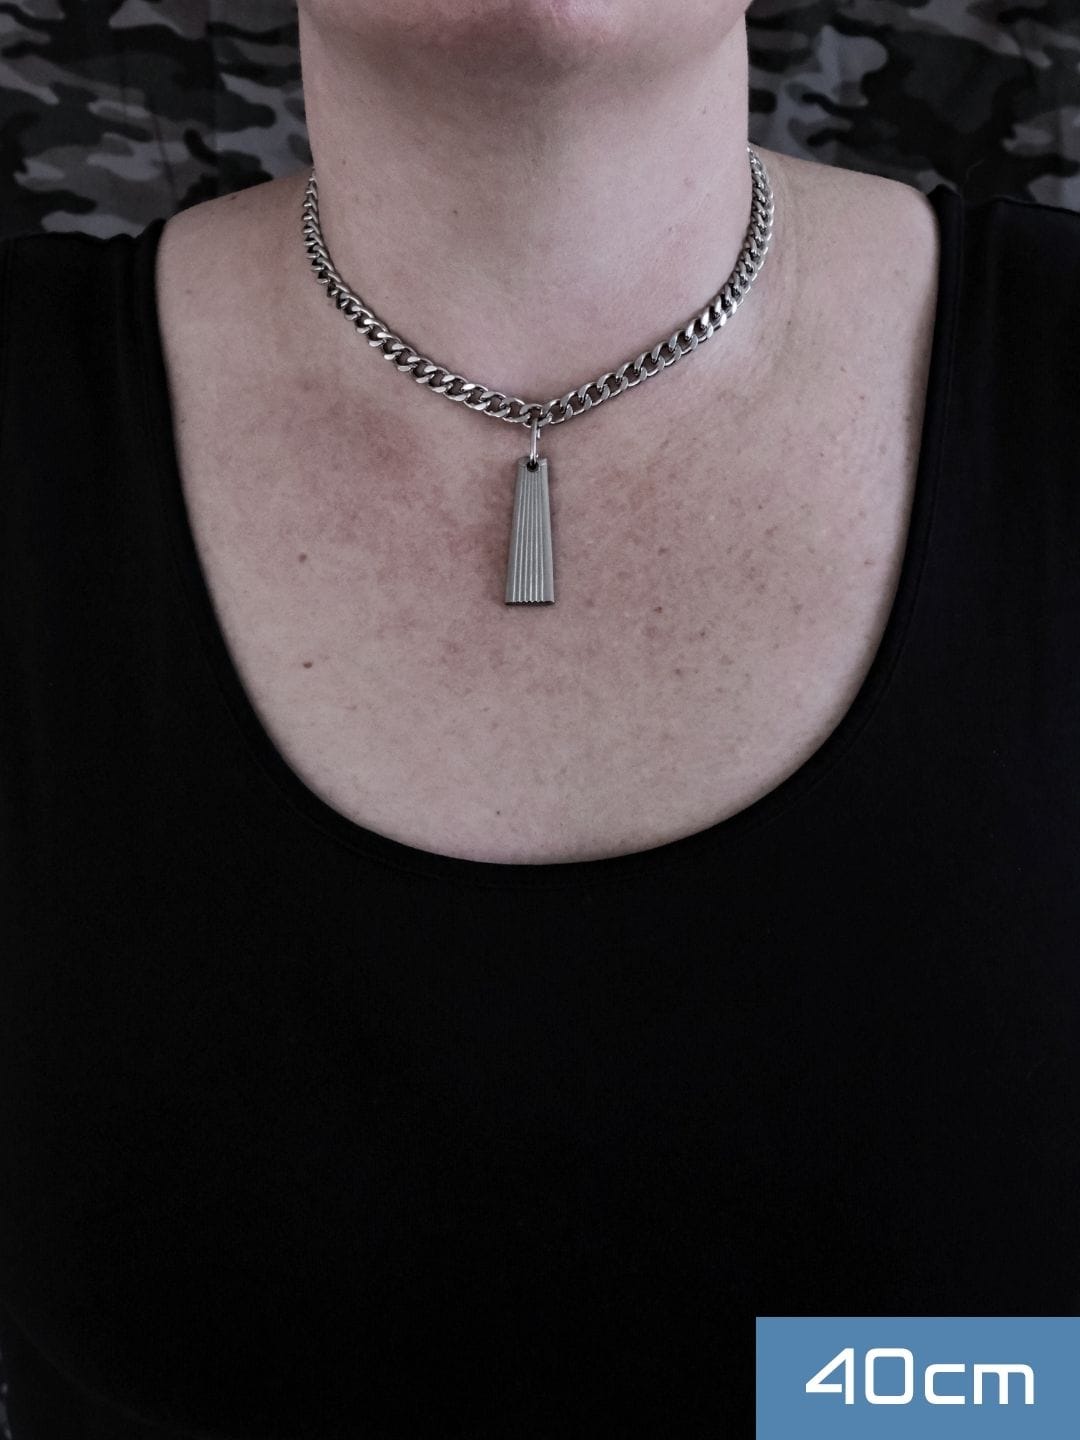
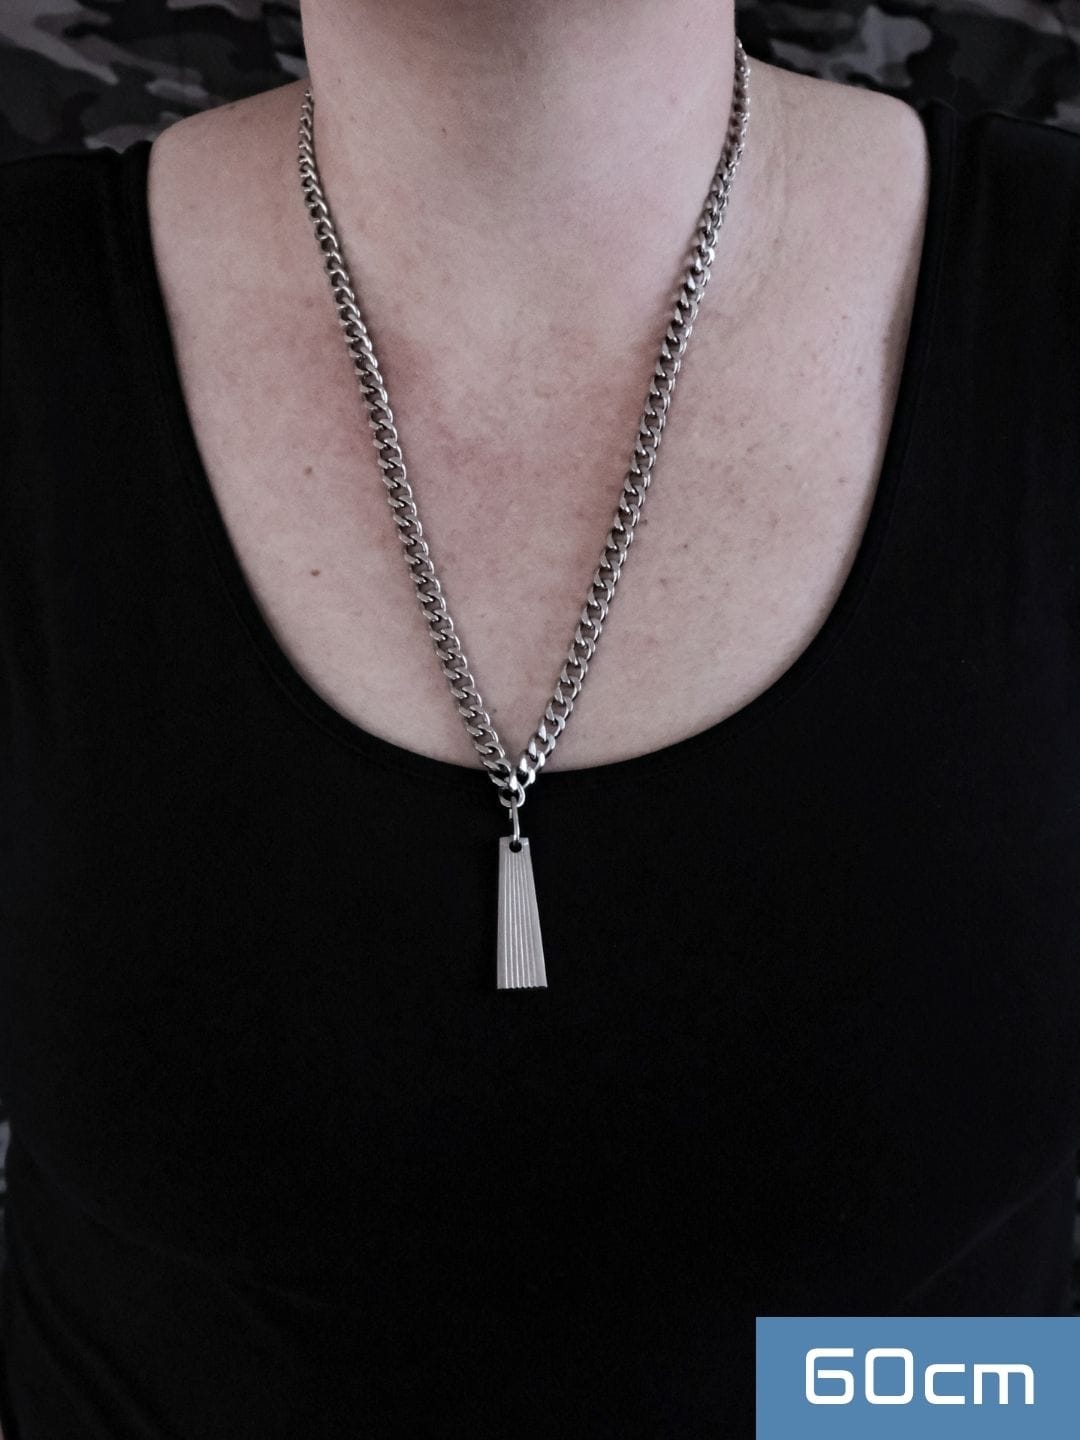
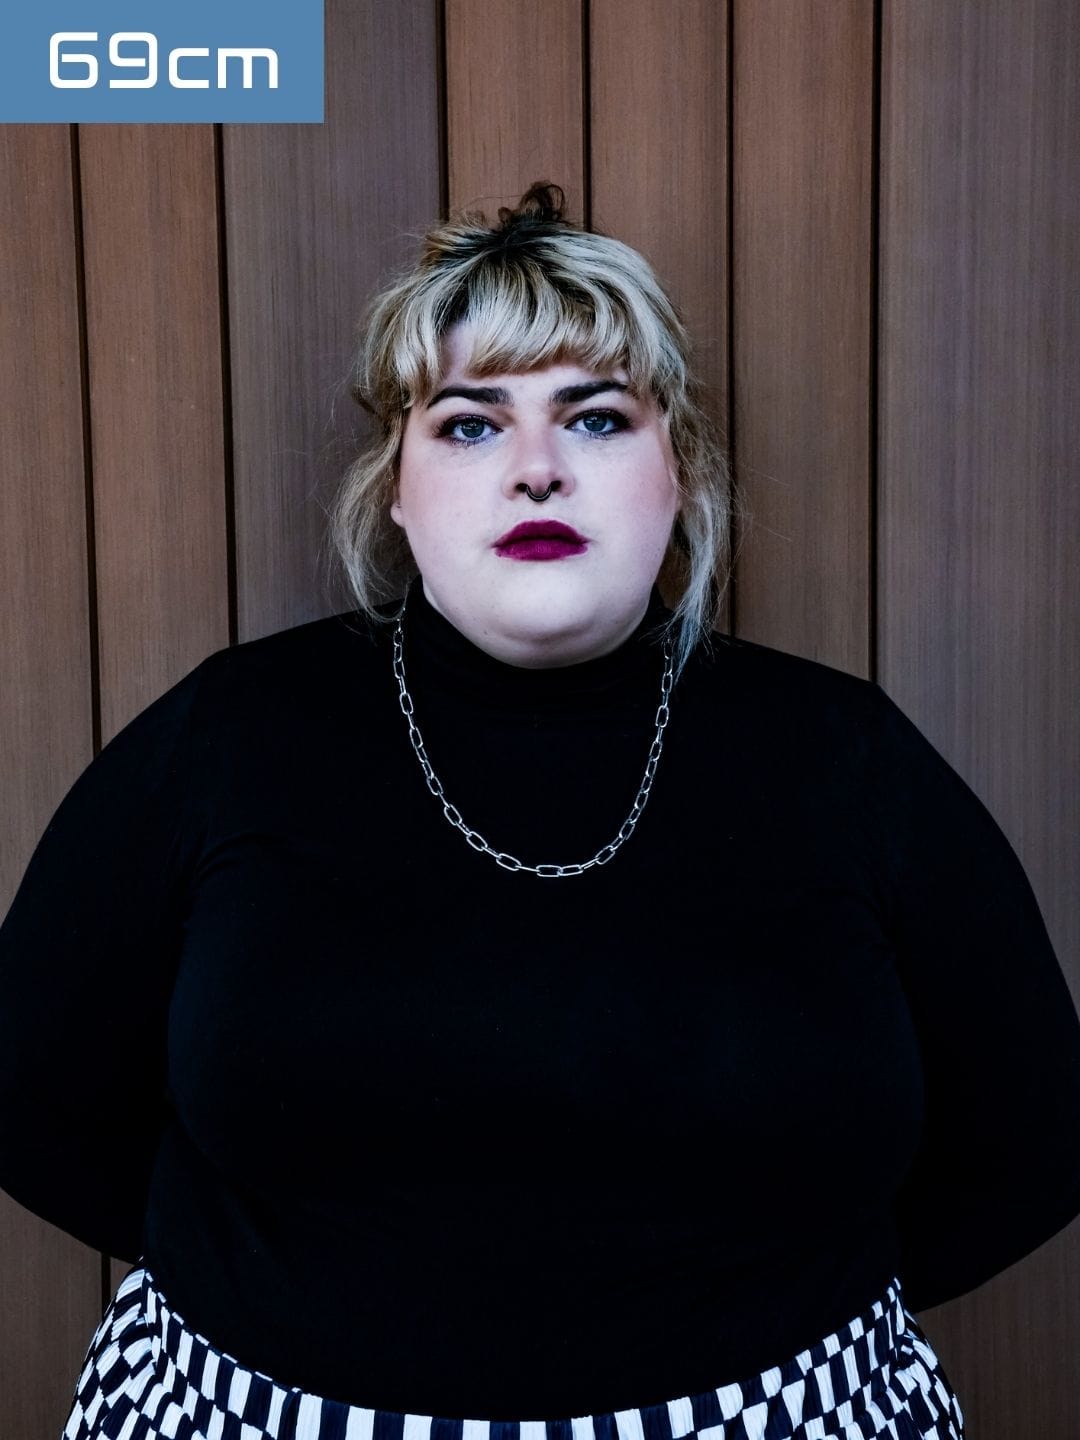
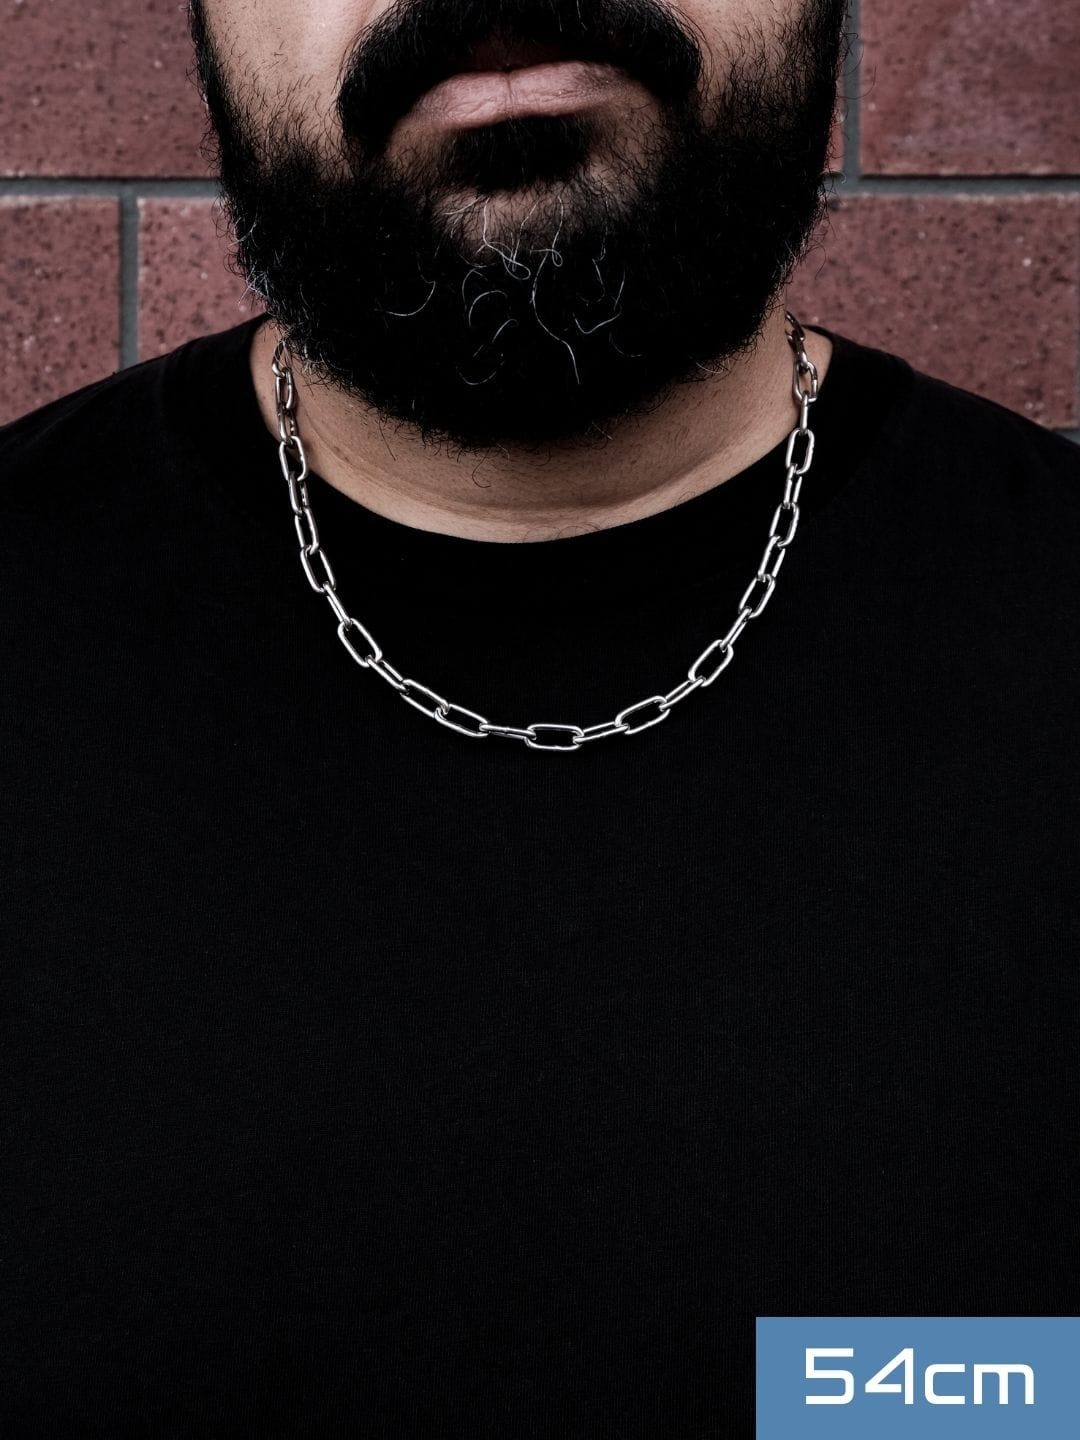
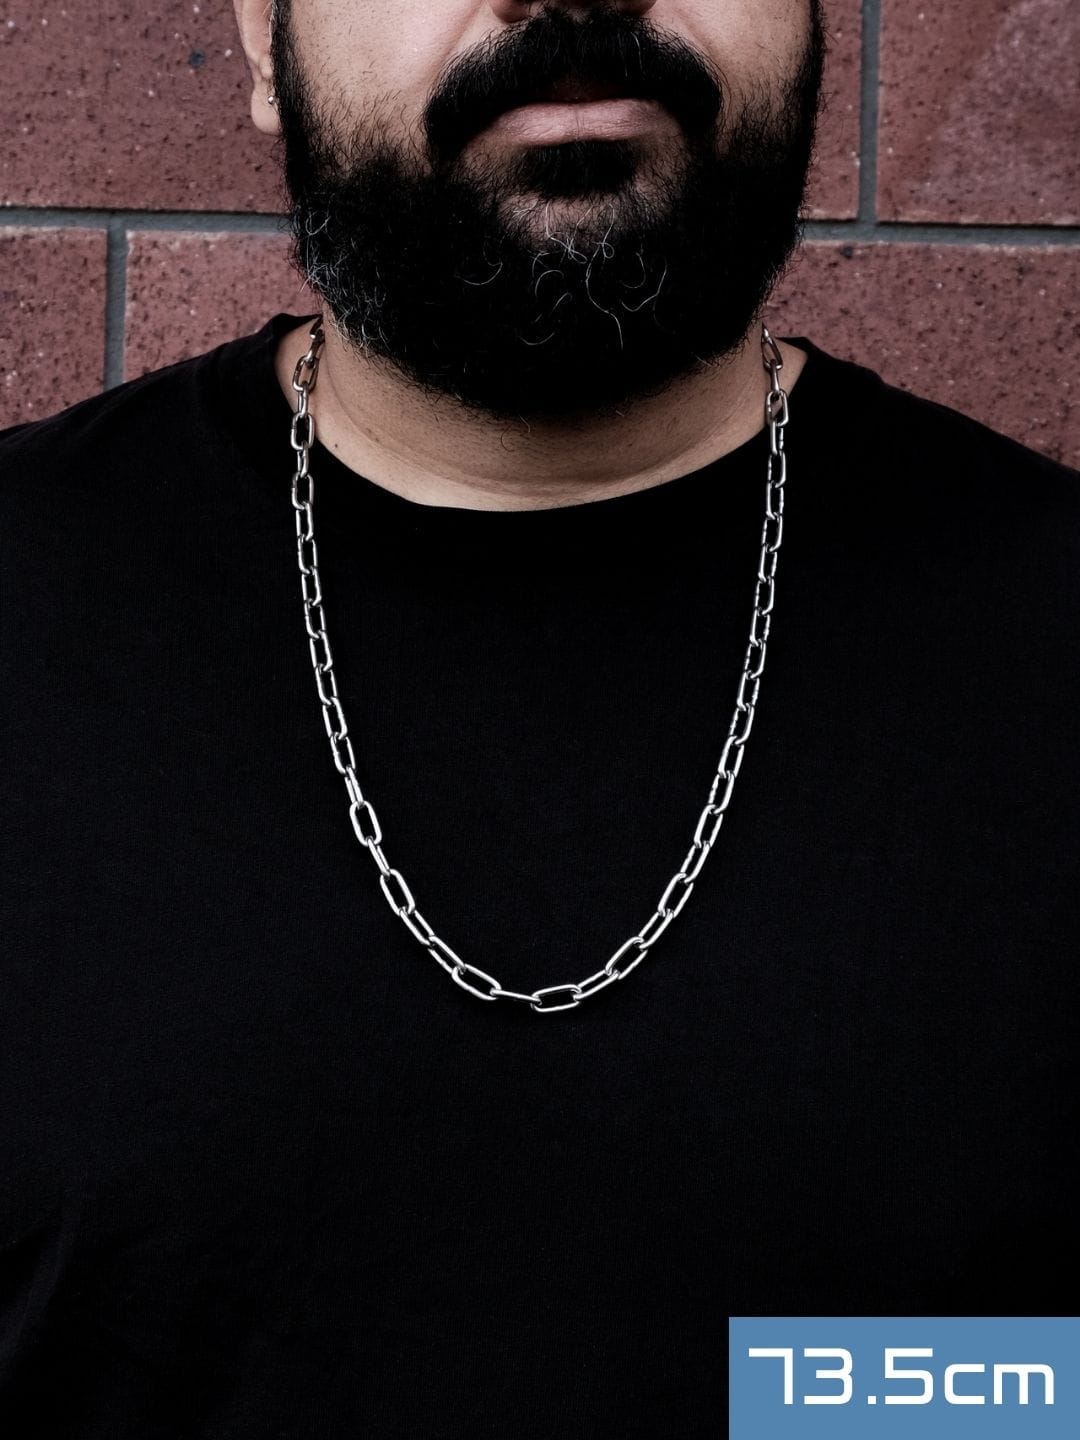
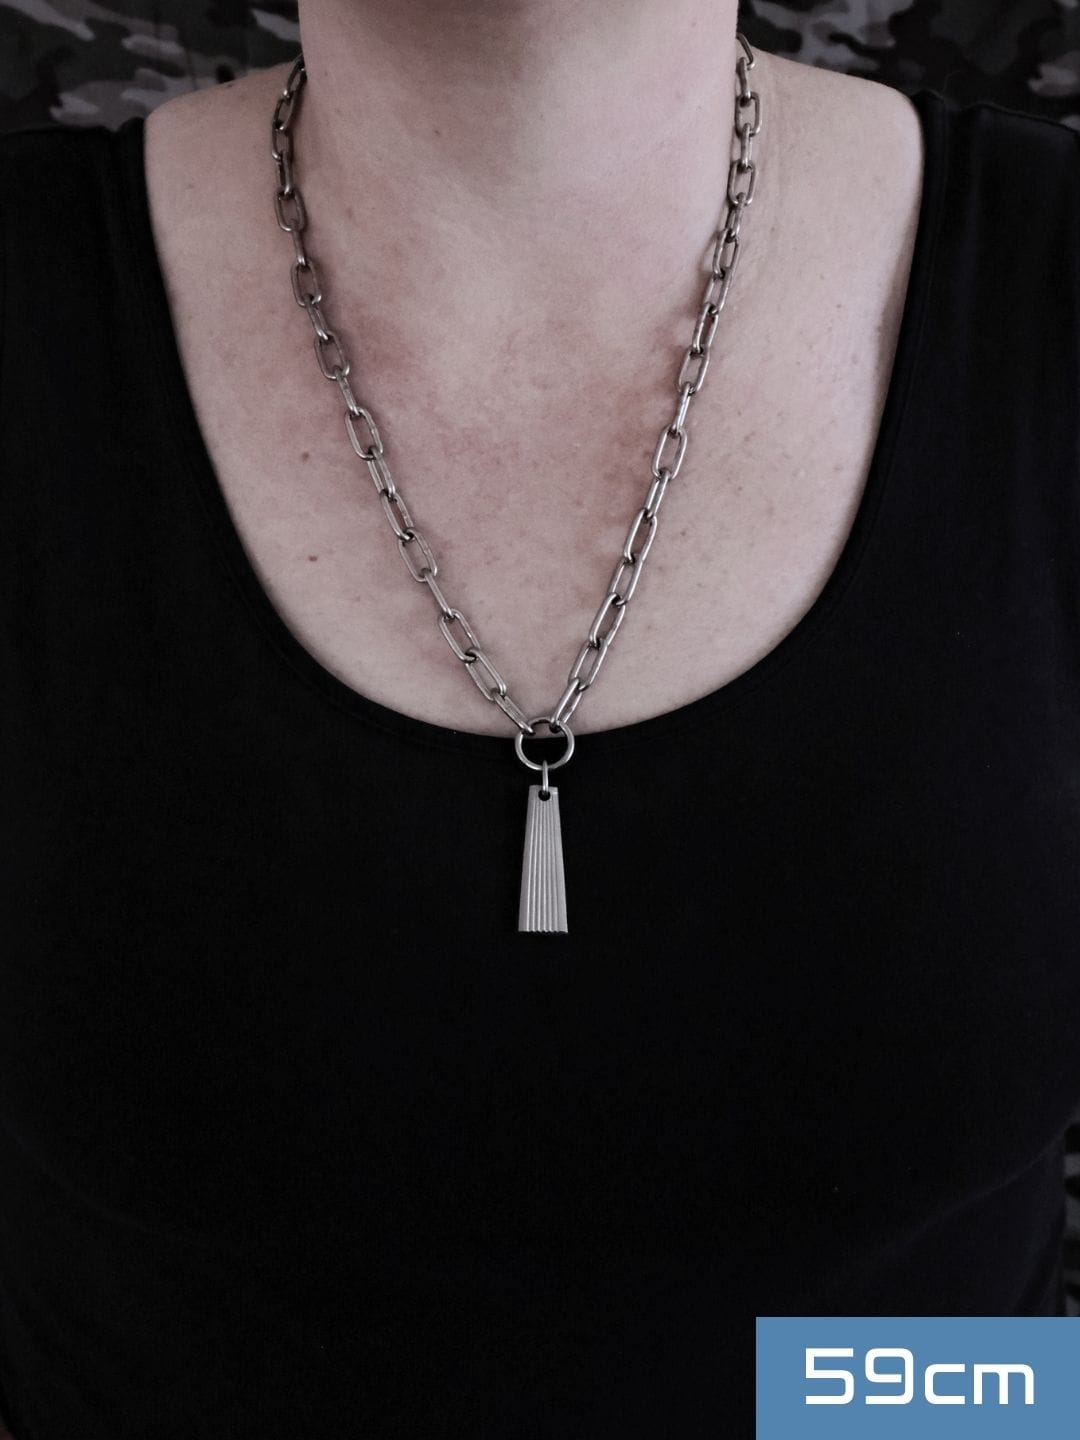
Check out the images below to see how the chain sits on various neck sizes. Keep in mind that if a pendant is added, it pulls down the chain by approx 1.5-2cm.

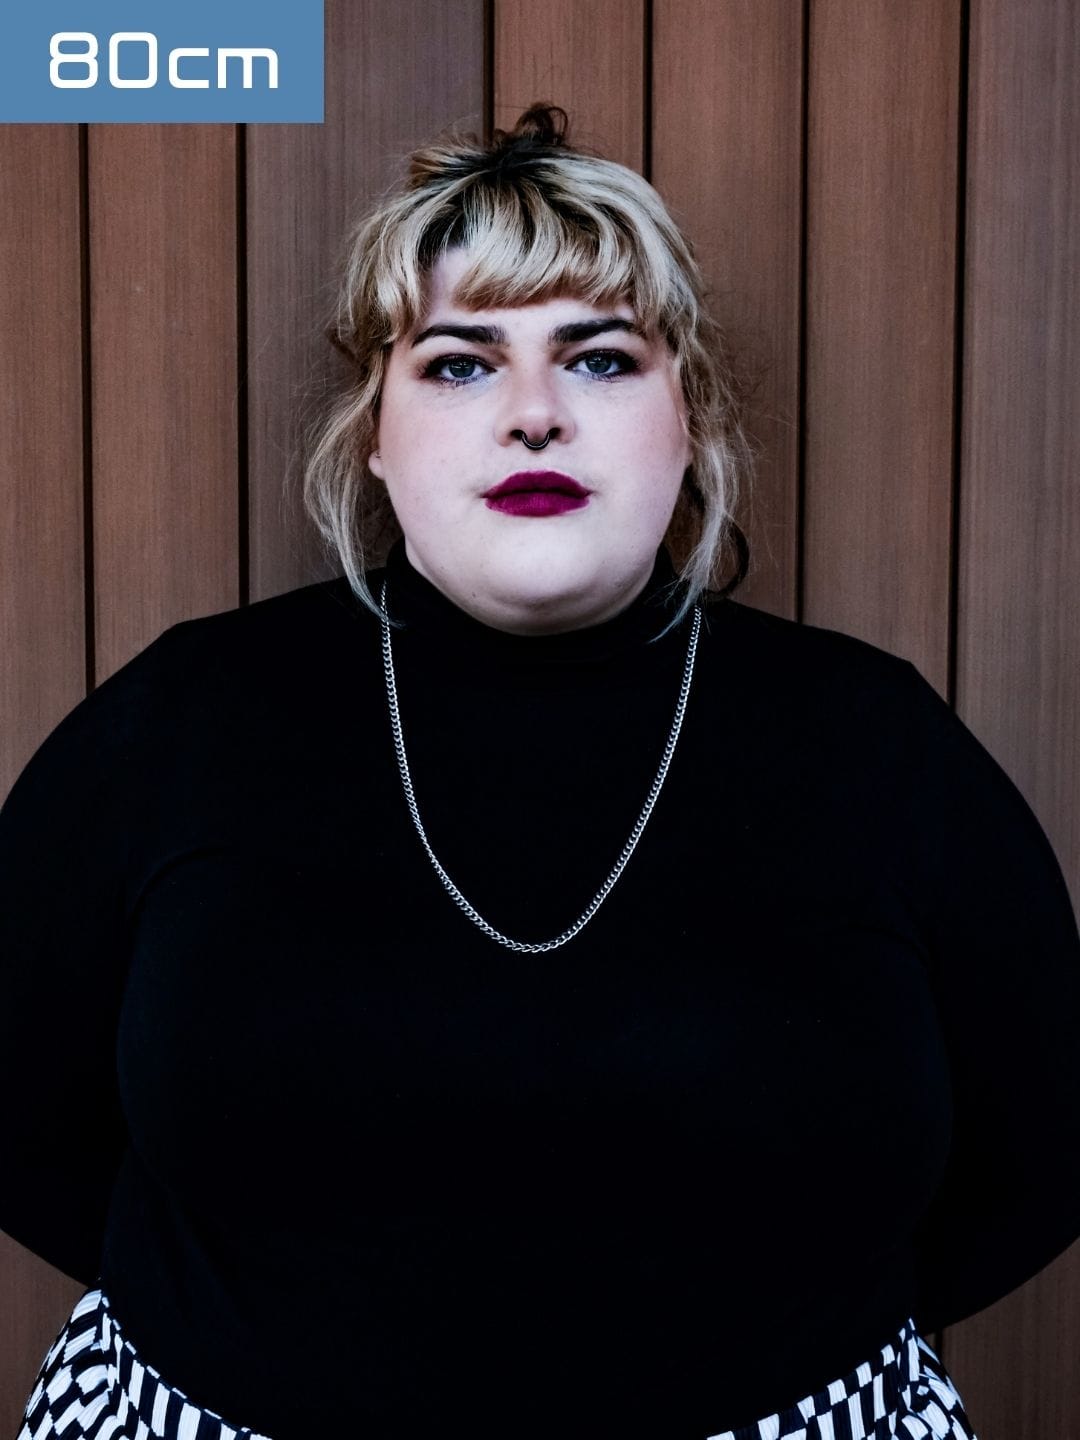
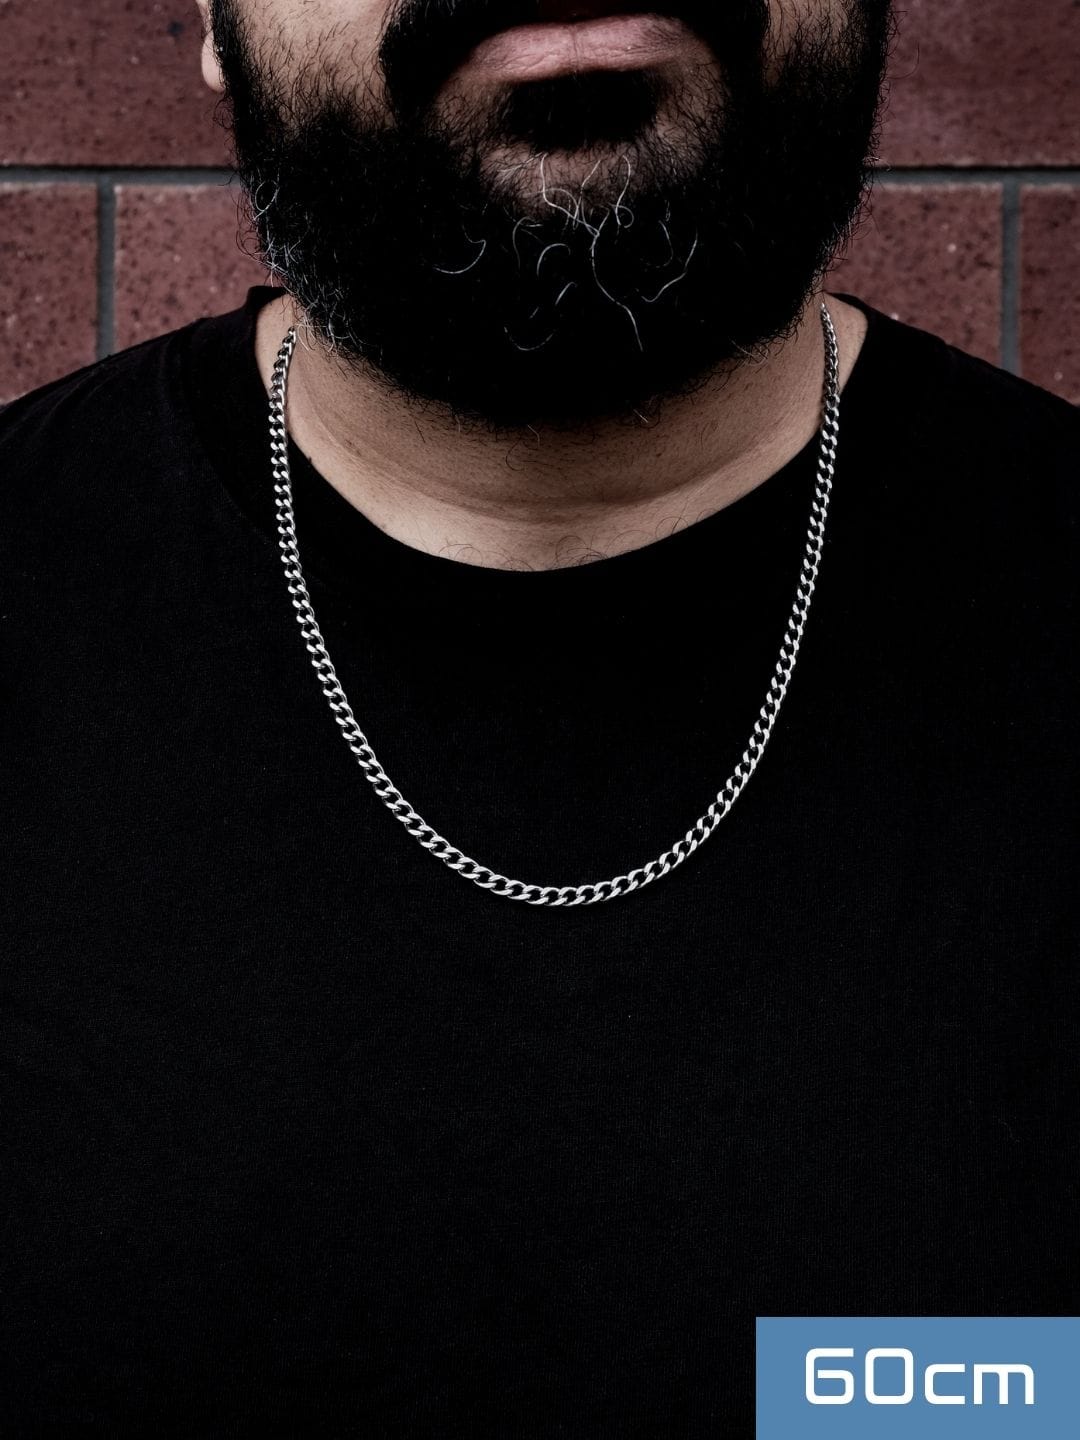

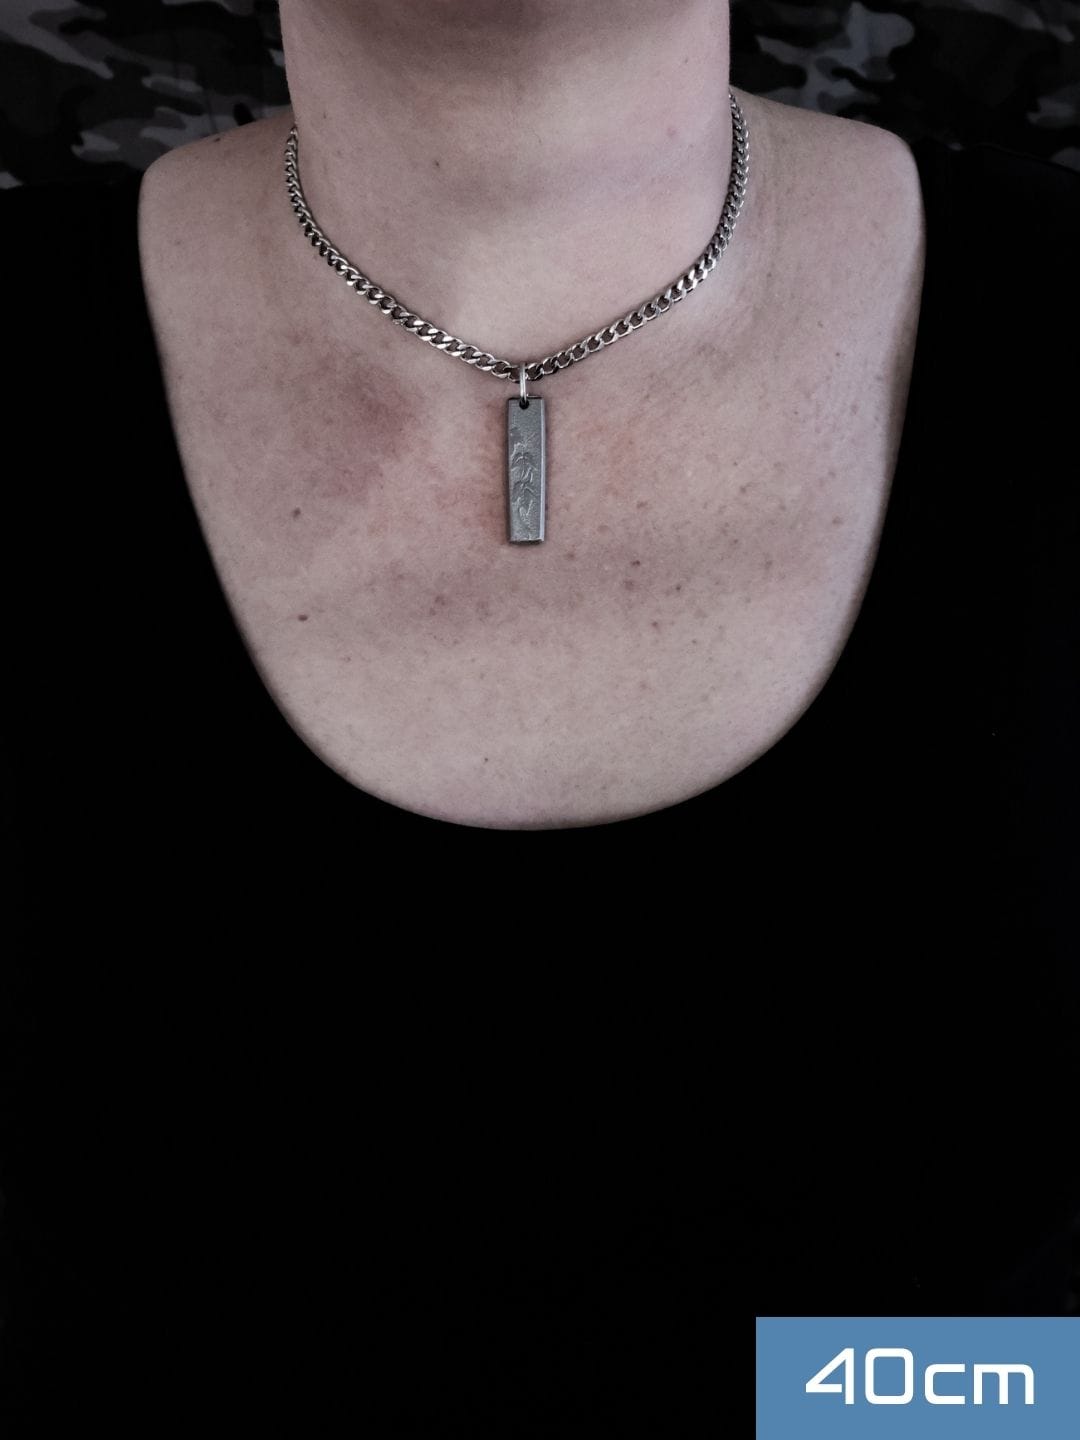

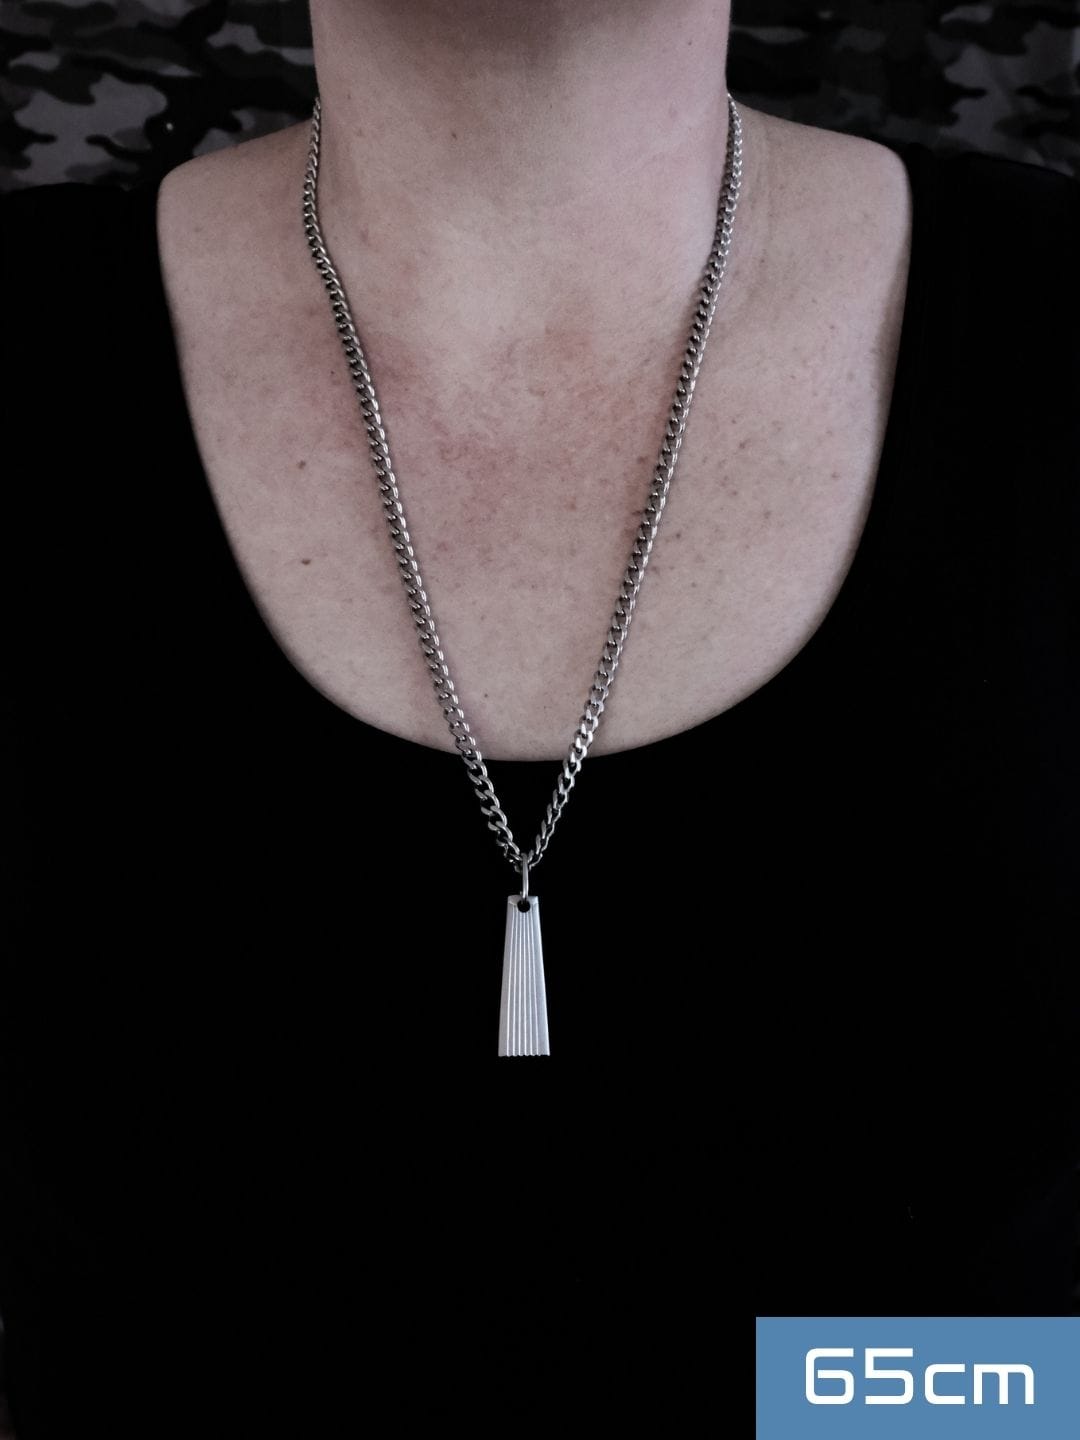
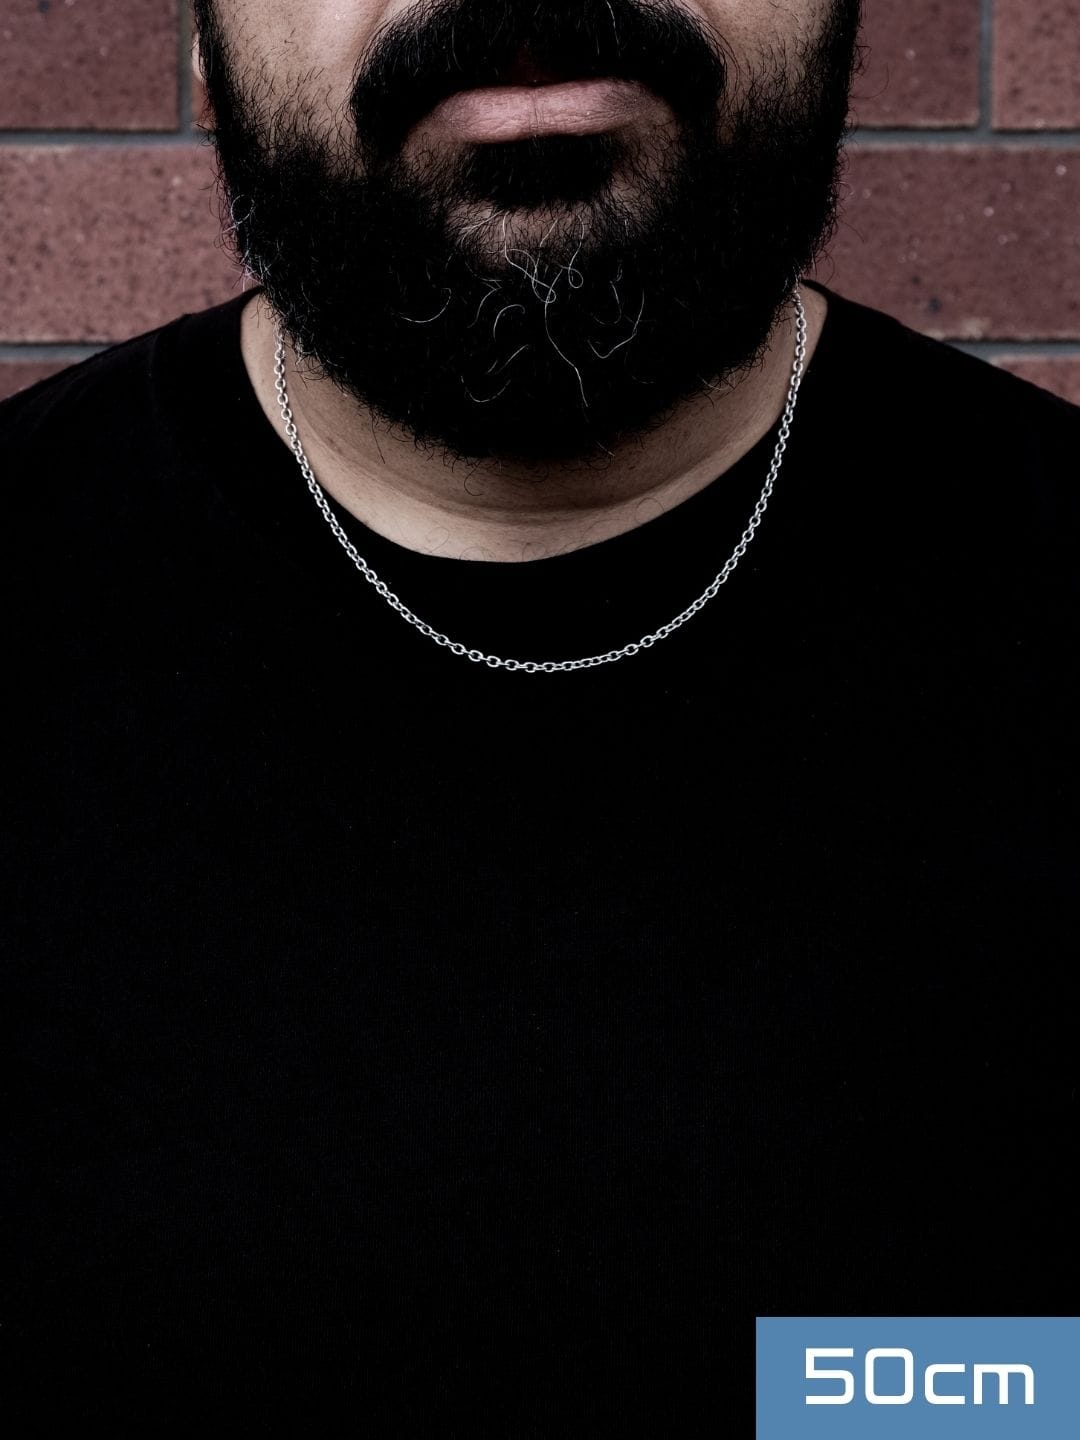
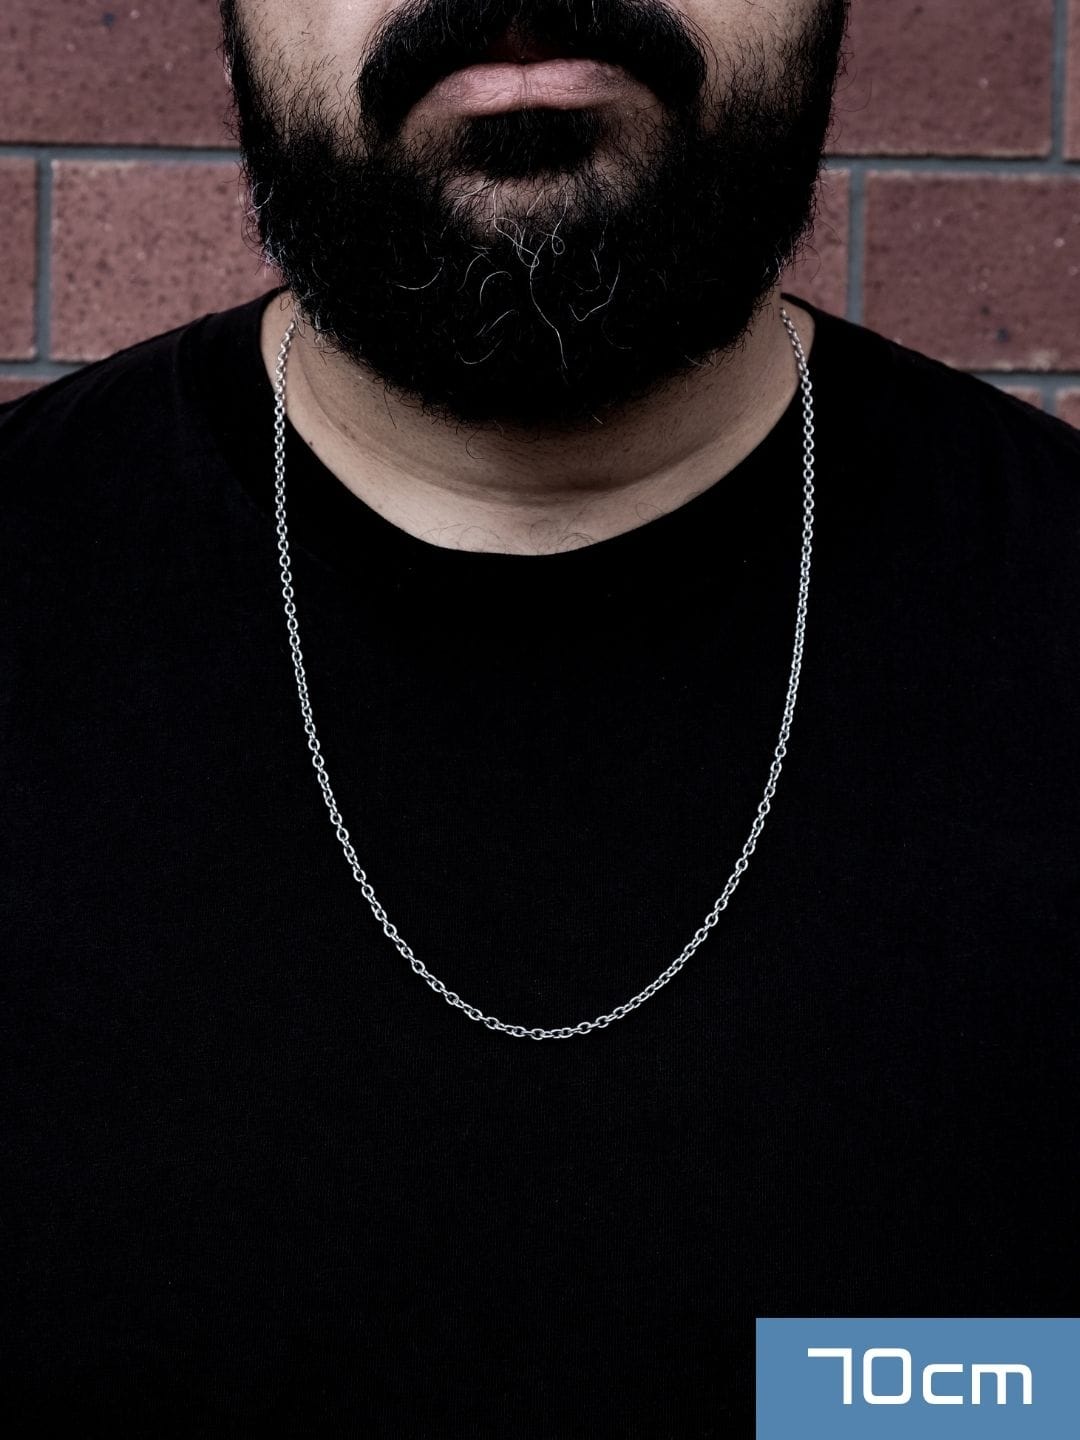
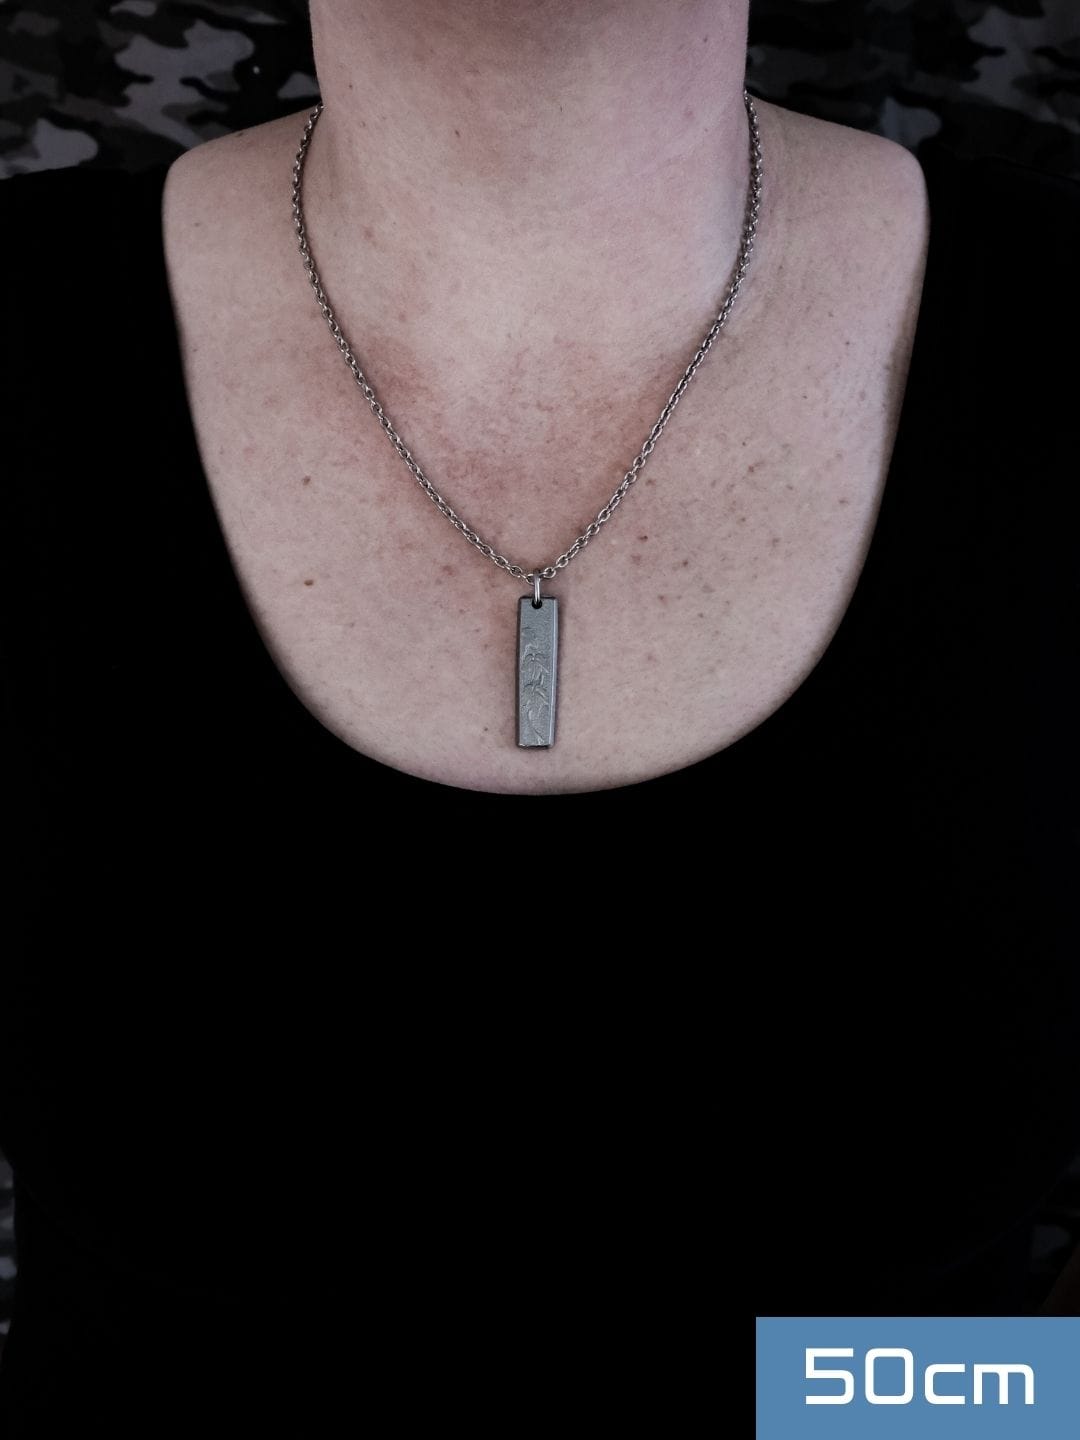
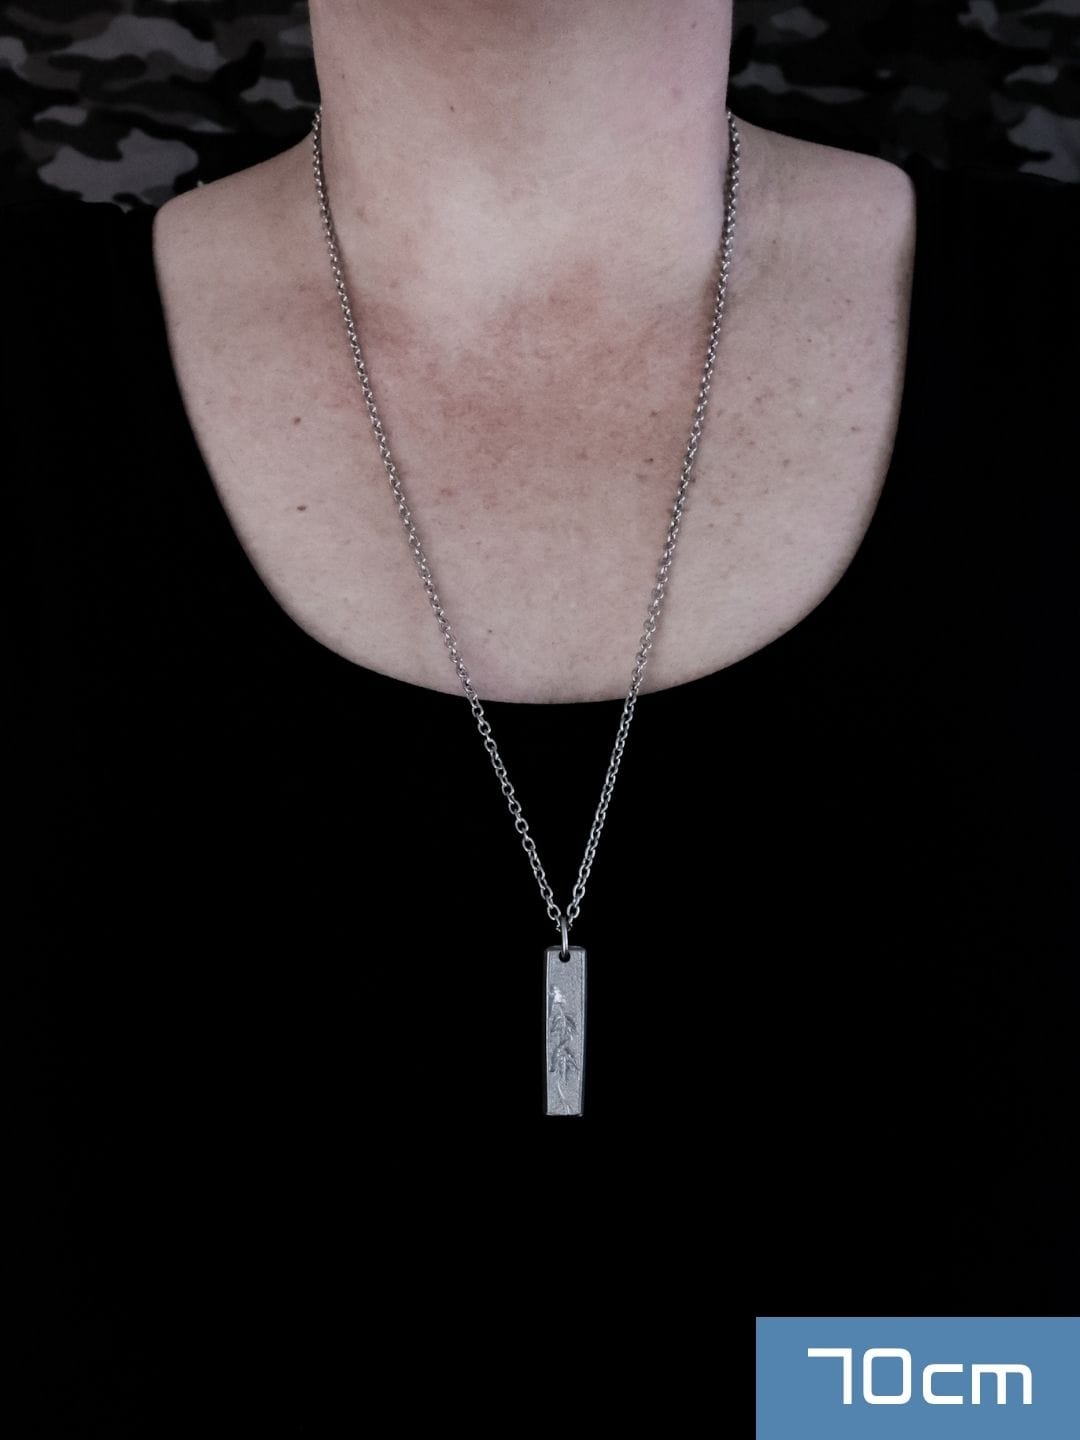
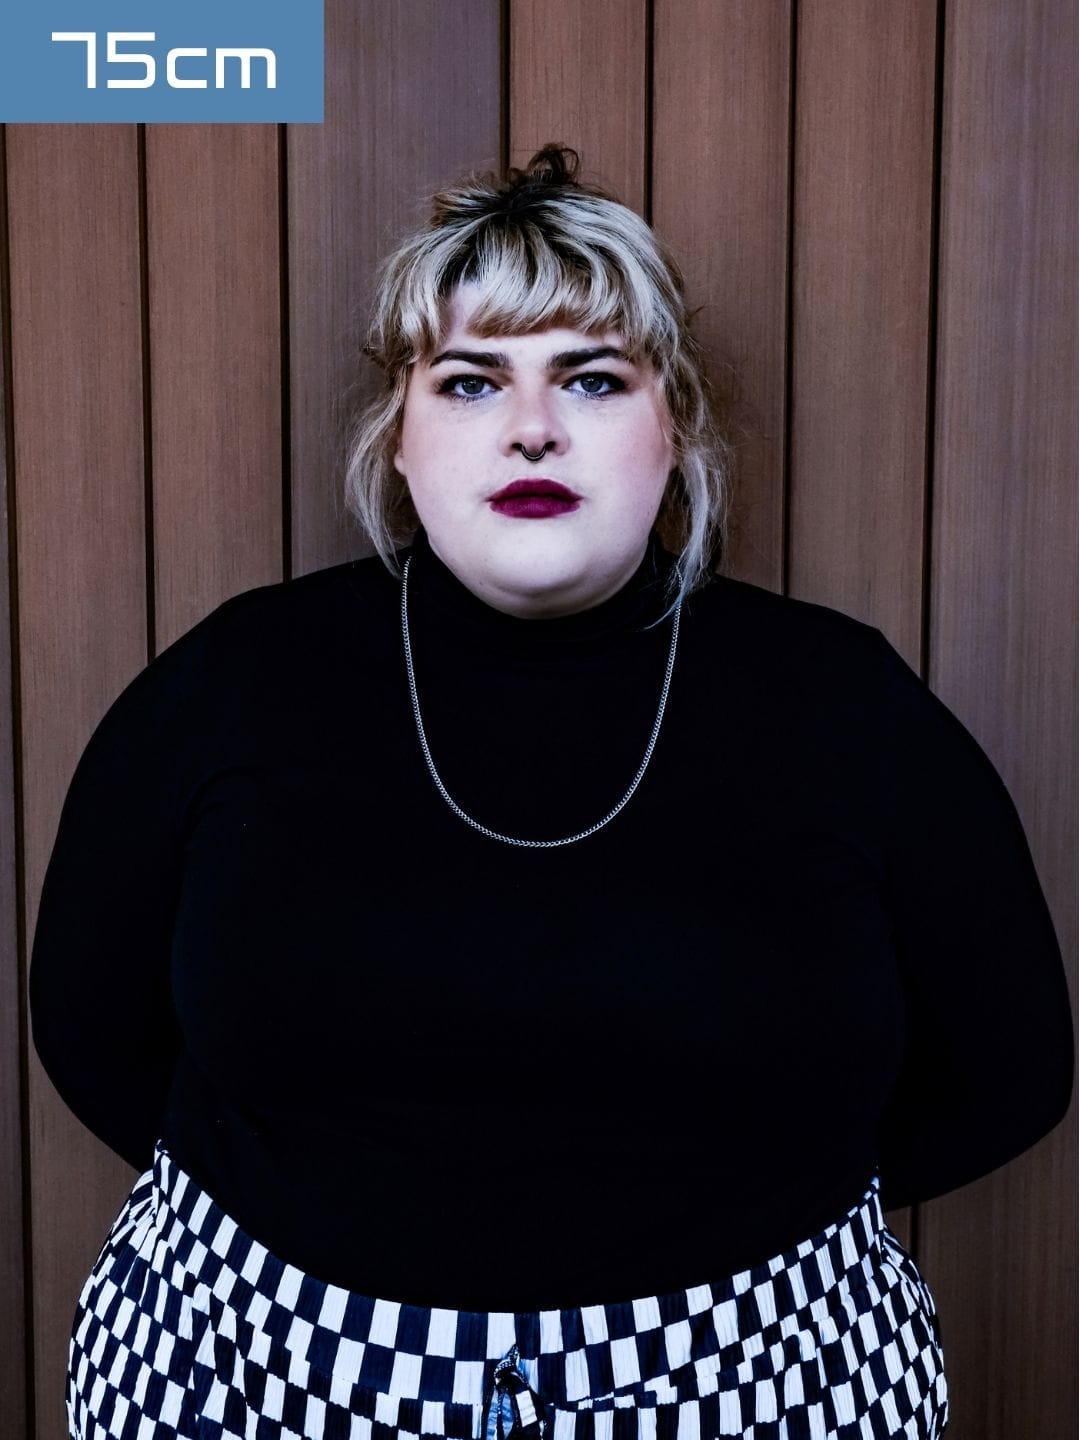
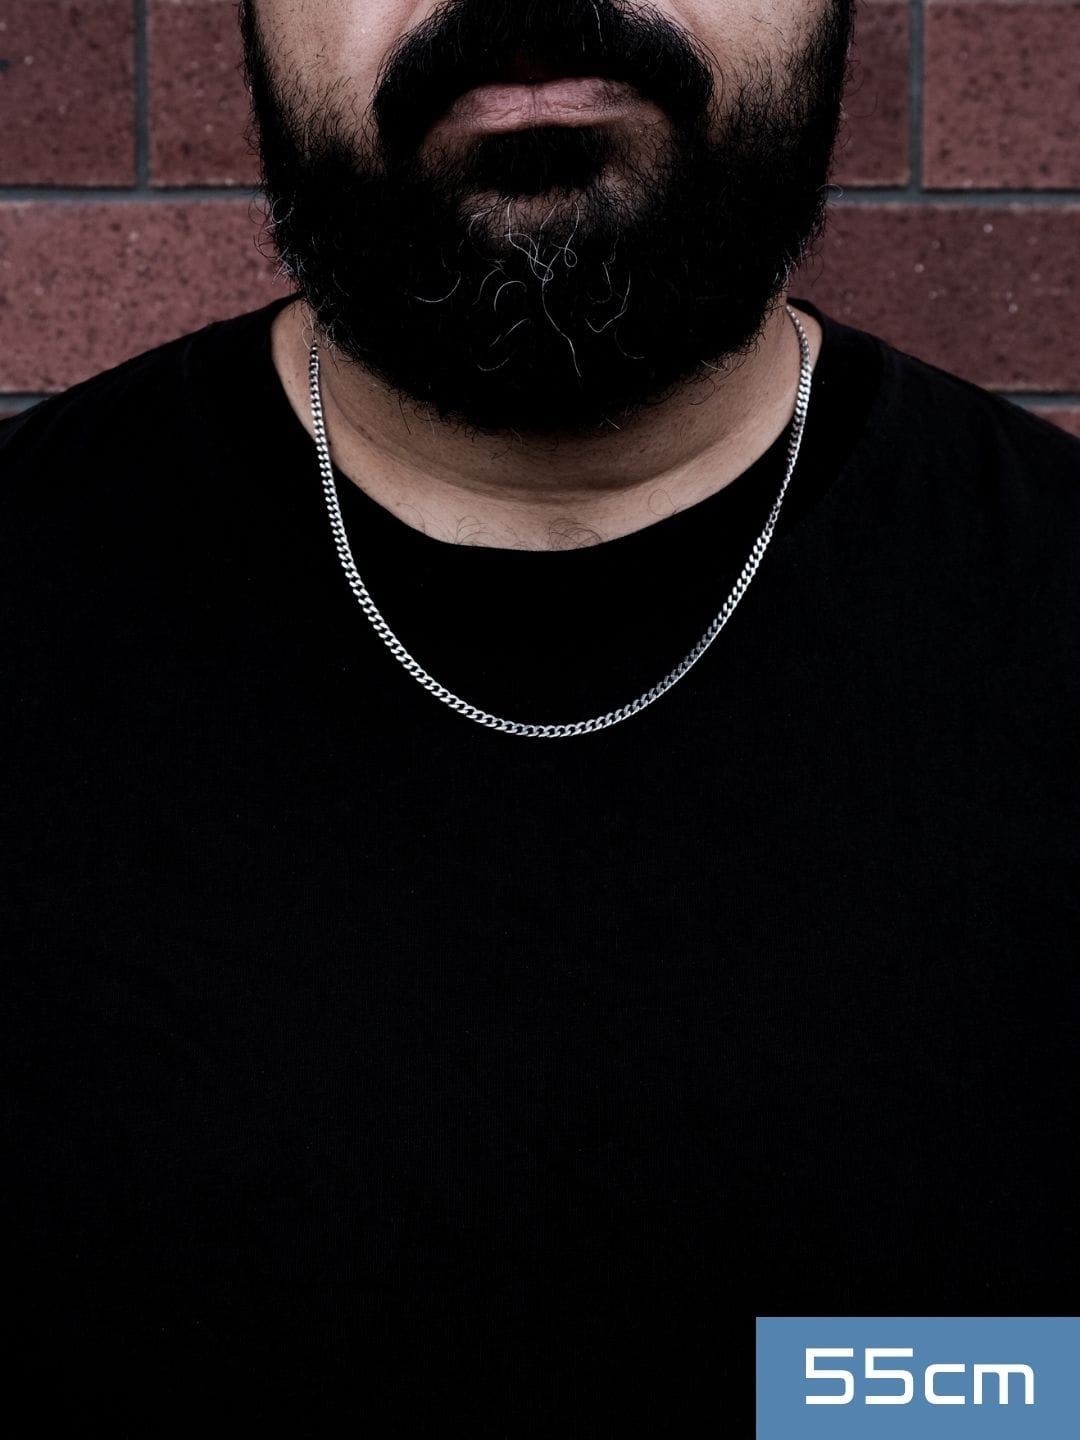
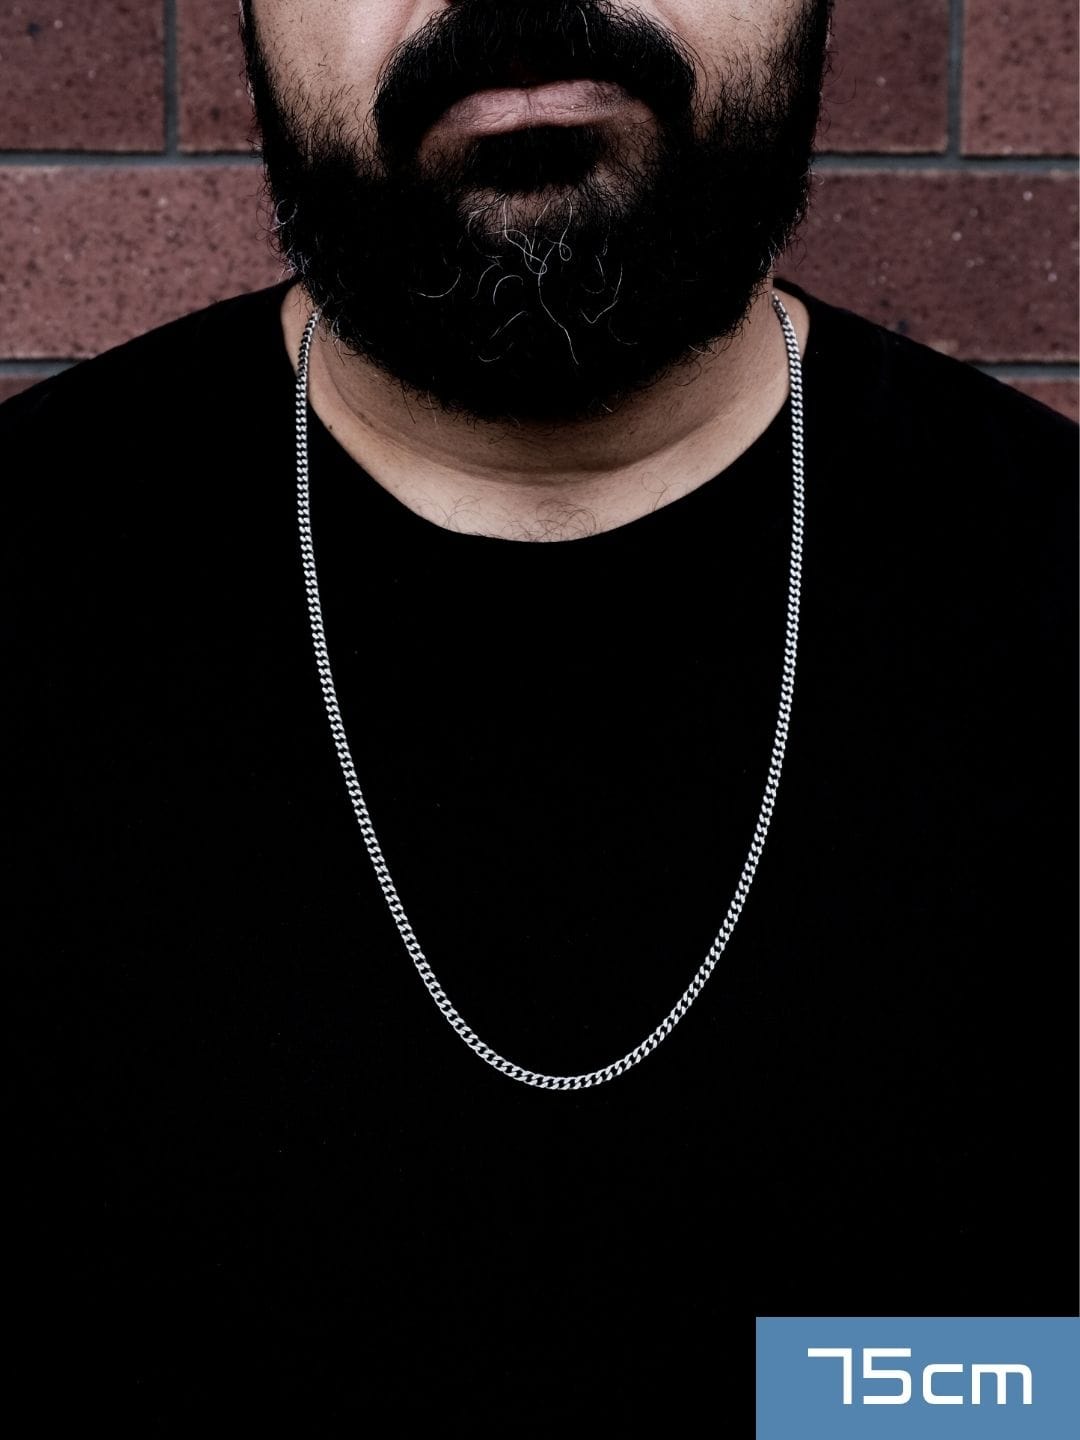
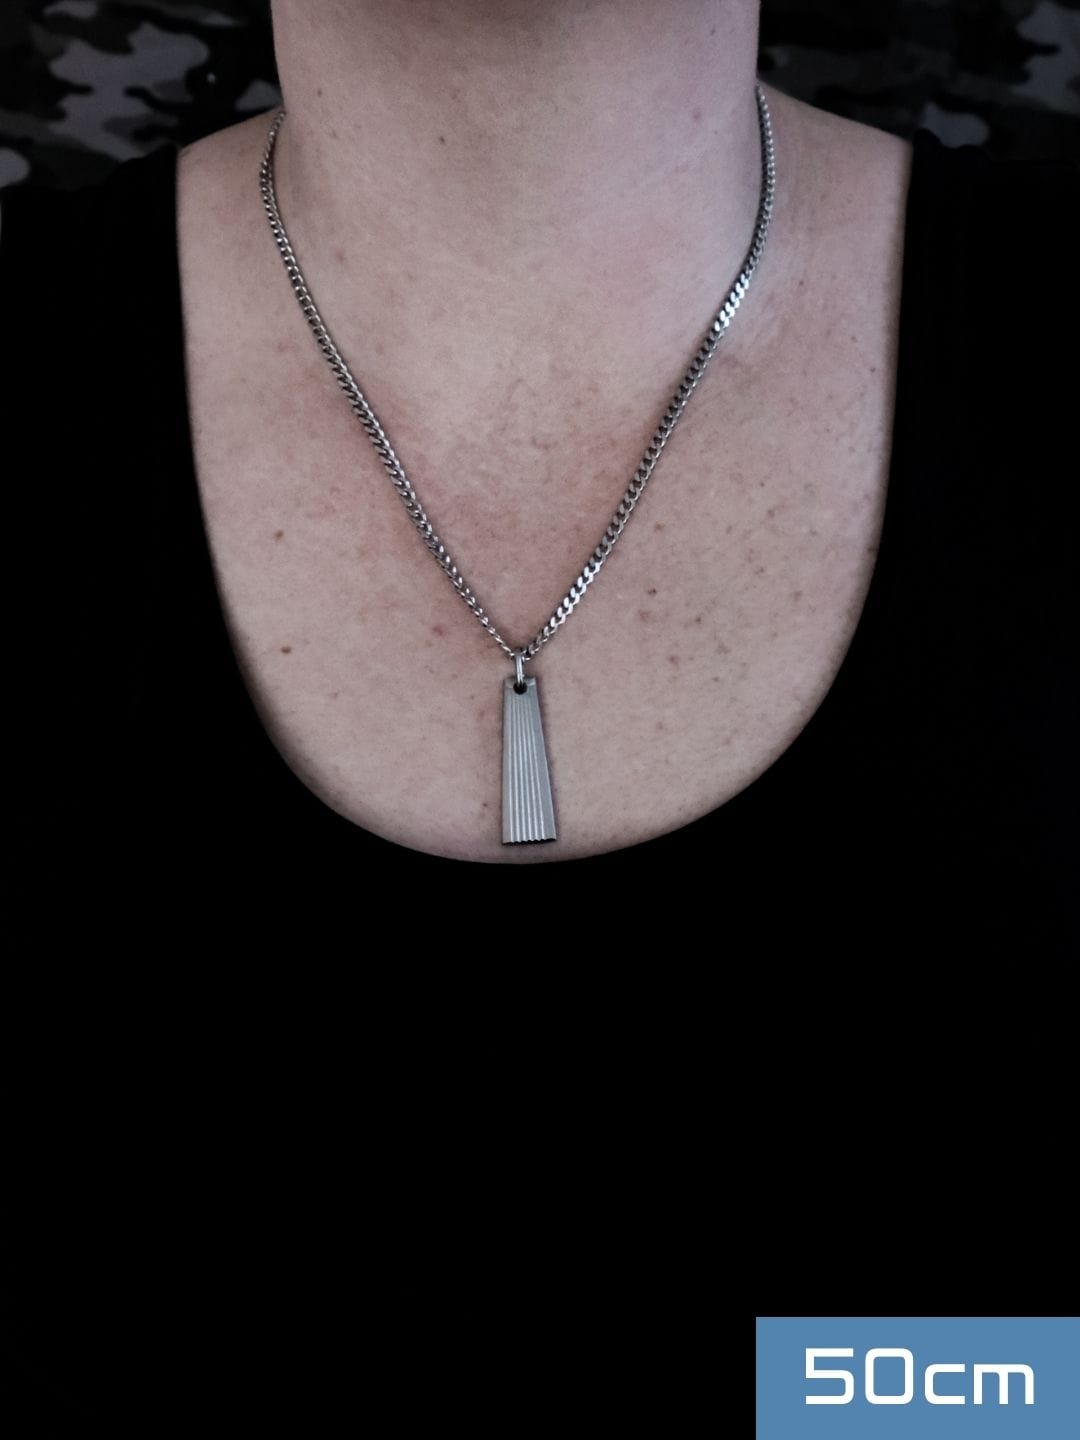
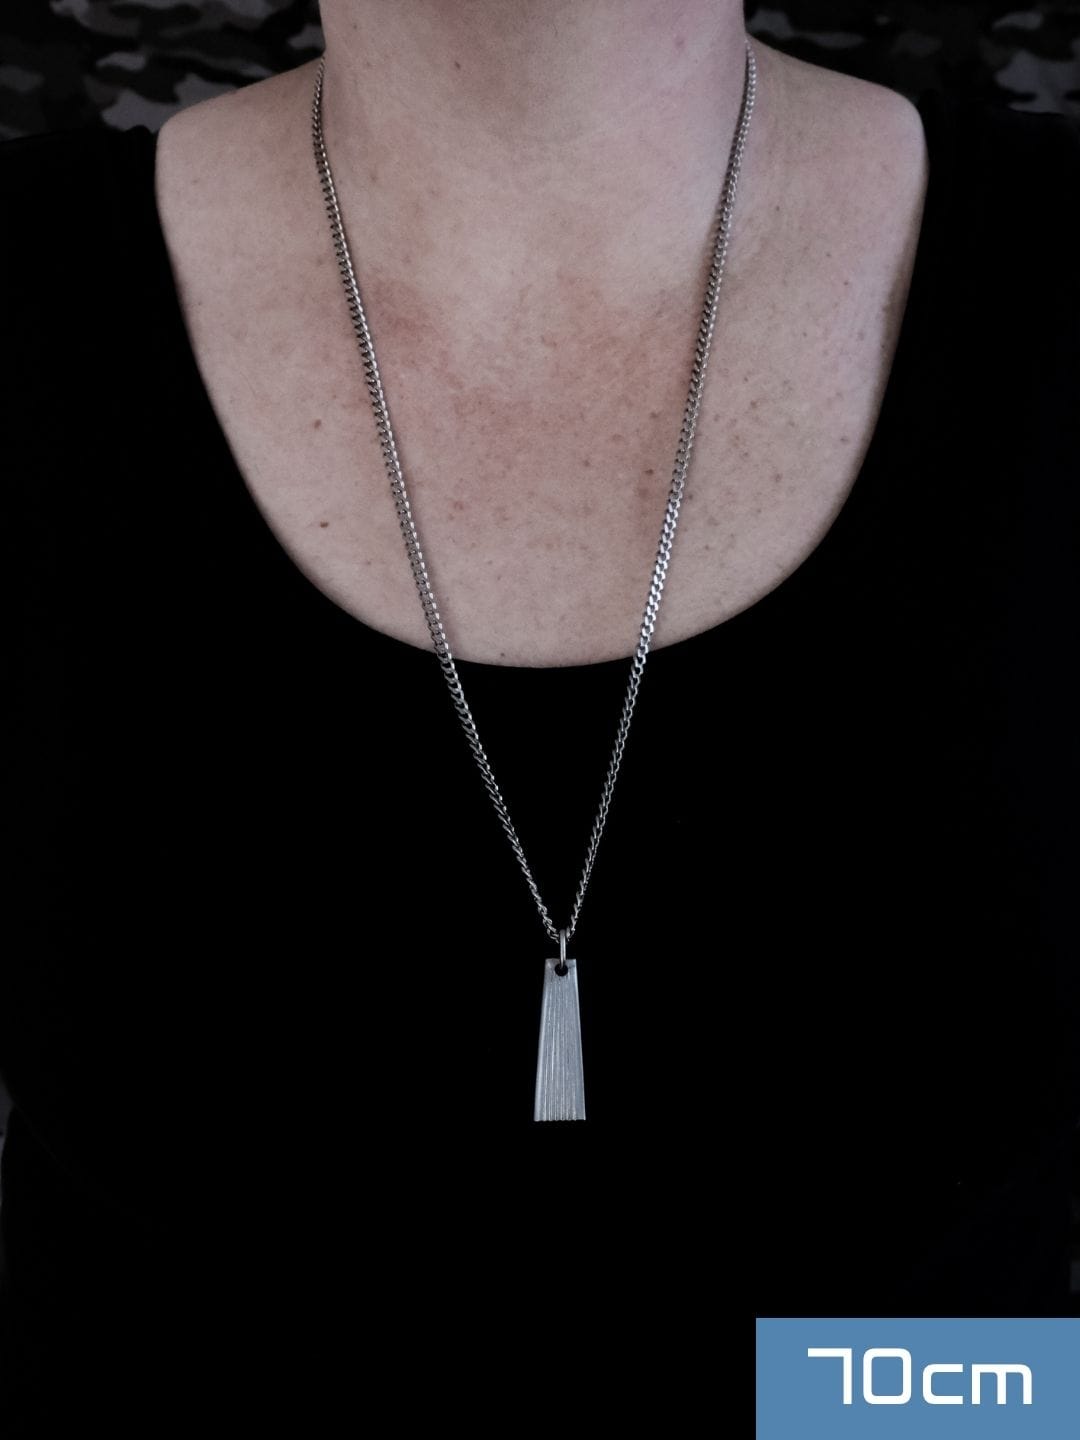
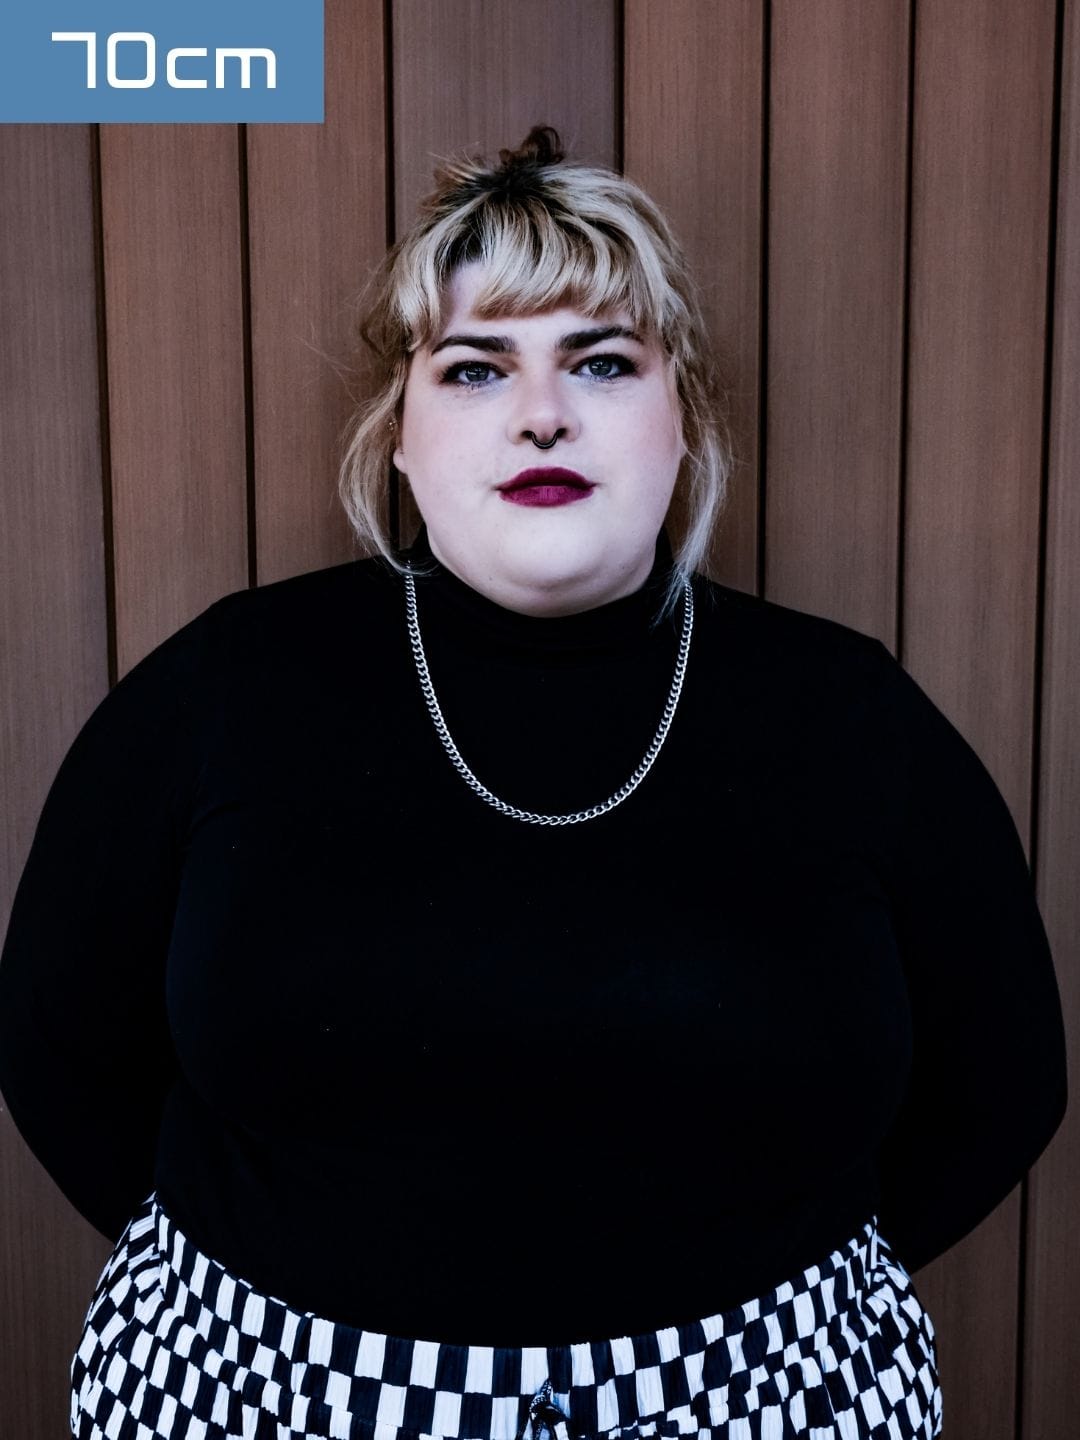
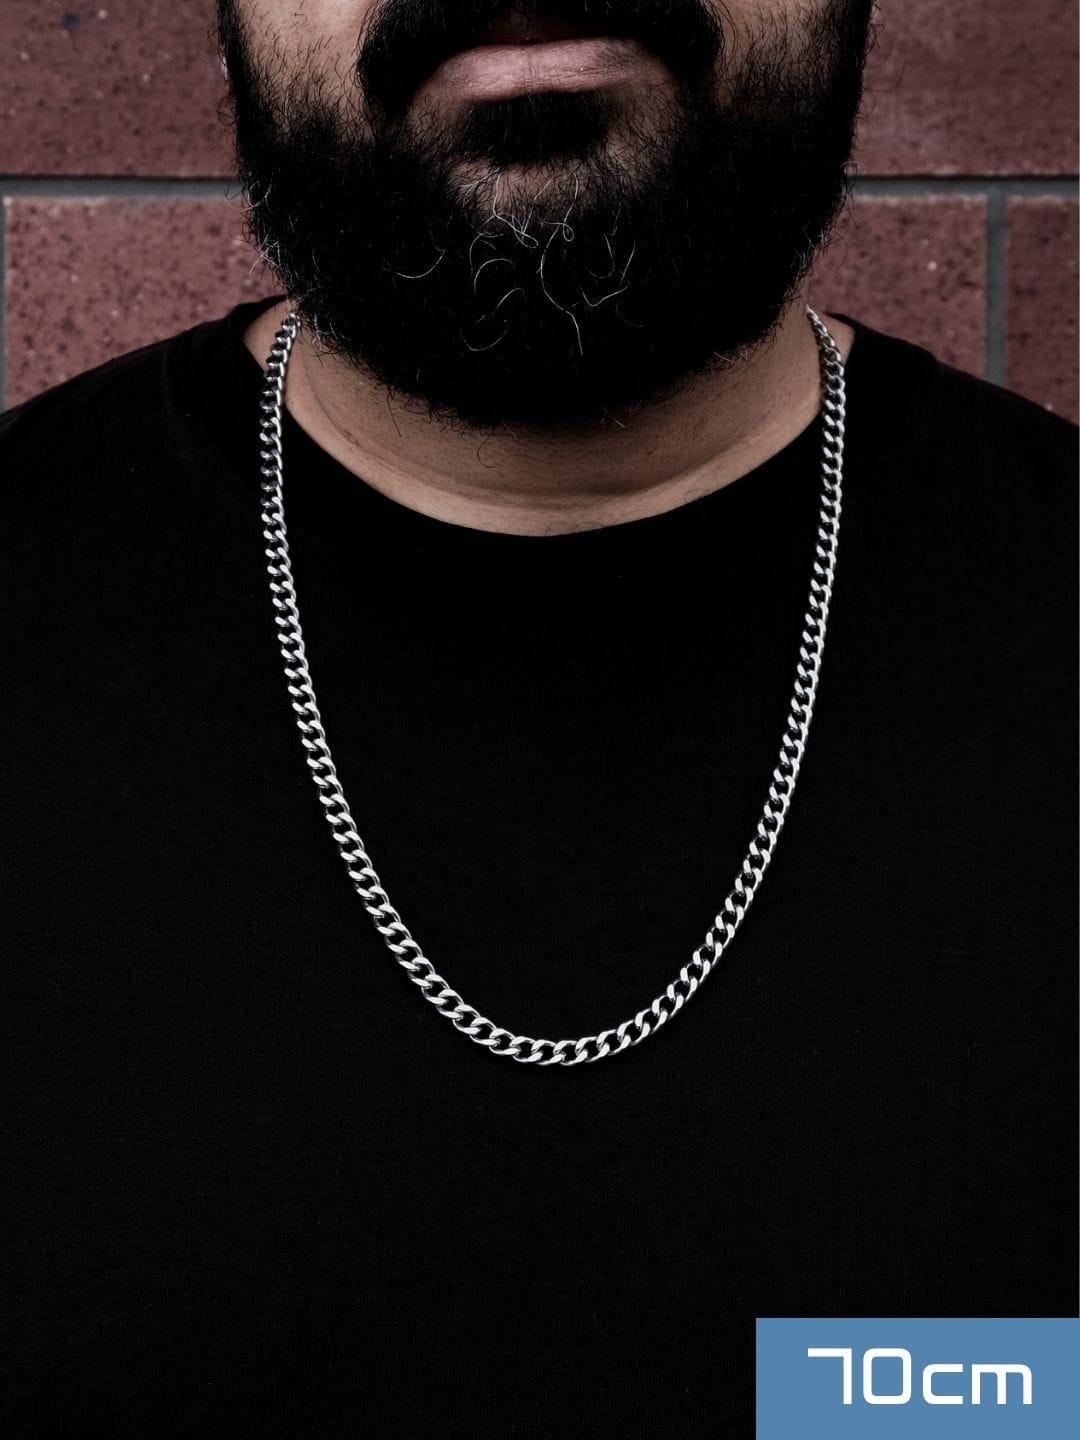
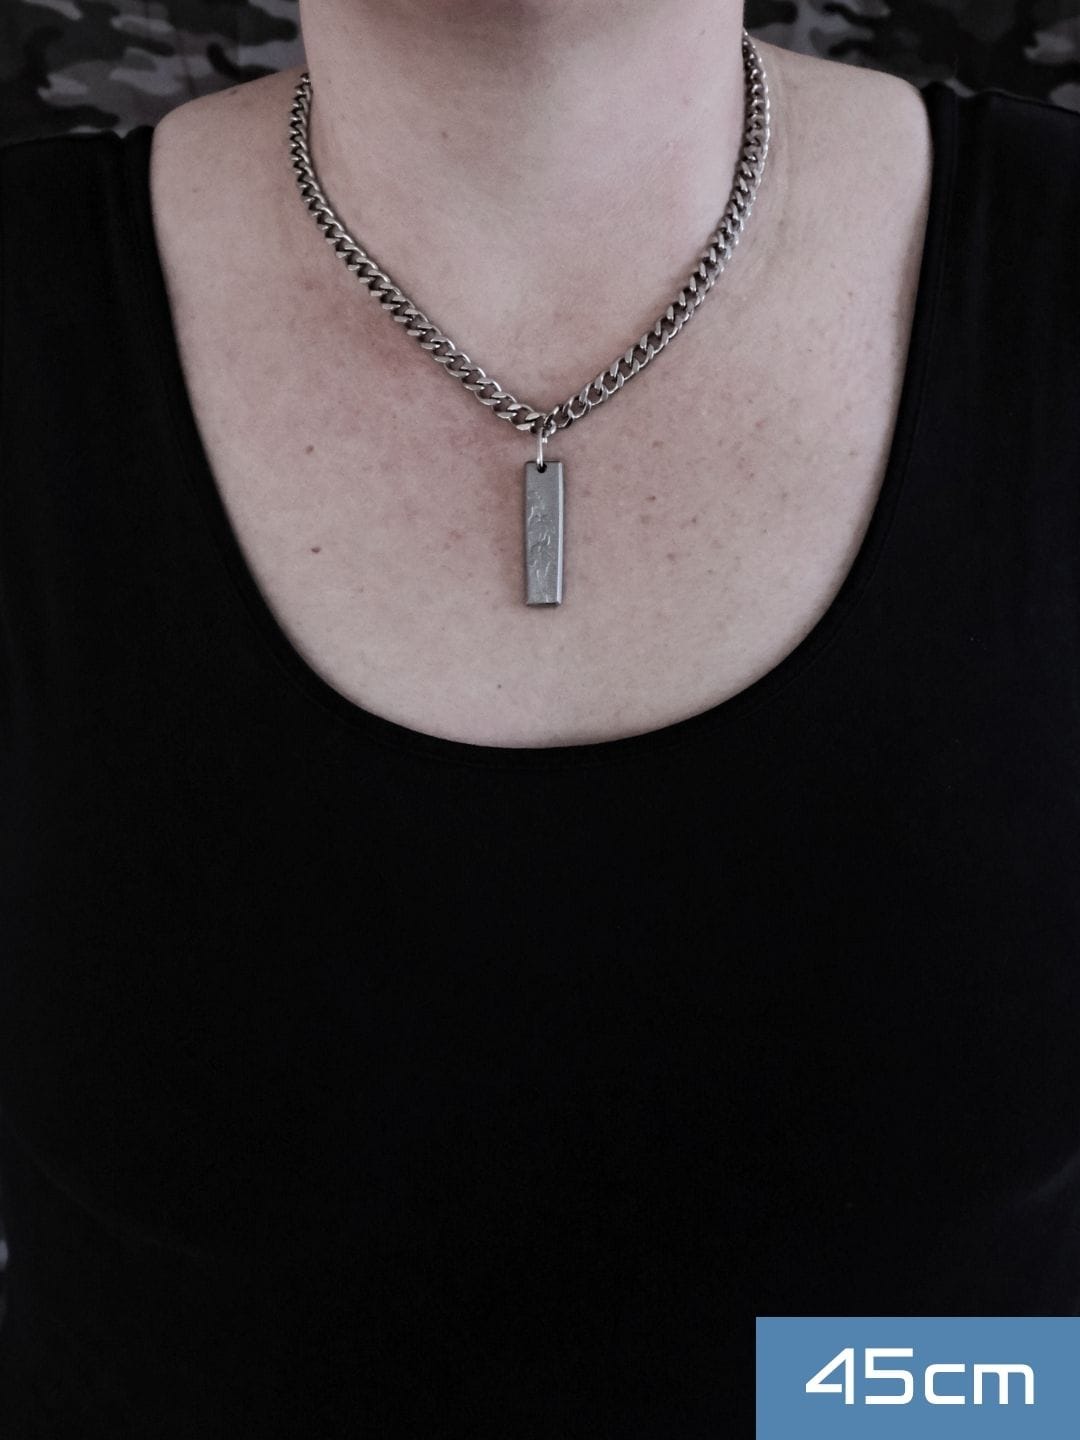
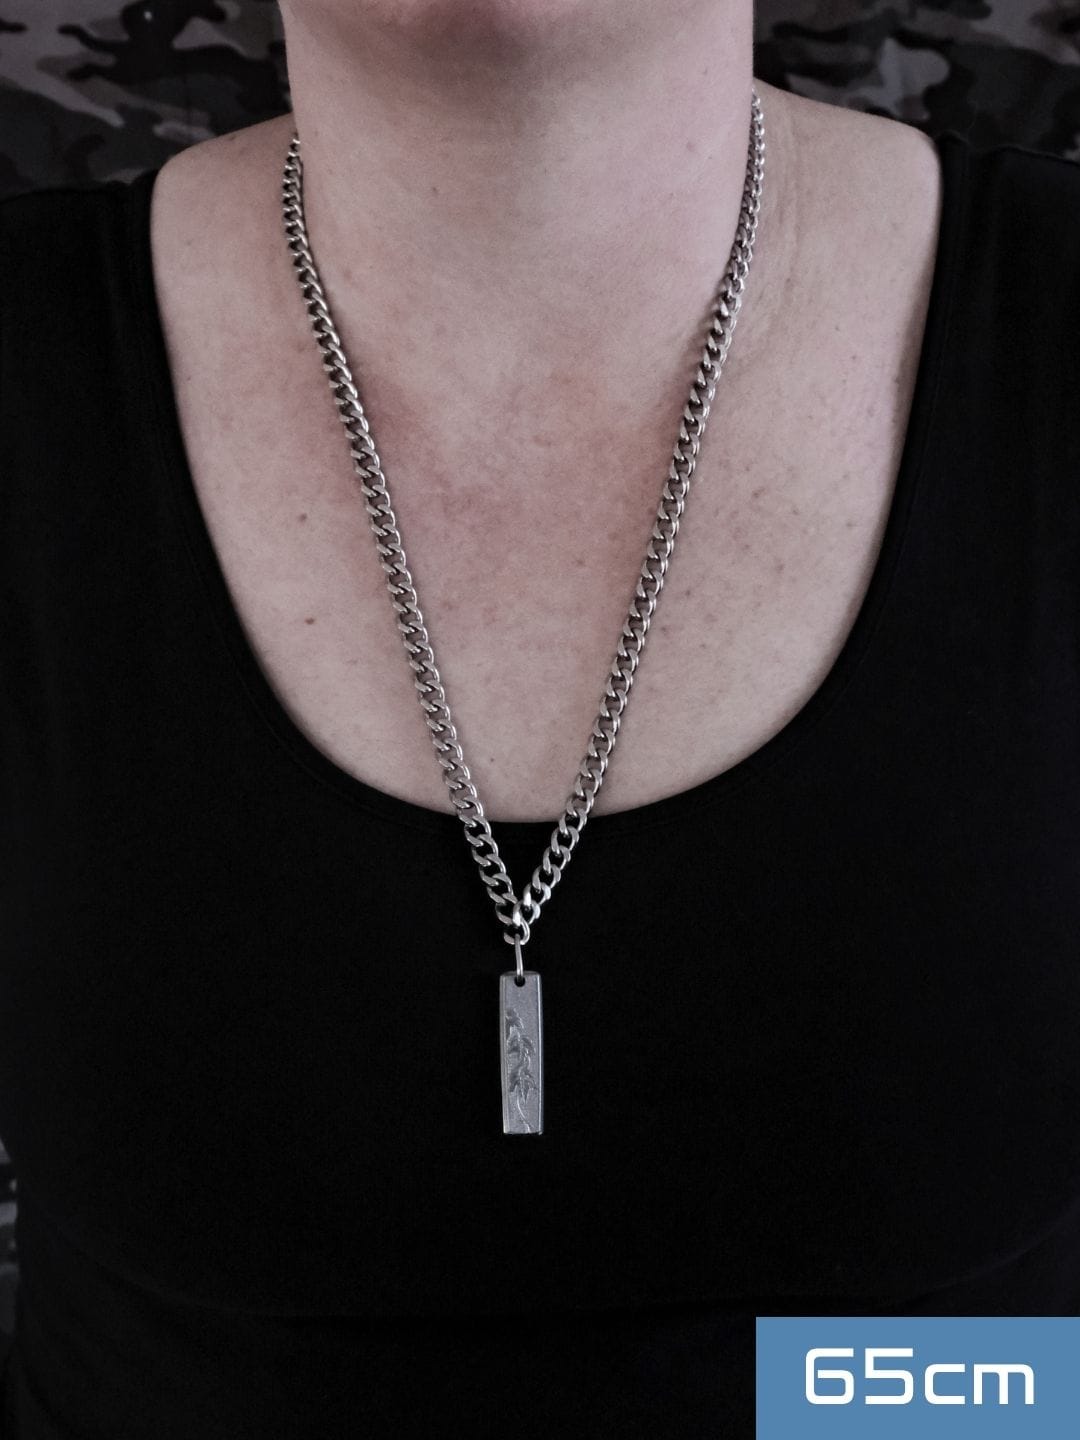
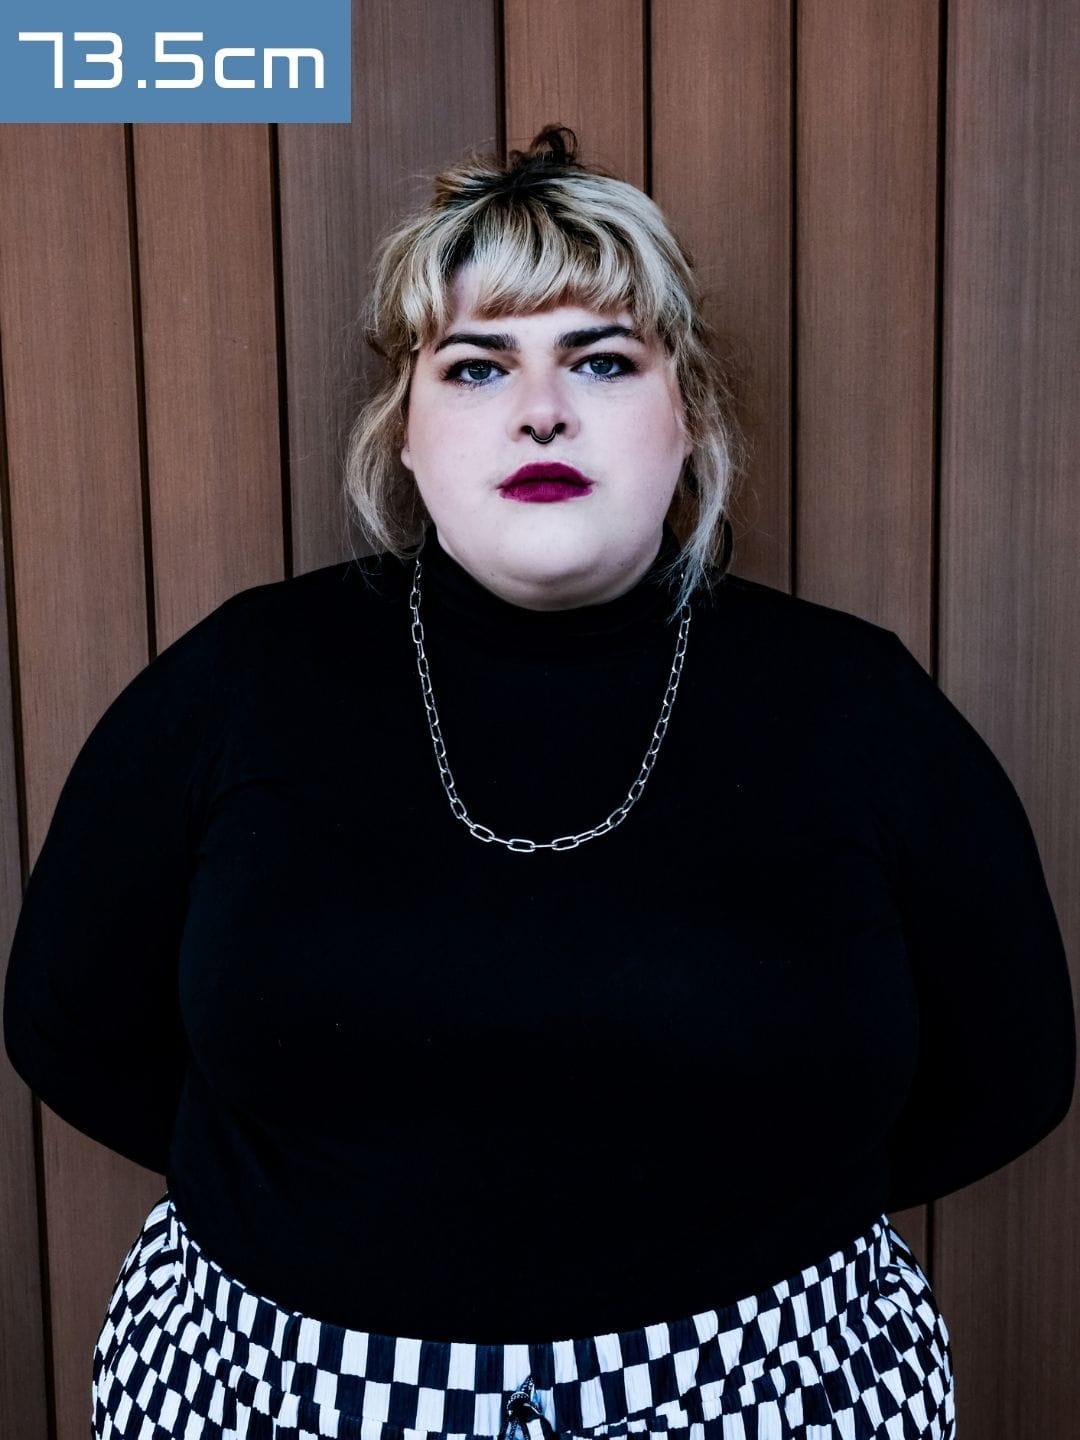
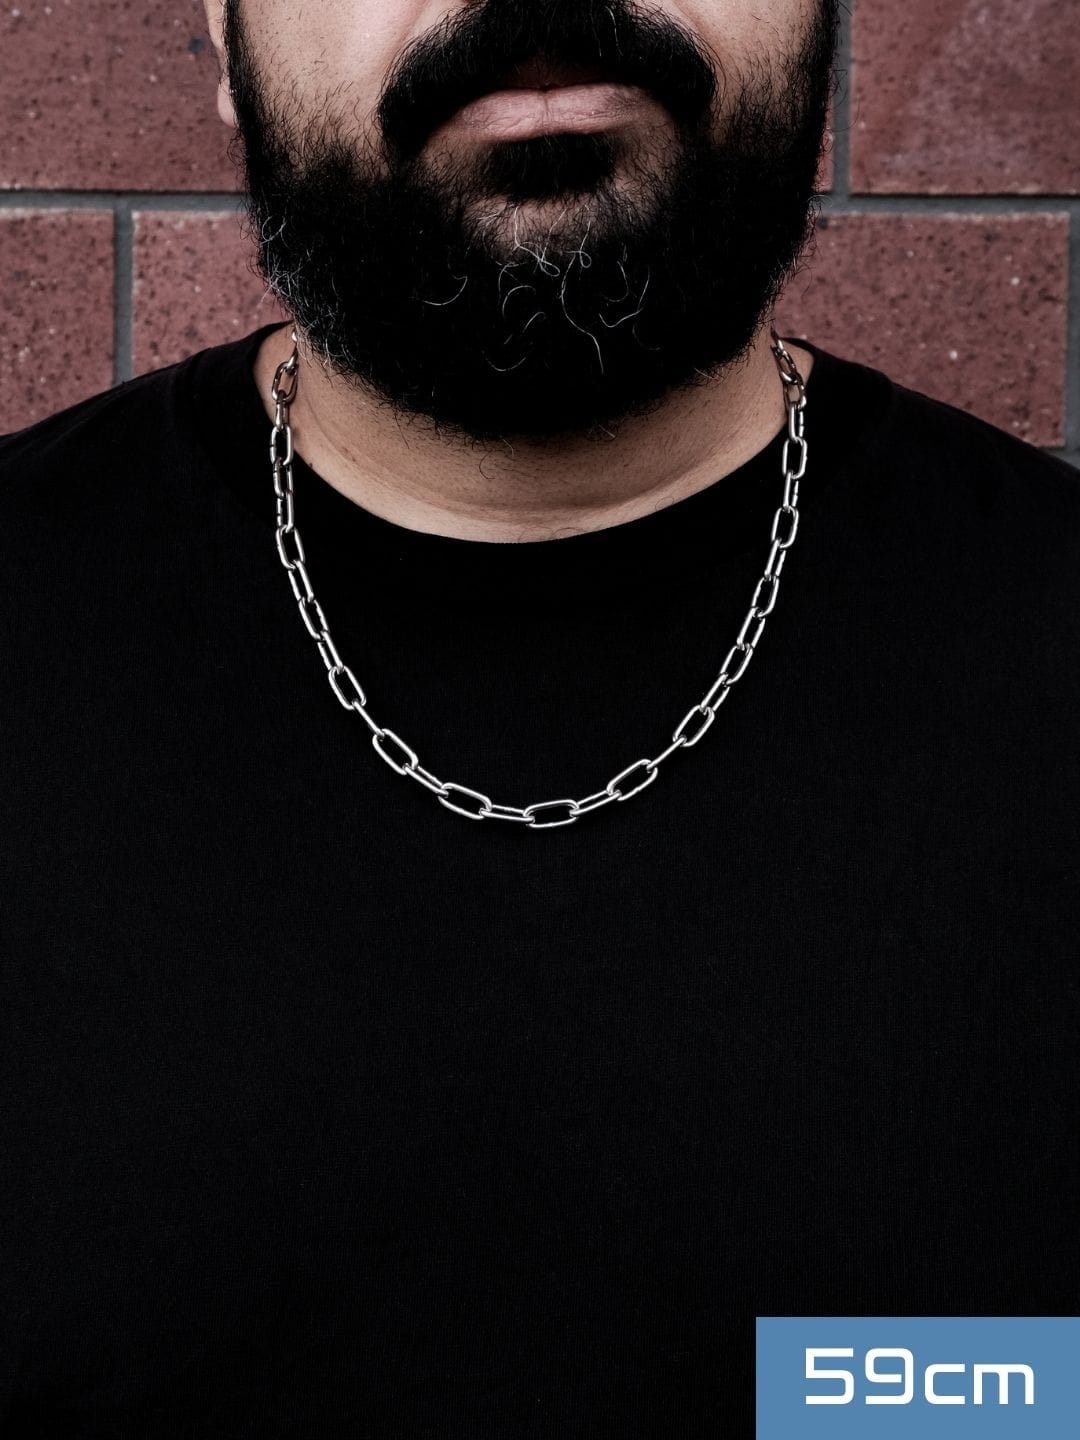
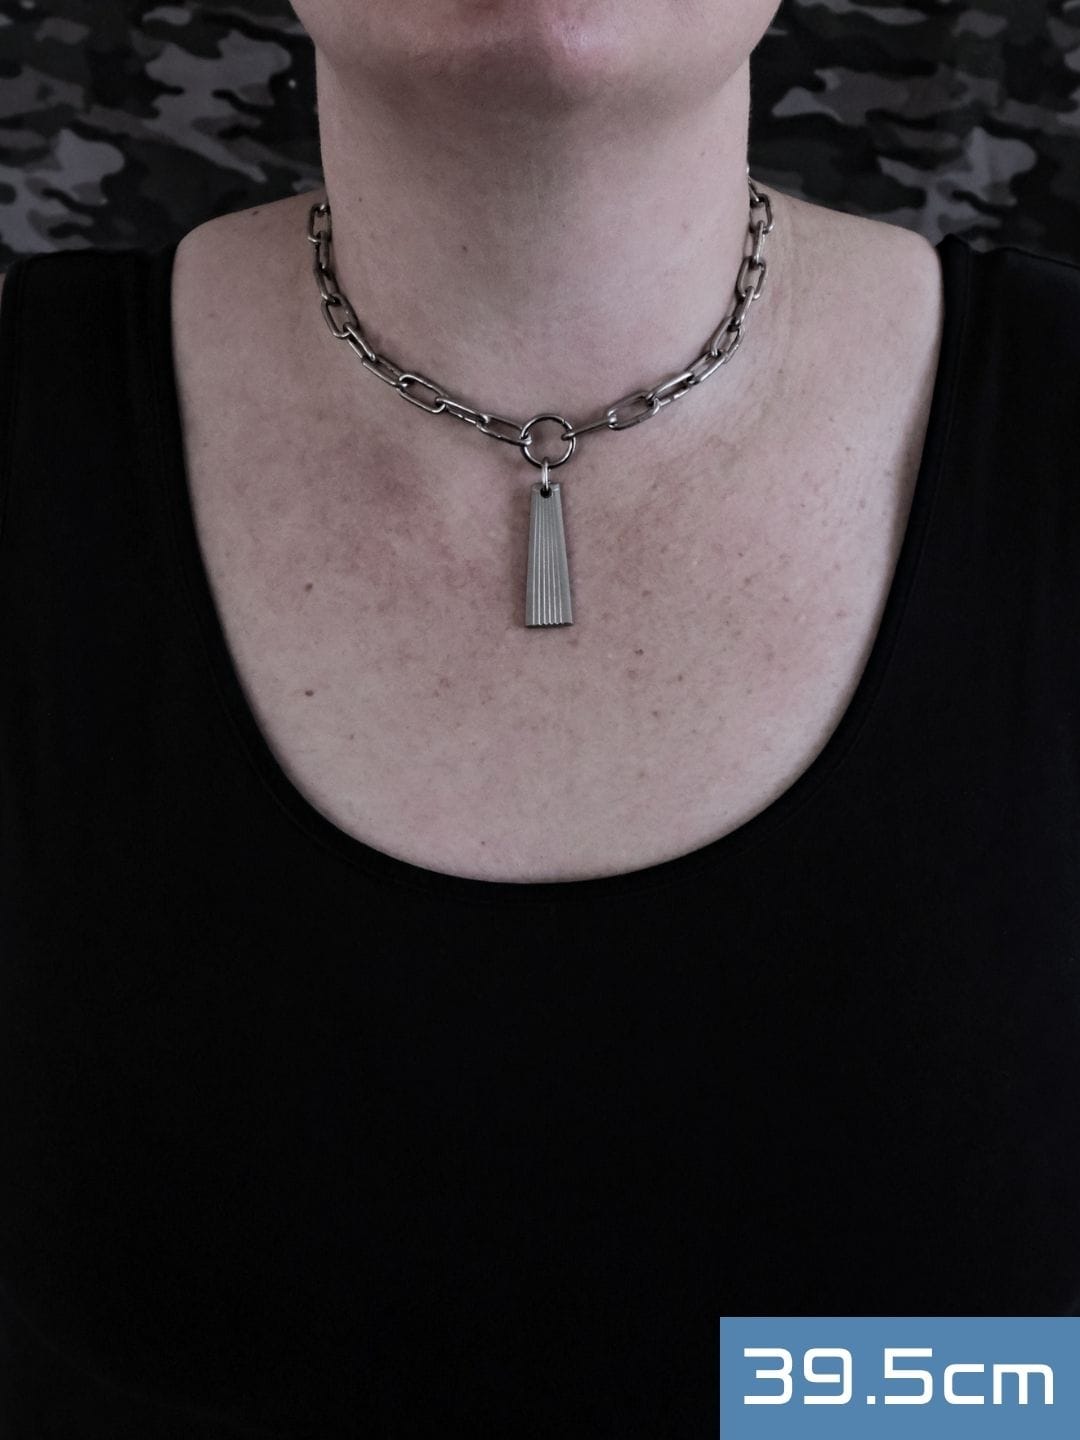
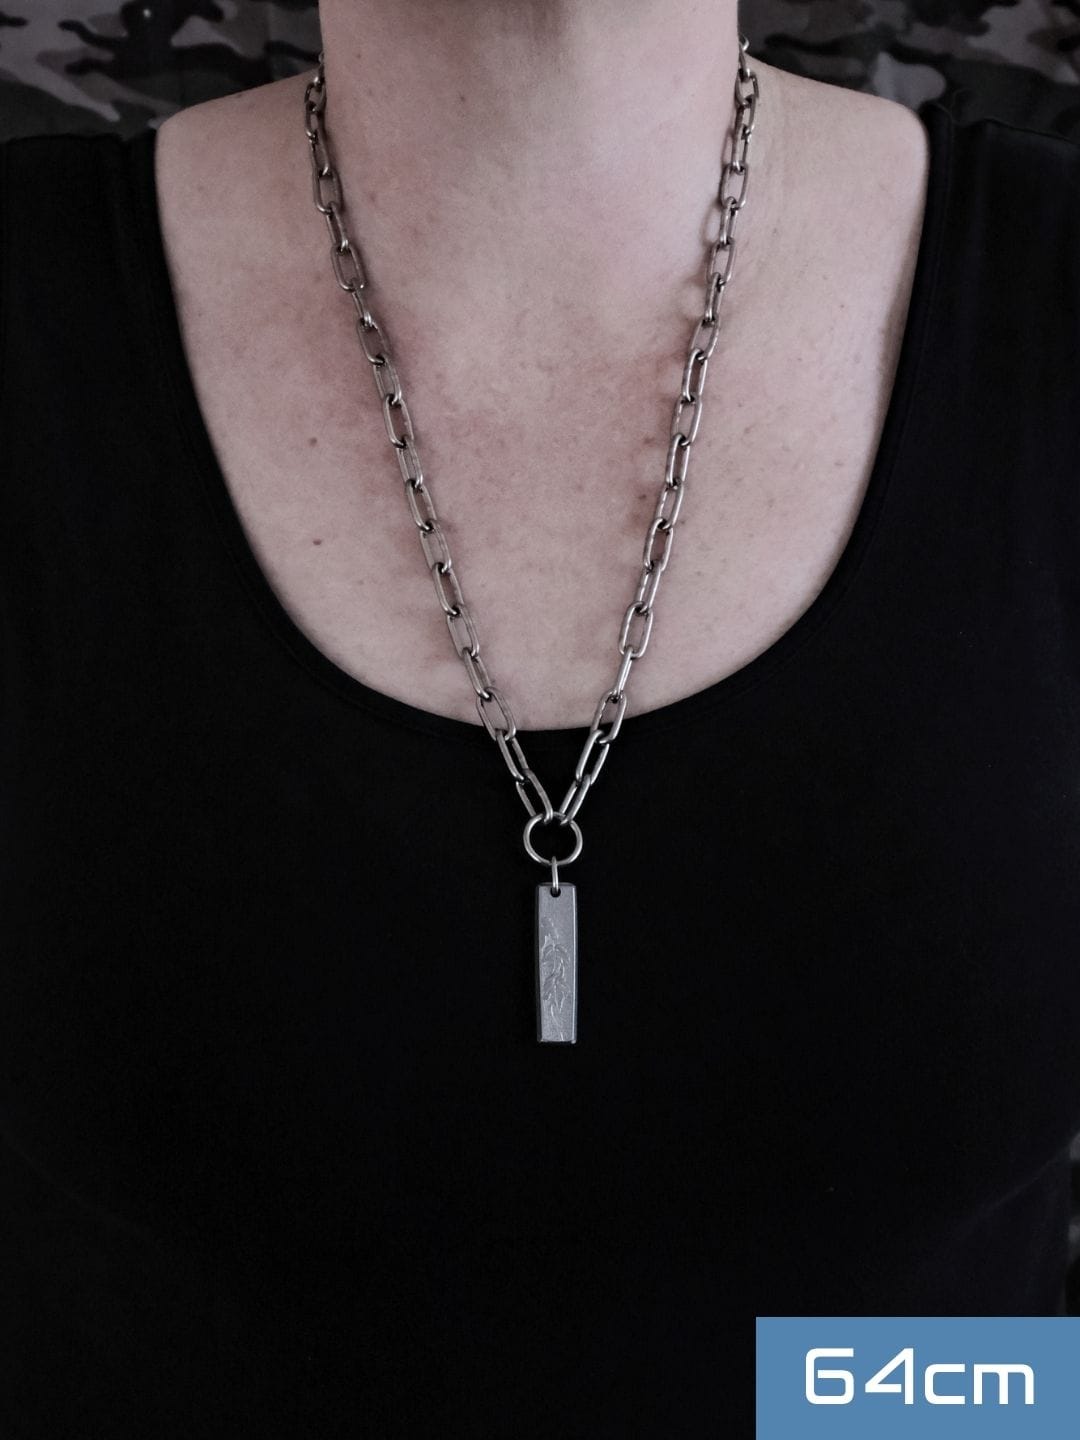
Check out the images below to see how the chain sits on various neck sizes. Keep in mind that if a pendant is added, it pulls down the chain by approx 1.5-2cm.

Check out the images below to see how the chain sits on various neck sizes. Keep in mind that if a pendant is added, it pulls down the chain by approx 1.5-2cm.


How to measure your wrist size:
There are a few different methods you can use to find out your wrist size.
When measuring, ensure you wrap it snugly but not super tight and not loose. Just flush/flat to the skin is ideal.
DO NOT choose the length size that you want the bracelet to be. Choose the length based on your wrist measurement only. This is because the bracelets are various thicknesses and I size the bracelet to the wrist size that you have entered. Be as accurate as possible!
If you have any questions at all about the sizing of any item, feel free to contact me any time, my inbox is open! Making sure you have a perfectly fitted piece that you love to wear is super important to me so don’t be shy, get in touch.
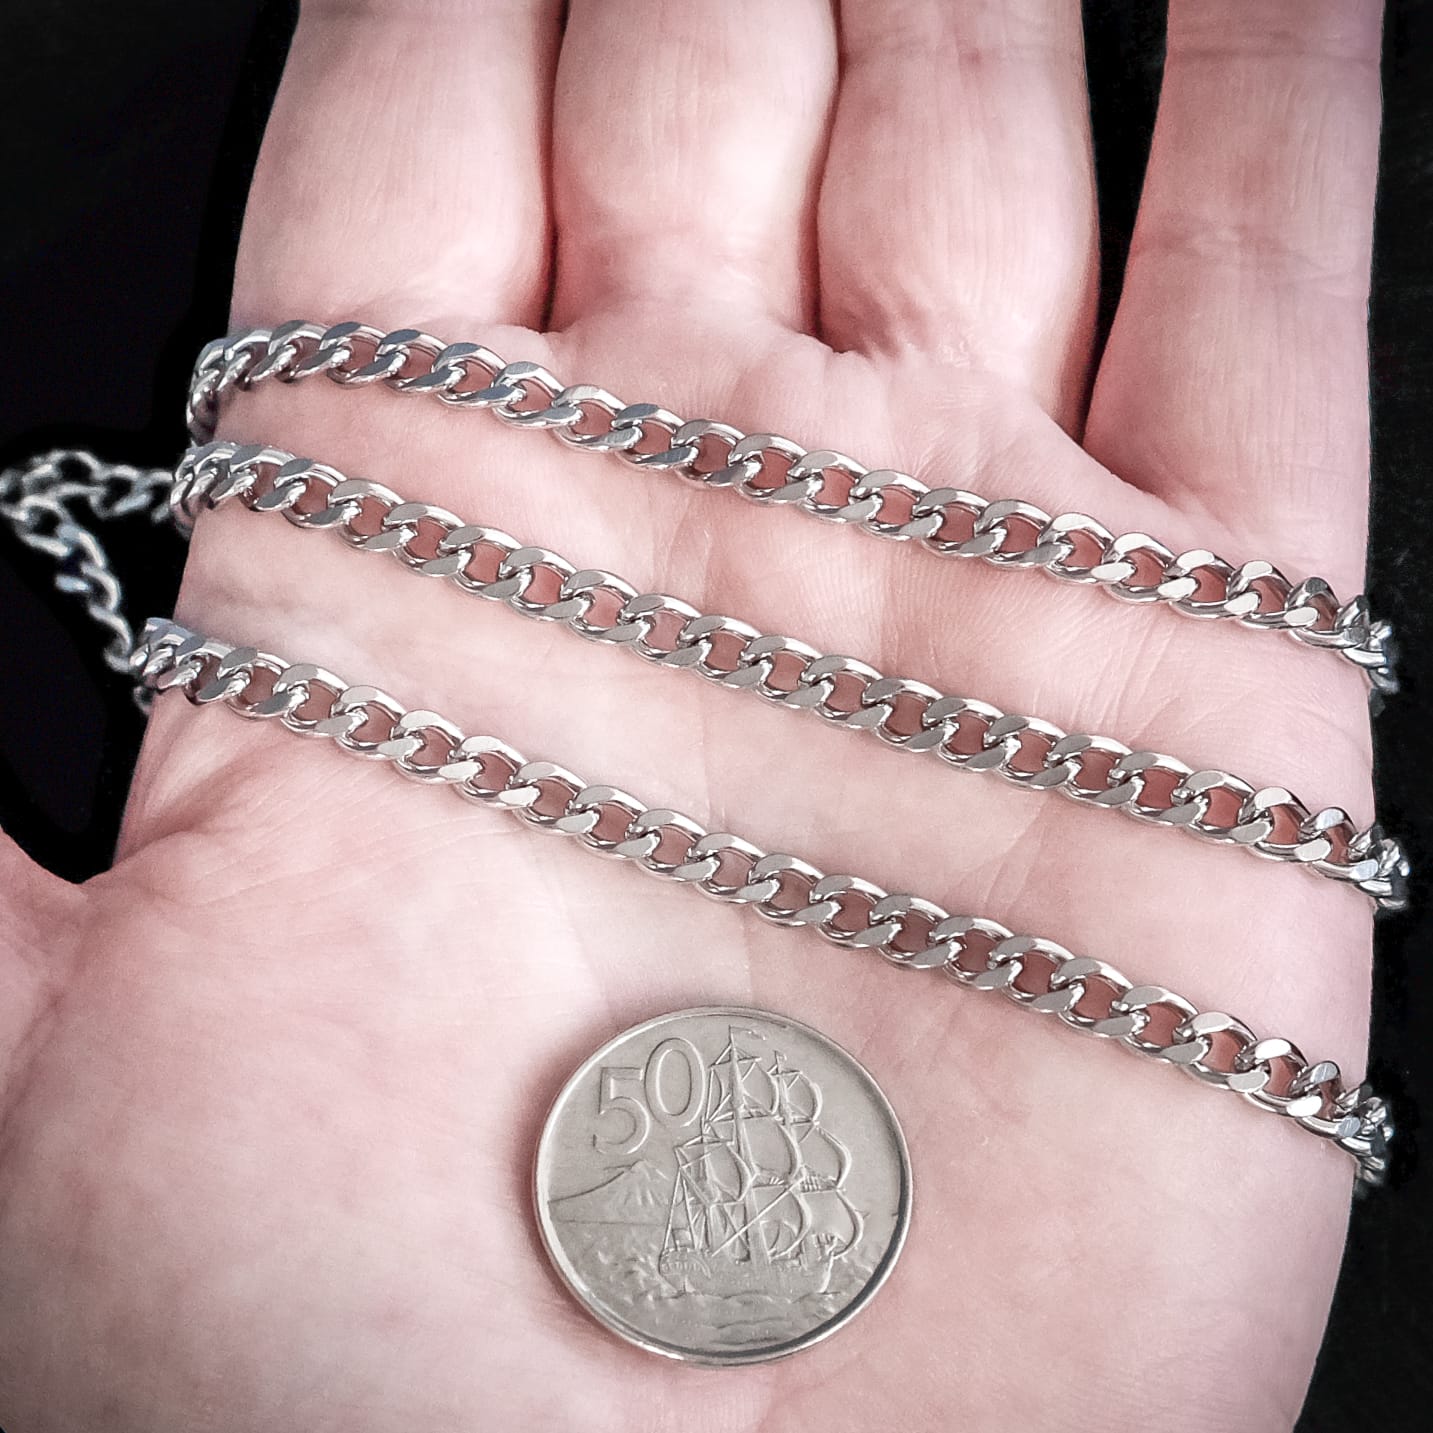
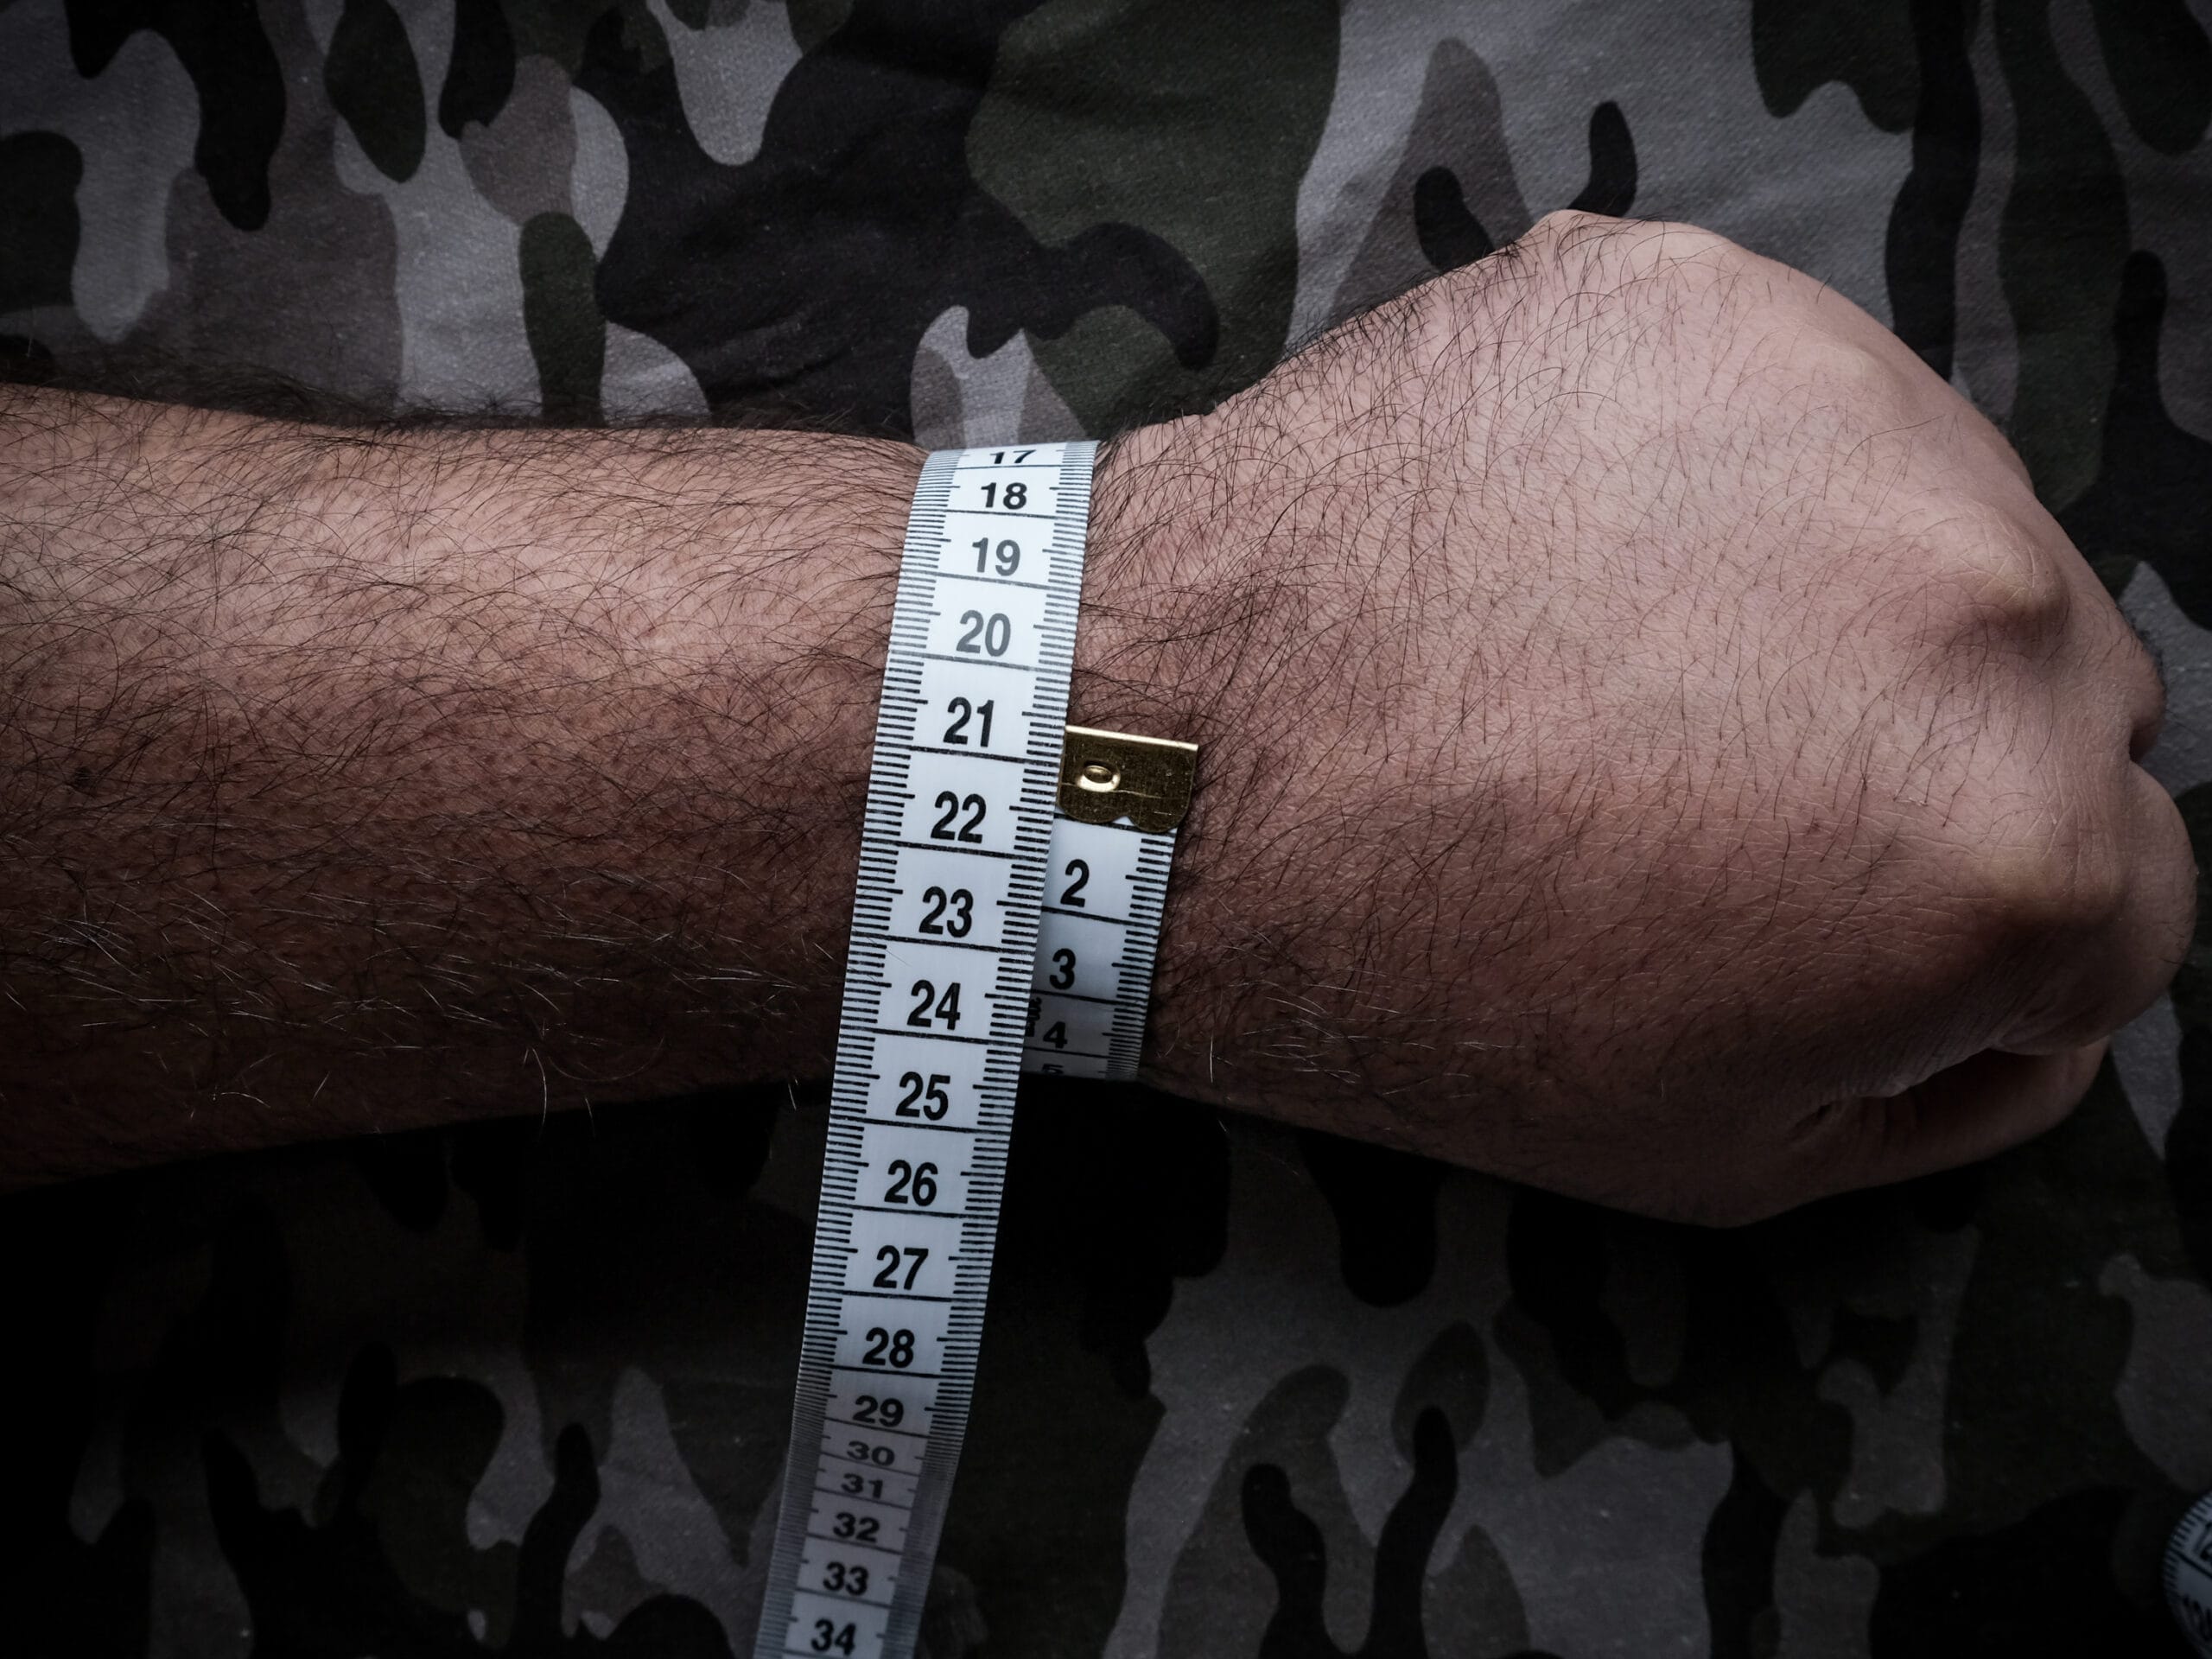
The easiest method if you have access to a soft tape measure! Measure around the wrist as shown. In this example his wrist measurement is 20.6cm.
Don’t pull the tape measure too tight or too loose, fit it snugly around the wrist. Have a friend assist or double triple check to be sure!
Alternatively you can totally send me a picture of the tape measure around your wrist and I can assist. Feel free to message me on Facebook or Instagram if you need help!
Cut a strip off of any piece of paper. Thinner is better. Preferably keep the straightest side as the guide as you’re wrapping it around the wrist.
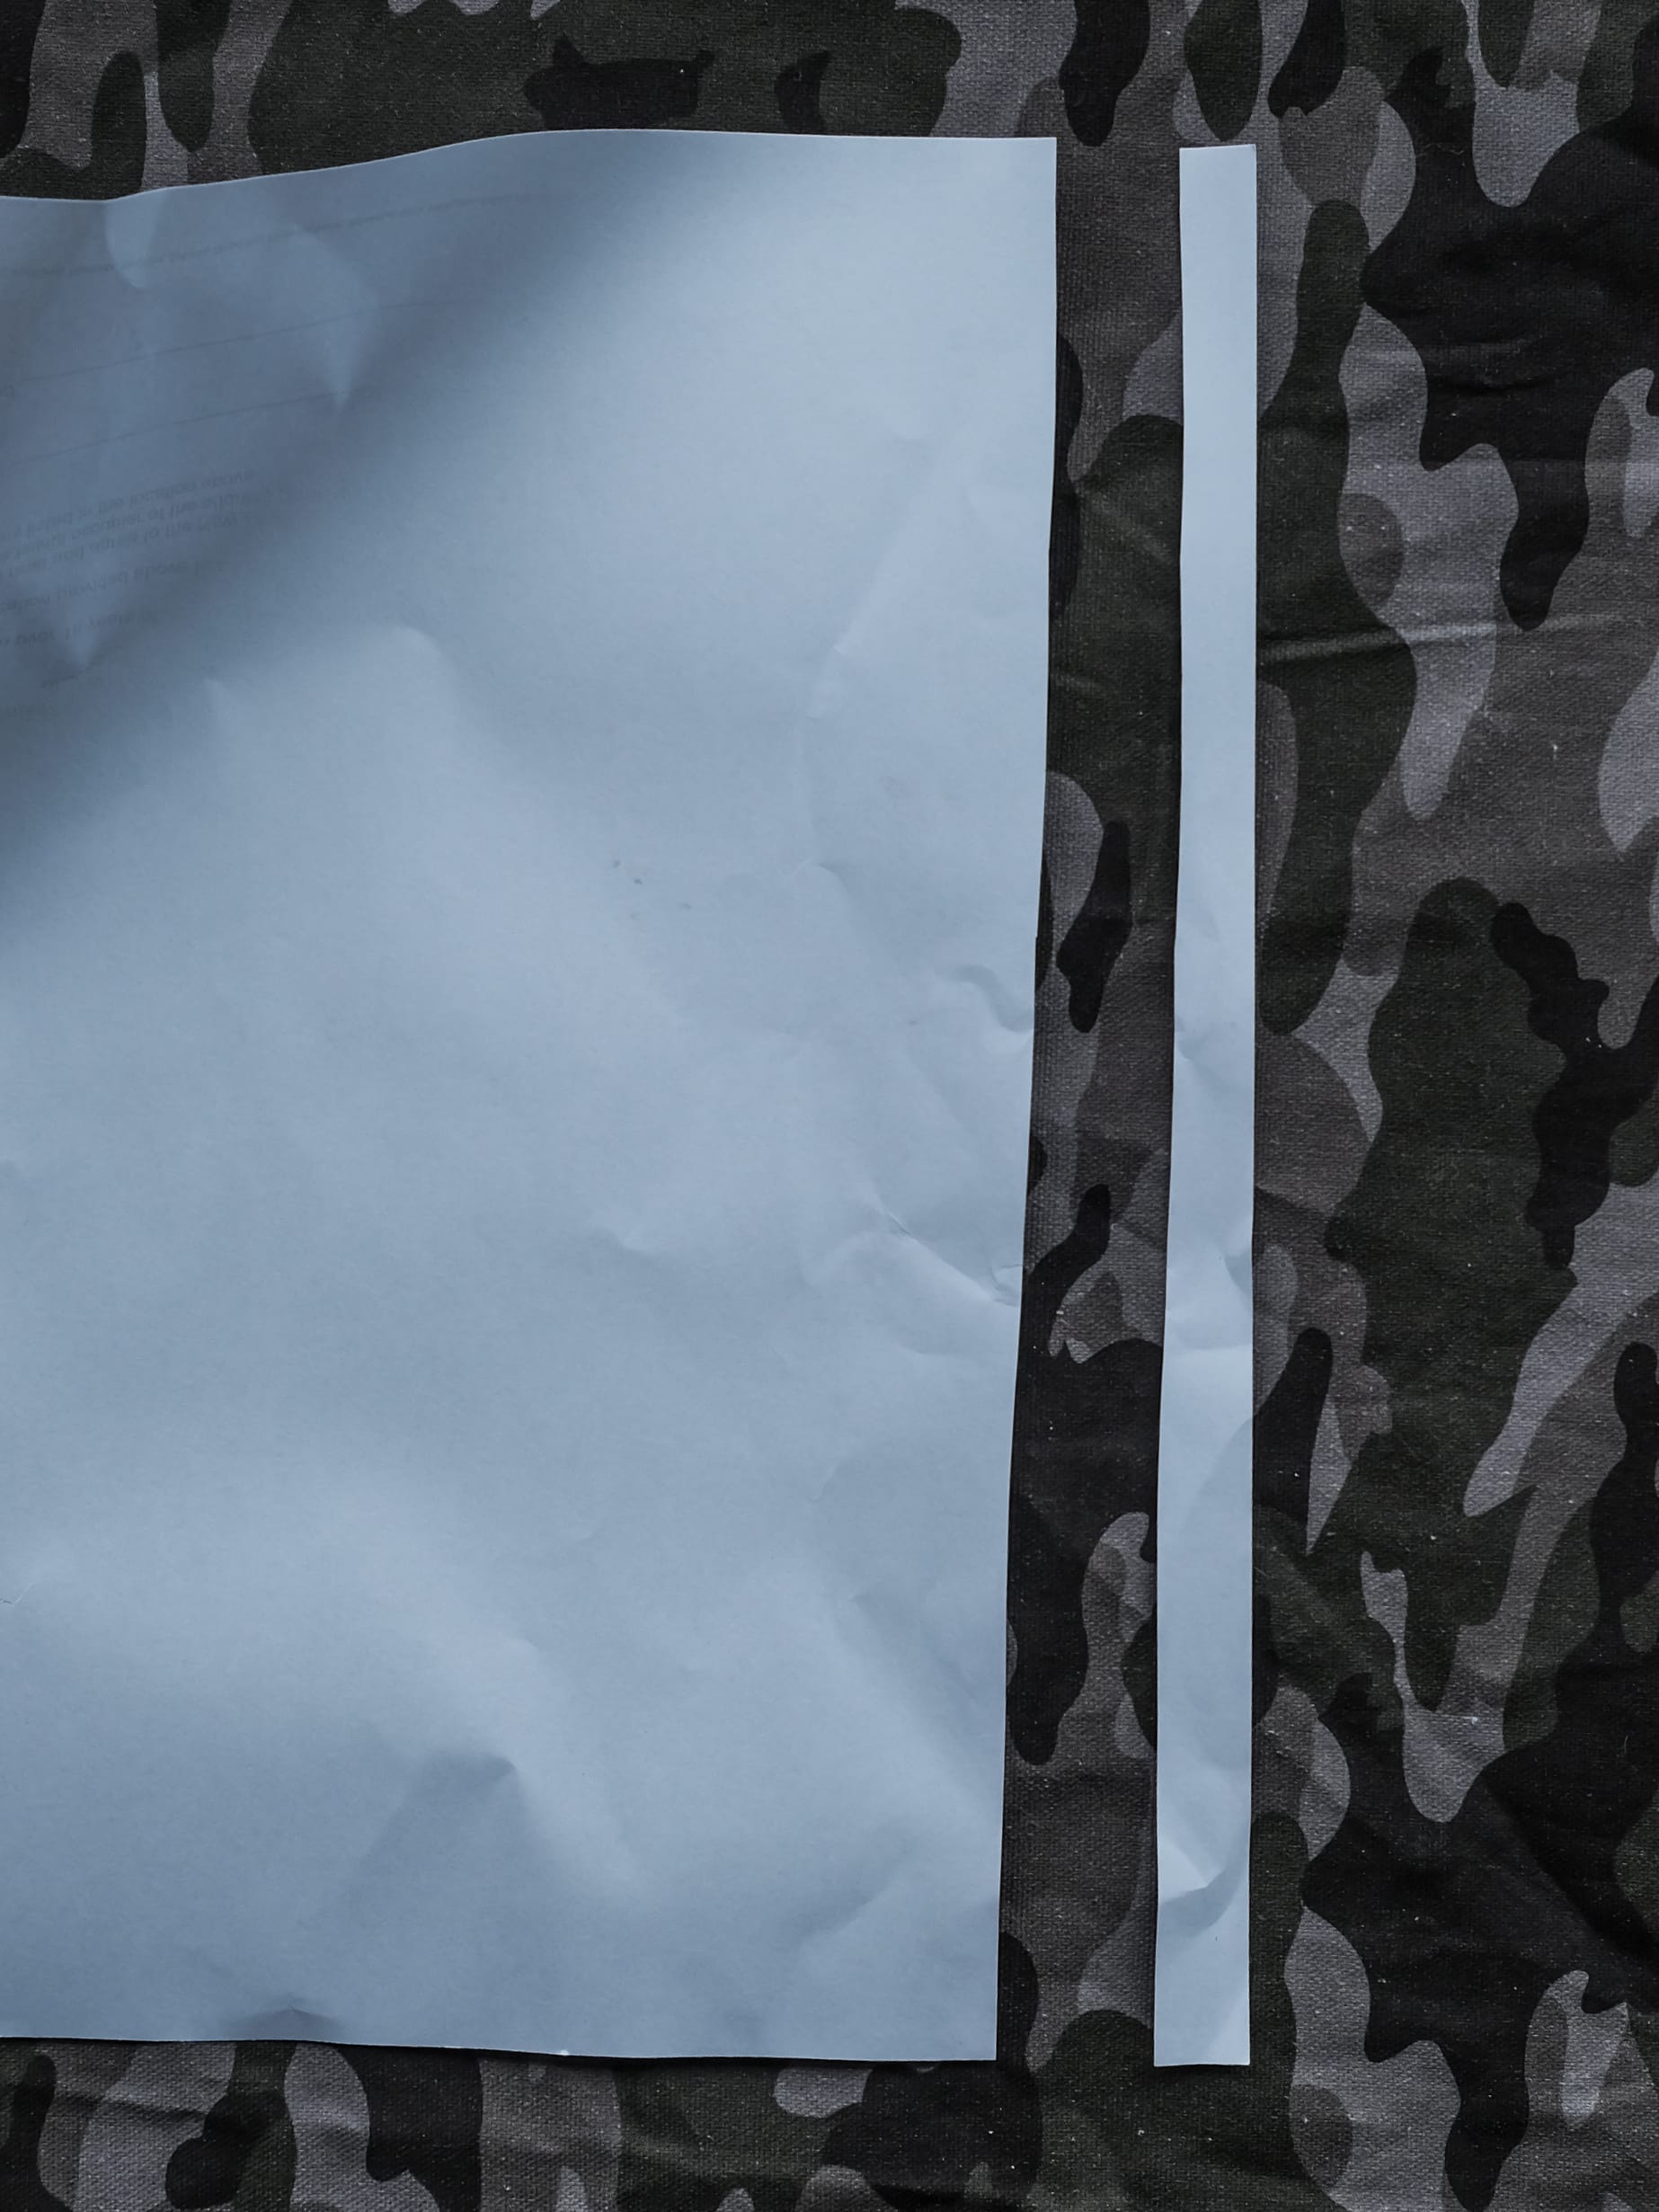
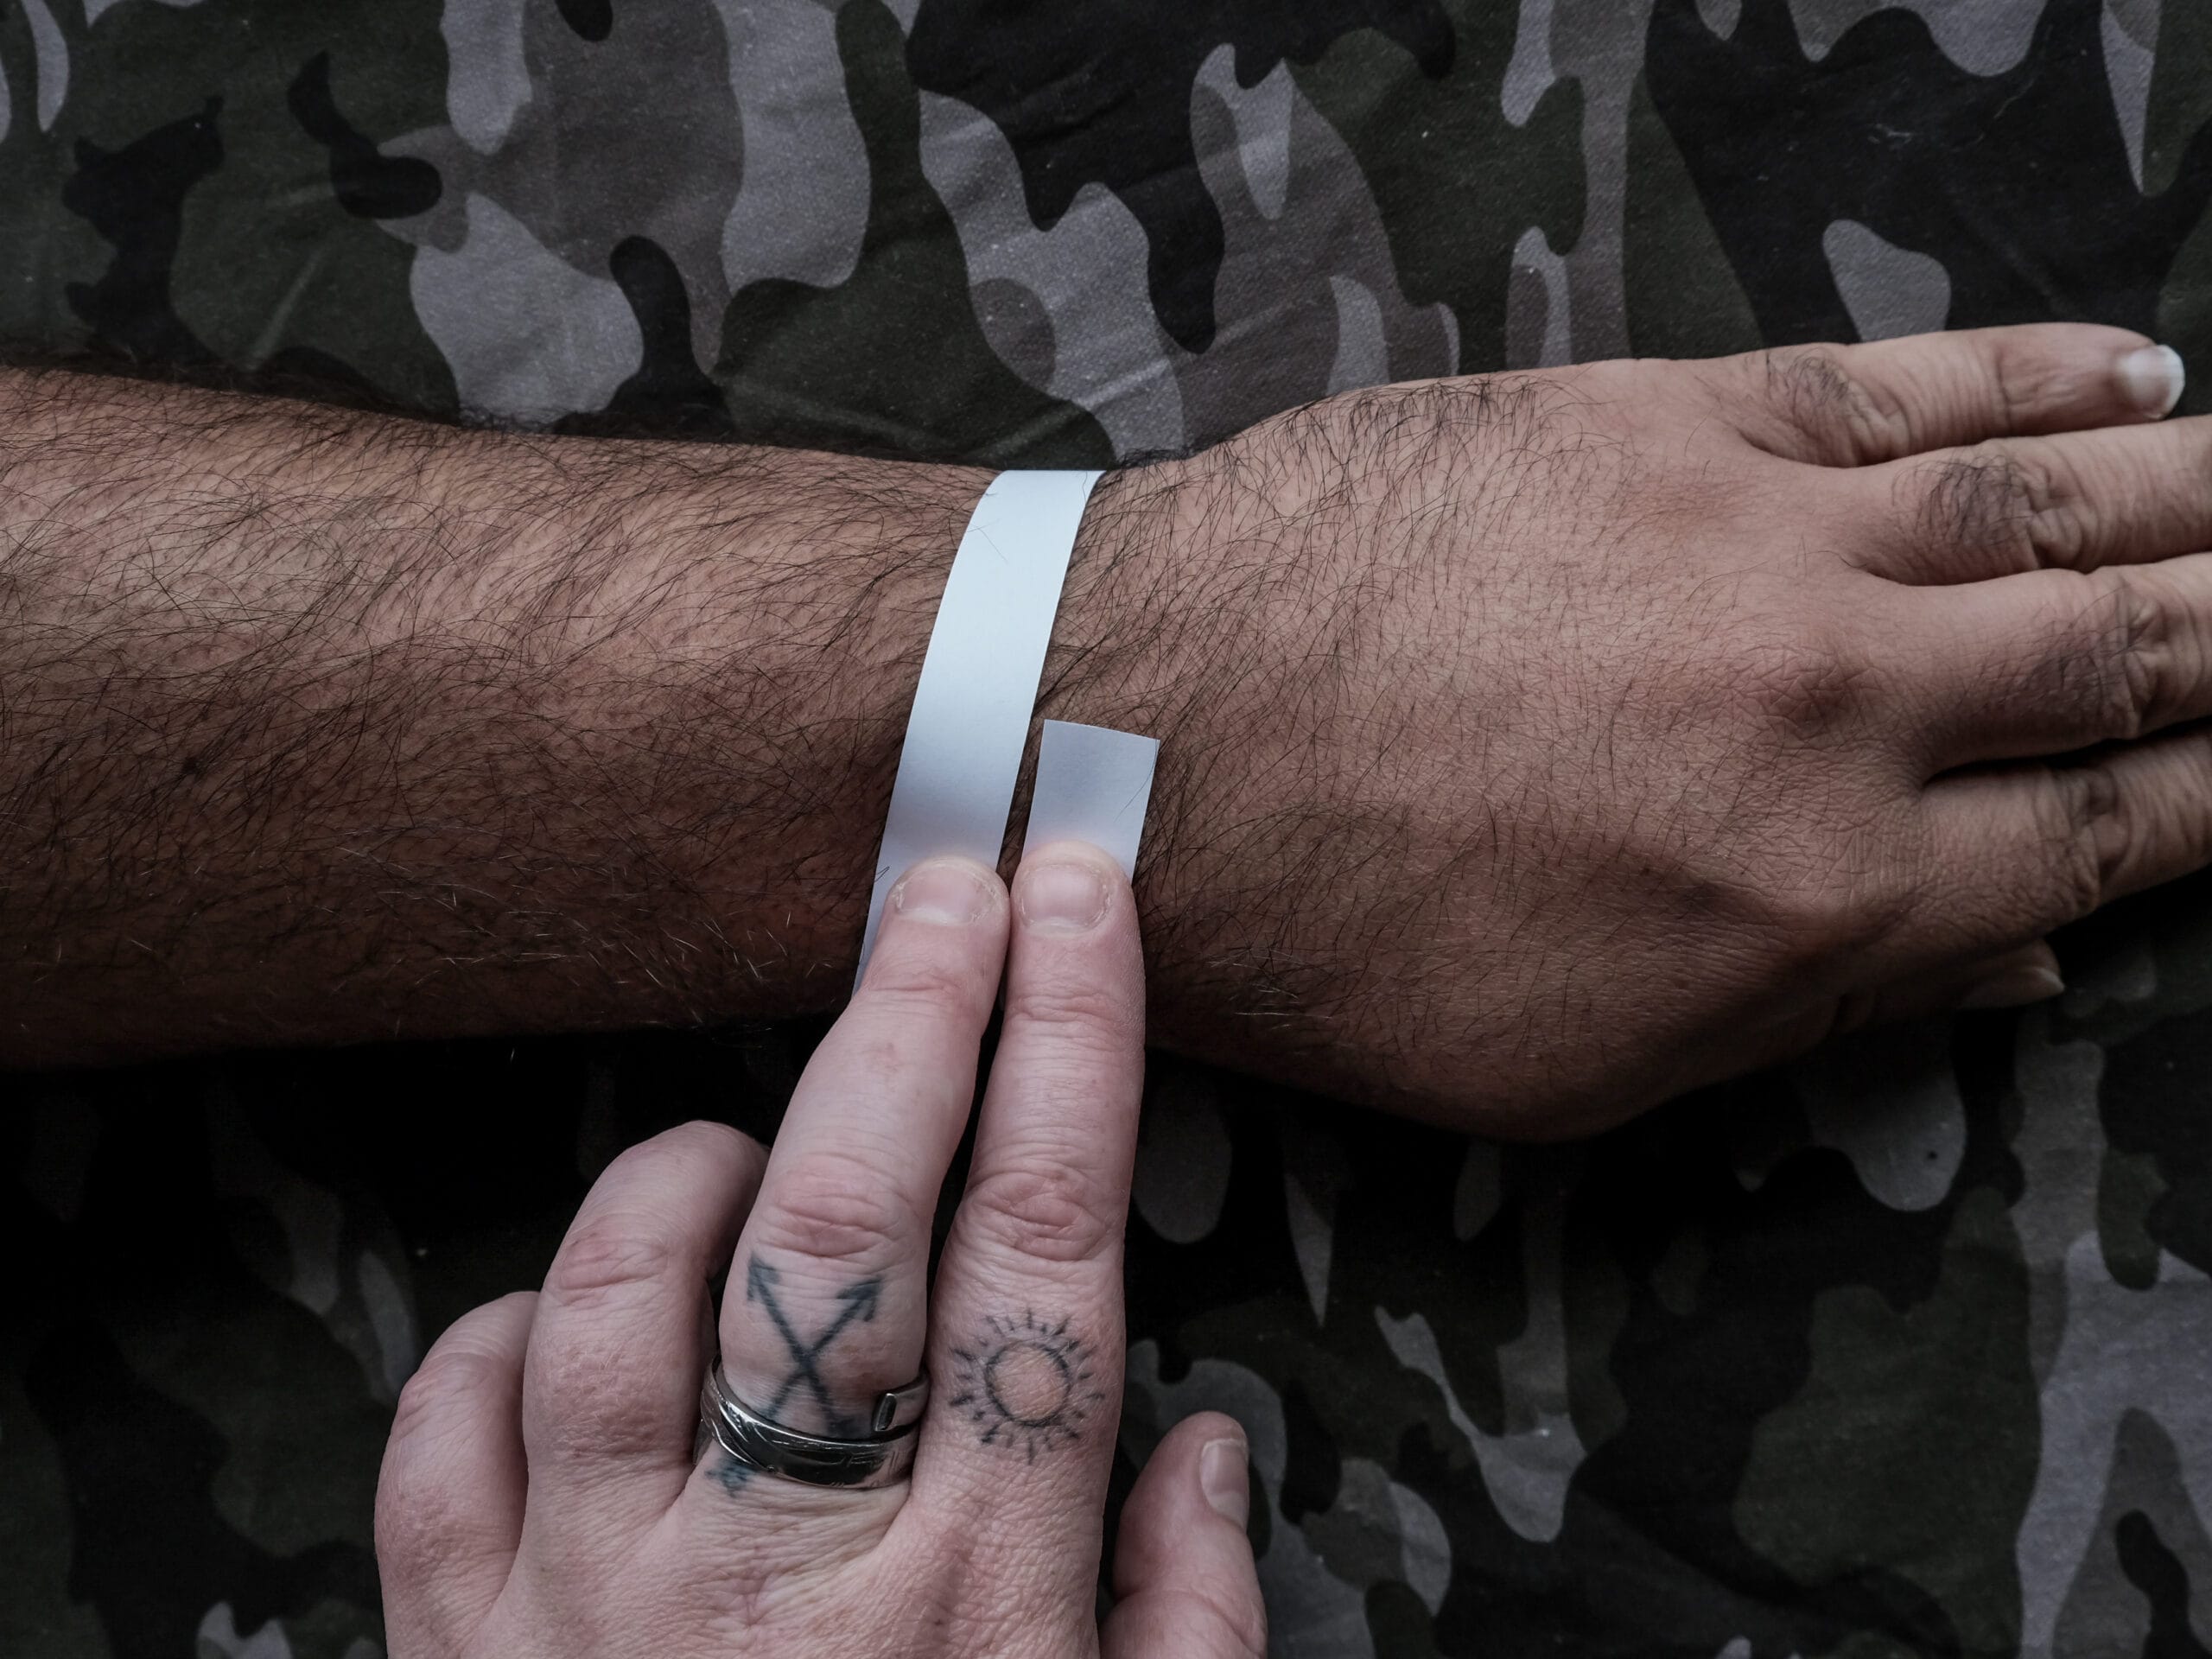
Wrap the paper around your wrist, overlapping it slightly. Don’t suffocate the wrist but make it pretty snug! I won’t make the bracelet this tight, but I will size the bracelet to a wrist of your exact size so please be as accurate as possible! Measure multiple times.
Mark with a pen where the end meets. You don’t need to cut the paper here, just make sure the pen mark is accurate to a snug (but not SUPER tight) fit to your wrist. Measure multiple times to be sure.
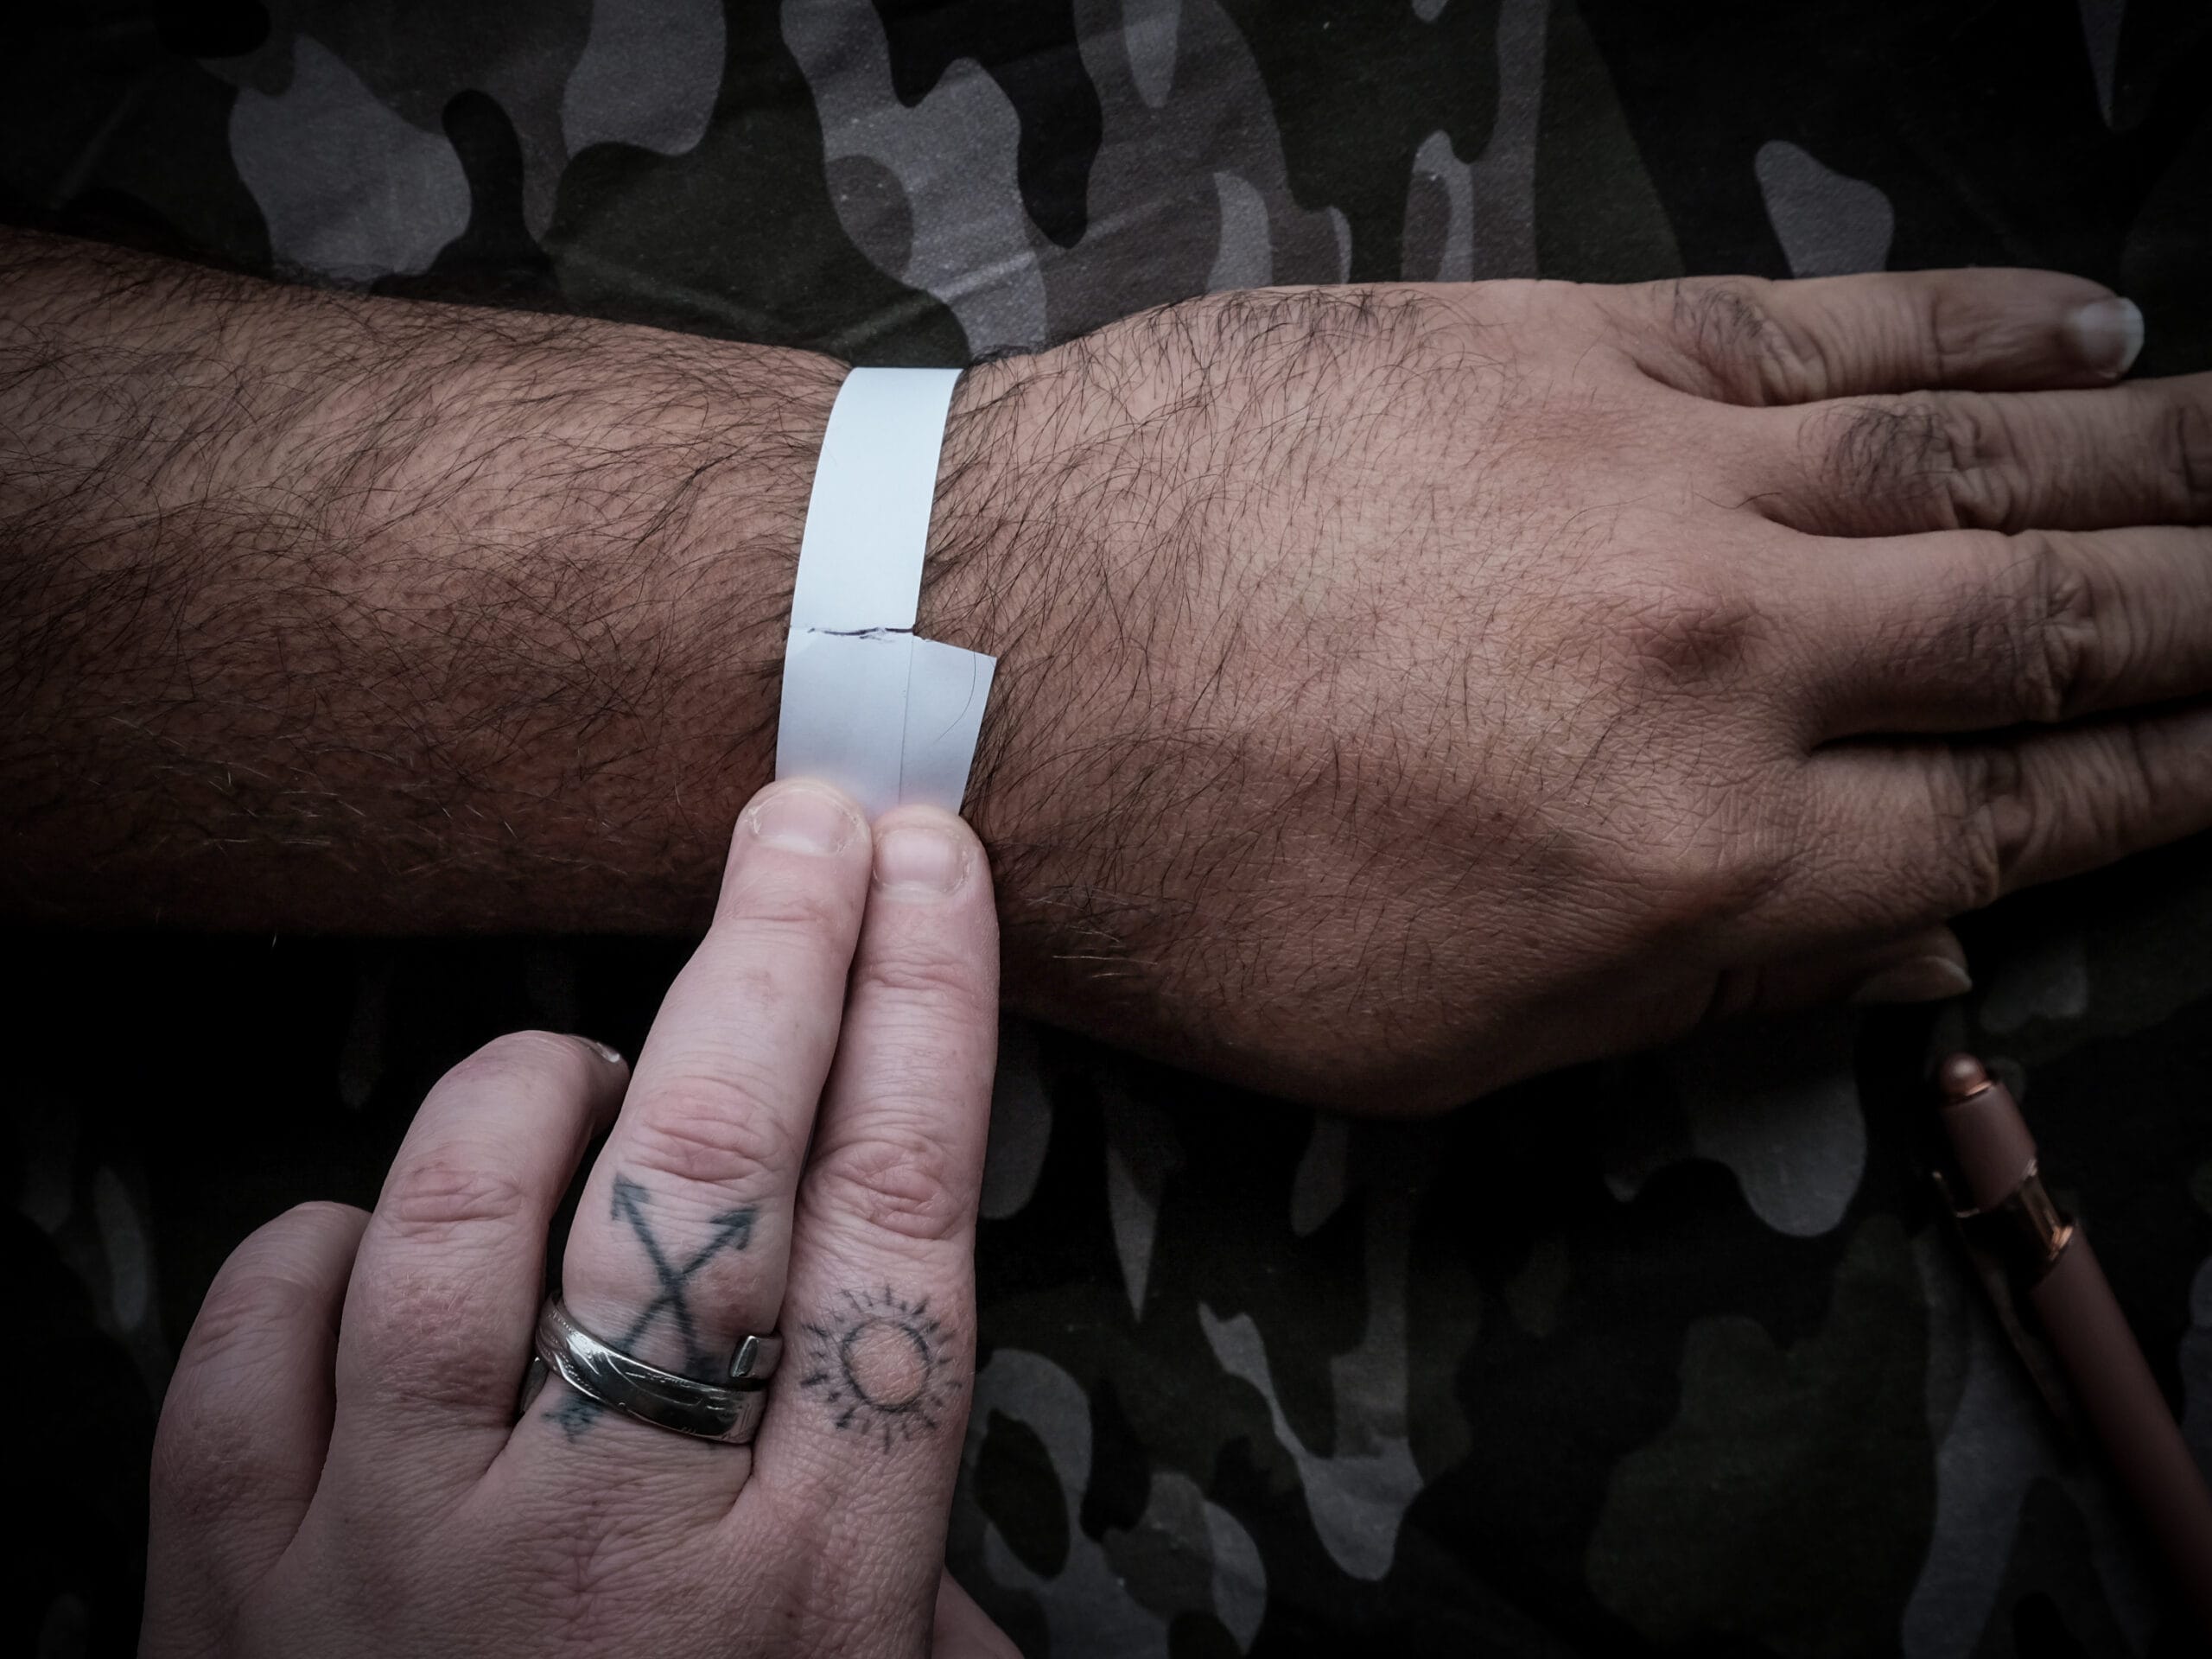
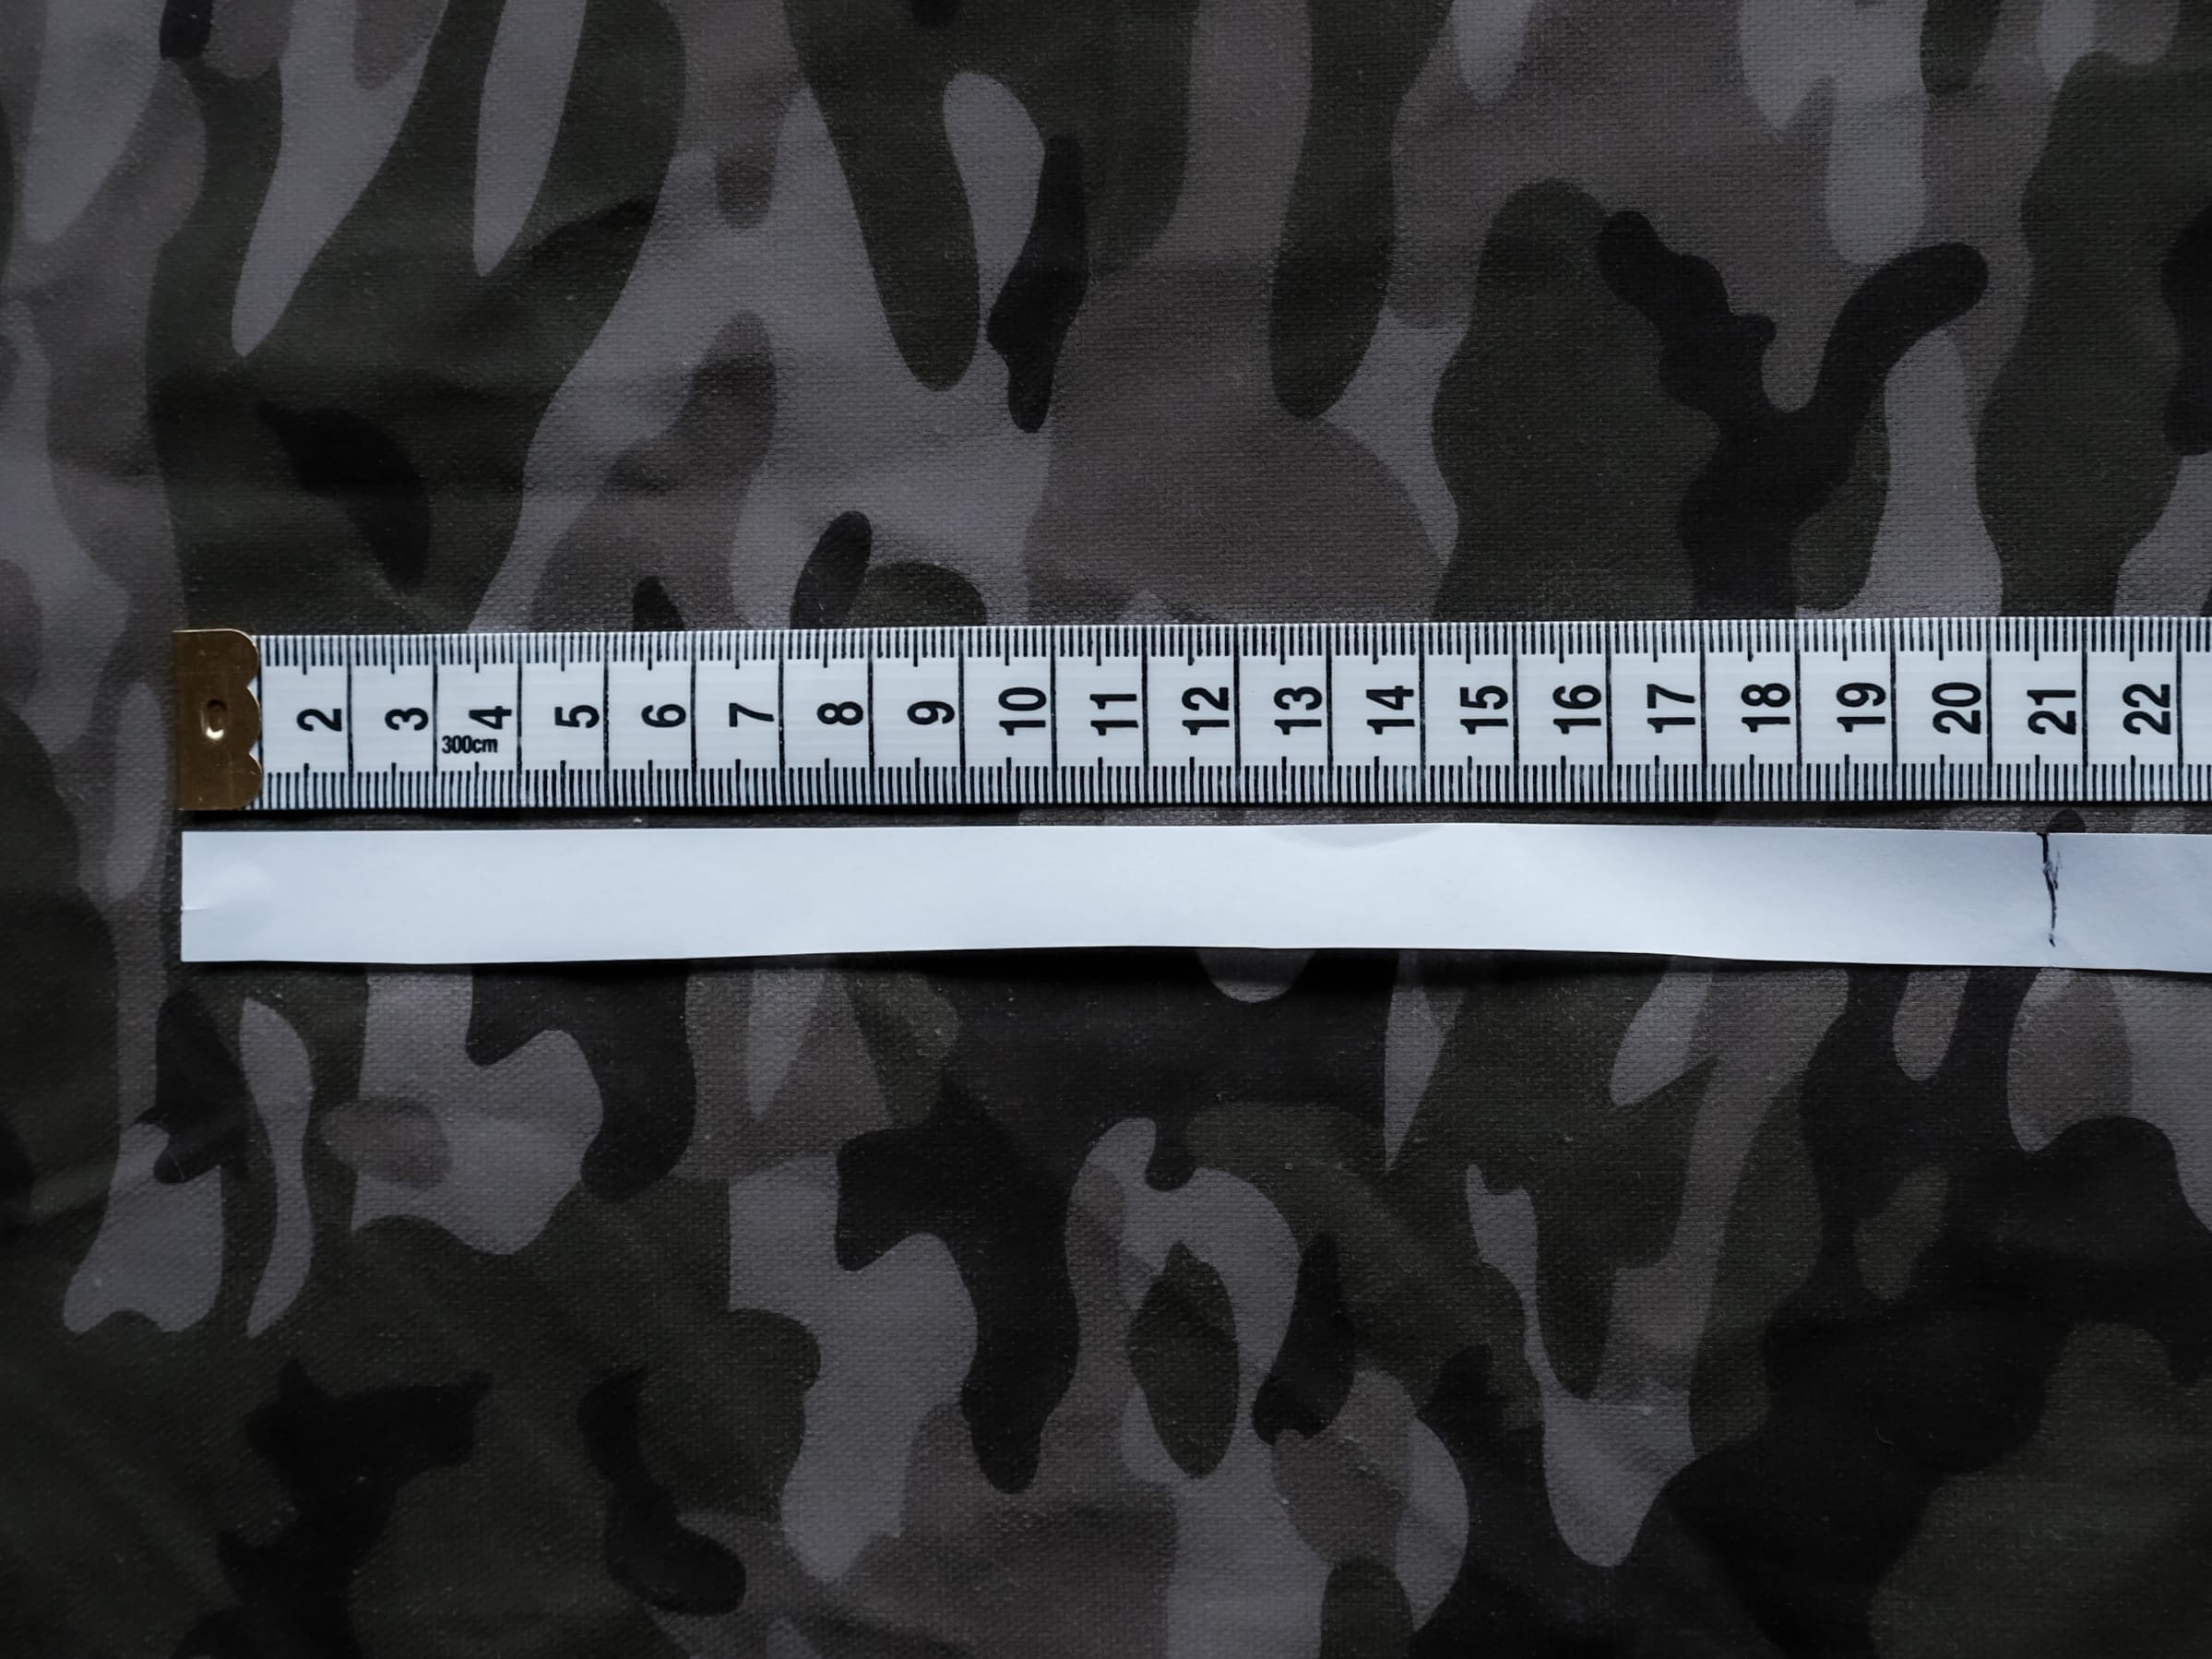
Line the paper up against any ruler. Be careful with what ruler you’re using, on some rulers the CM number is shown in the middle of the CM area which confuses a lot of people! This measurement on the image shown is 20.6cm.
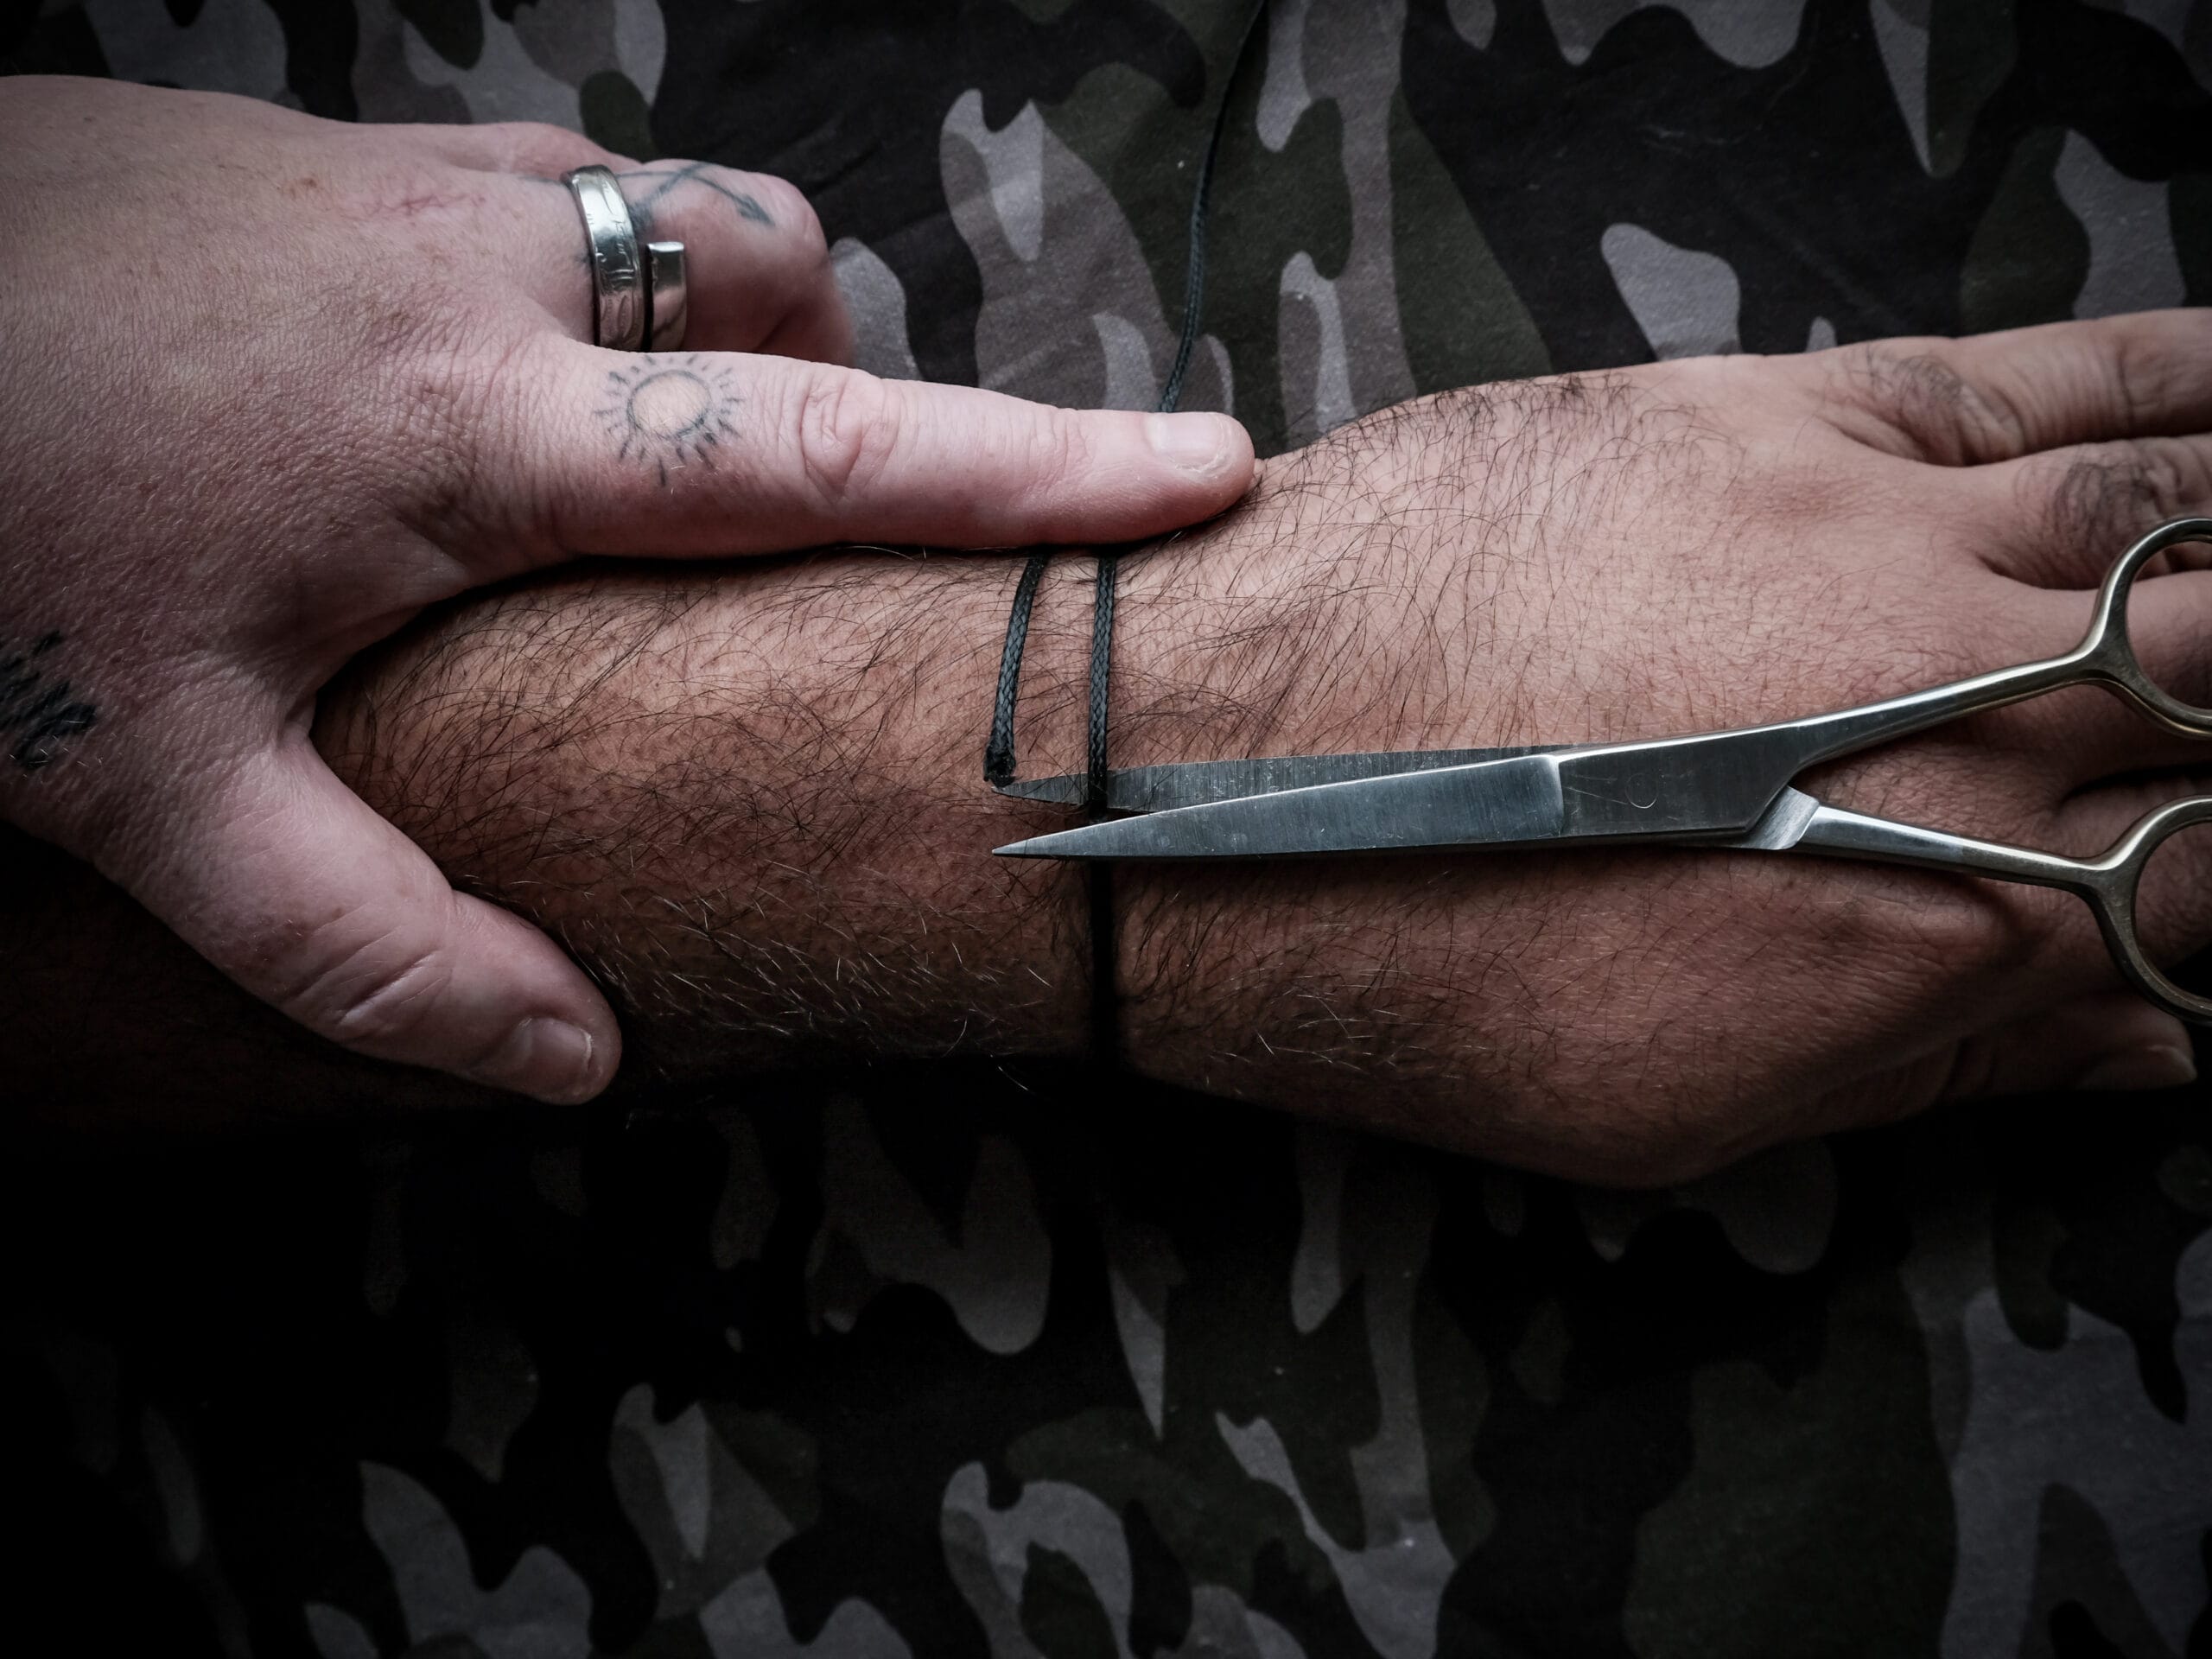
Wrap a piece of string around your wrist then cut it where it meets.
Ensure the ends are touching. The string should not be super tight or too lose. Fitting snugly around the wrist.


Measure the string against any flat ruler. Be careful with what ruler you’re using, on some rulers the CM number is shown in the middle of the CM area which confuses a lot of people! This measurement on the image shown is 20.6cm.
SUPER IMPORTANT: If your finger is fleshy/chubby/soft you need to TIGHTEN the measuring tool to counteract the squishiness. When rings are put on, they compress the finger softness, not sit lightly around it. The squishier the finger, the more it forms to the ring. Wrap the measuring tape/paper and pull as tight as possible (without any pain of course!). Message me if you’re unsure or having trouble.
For example – my chonky index finger measurement is 75mm IF I only wrap it around the finger flush to the skin. According to ring sizing charts, this would make the finger a Z++++ but any ring of that size would actually be WAY too big. The perfect size for my index finger is actually a 70mm circumference – just over a Z size. The difference will depend on the squishiness of your finger, but as long as you’re measuring as tight as possible it should be okay!
I know it’s a bit confusing, but this is why ring sizing charts and tools are often so wrong, especially when it comes to plus sized people, or just anyone with a little fat on their fingers. The universal charts are based on a firm, slim ring finger which is why they are often so wrong.
I wholeheartedly believe everyone should be able to wear rings if they want to. I can make ANY SIZE AT ALL. I DO NOT charge extra for larger ring sizes. It makes no difference for me, it is the same cost and same process for every ring size. If you see something in the “ready-to-go” rings you love but it isn’t your size, get in touch and I’ll see what I have similar in my cutlery collection (I have A LOT).
I know purchasing rings online is daunting, and often unsuccessful, but I am here to help! It is no bother to me at all to be contacted regarding any kind of sizing, my inboxes are open! It is more important to me that you love and fit your purchase perfectly. I can even do a video call with you if necessary and walk you through the sizing methods.
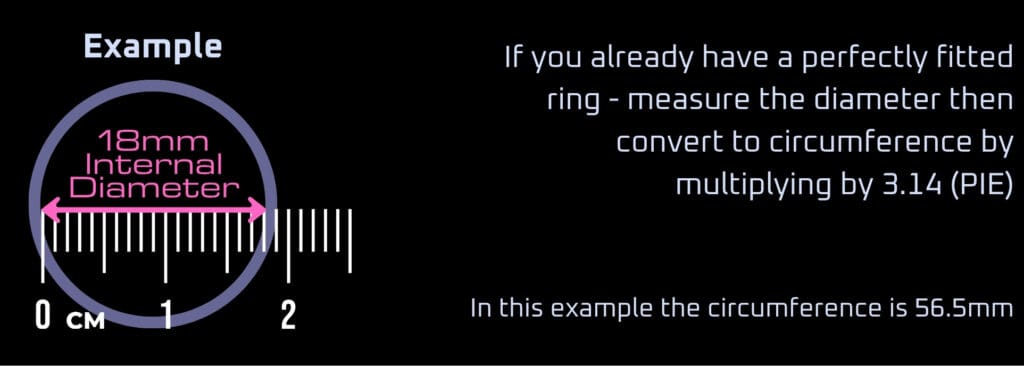
IF YOU HAVE A PERFECTLY ROUND RING THAT FITS PERFECTLY:
Measure the INTERNAL DIAMETER then multiple by 3.14 to determine the circumference.
ONLY use the diameter method if the ring you have is perfectly circular.
Description for this block. Use this space for describing your block. Any text will do. Description for this block. You can use this space for describing your block.
Description for this block. Use this space for describing your block. Any text will do. Description for this block. You can use this space for describing your block.
Description for this block. Use this space for describing your block. Any text will do. Description for this block. You can use this space for describing your block.
Description for this block. Use this space for describing your block. Any text will do. Description for this block. You can use this space for describing your block.
Table below help find your size
| Ring Size | Circumference (mm) |
|---|---|
| A | 37.8mm |
| B | 39.1mm |
| C | 40.4mm |
| D | 41.5mm |
| E | 43mm |
| F | 44.2mm |
| G | 45.5mm |
| H | 47mm |
| I | 48mm |
| J | 49.5mm |
| K | 50.5mm |
| L | 52mm |
| M | 53mm |
| Ring Size | Circumference (mm) |
|---|---|
| N | 54.5mm |
| O | 56mm |
| P | 57mm |
| Q | 58mm |
| R | 59.5mm |
| S | 60.5mm |
| T | 62mm |
| U | 63mm |
| V | 64.5mm |
| W | 66mm |
| X | 67mm |
| Y | 68mm |
| Z Z+1 Z+2 Z+3 Z+4 Z+5 Z+6 Z+7 Z+8 Z+9 Z+10 Z+11 Z+12 Z+13 Z+14 | 69.5mm 71mm 72mm 73mm 74.5mm 75.8mm 77mm 78.3mm 79.5mm 80.8mm 82mm 83.3mm 84.5mm 85.8mm 87mm |